Set preferences on the Volunteer Events tab
In the Production environment, go to the ‘Volunteer Events’ tab and click on the ‘Settings’ button.

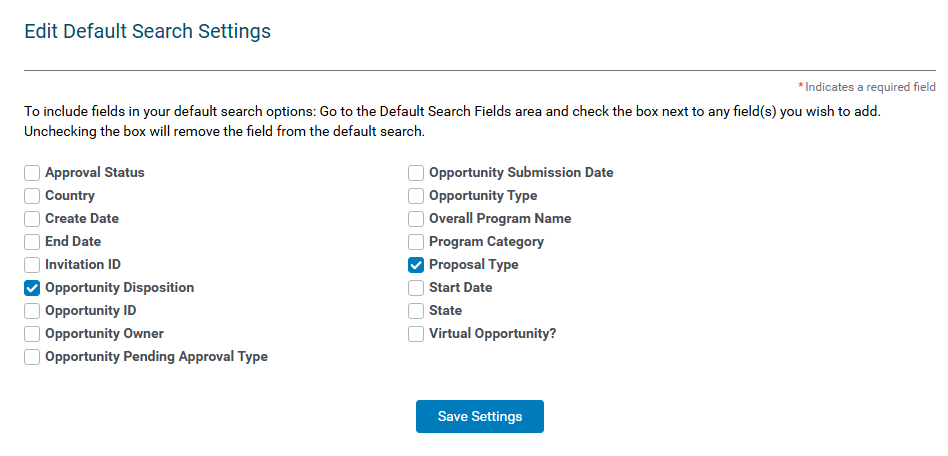
Edit/Add Search Filters: To include fields in your default search options: Go to the Default Search Fields area and check the box next to any field(s) you wish to add. Unchecking the box will remove the field from the default search. Click the "Save Setting" button at the bottom of this screen to save any changes to your search preferences.
Edit Results Column: To add Columns to your Volunteer Connection Tab display: In the "Available" section, click on the field name(s) you wish to add, and click the right arrow. To remove Columns: In the "In Use" section, click on the field name(s) you wish to remove, then click the left arrow.
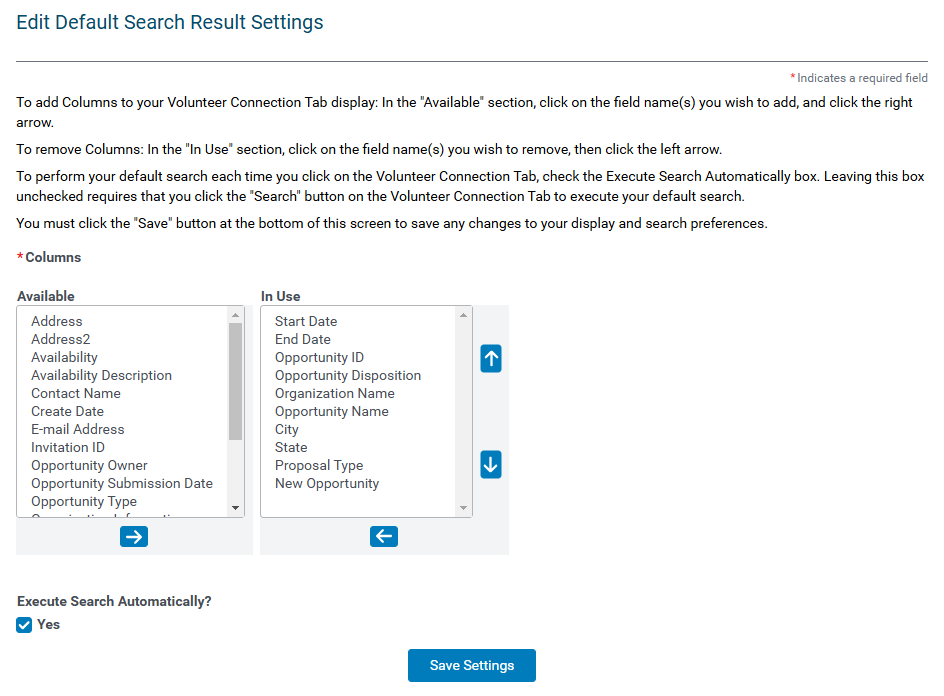
To perform your default search each time you click on the Volunteer Connection Tab, check the Execute Search Automatically box. Leaving this box unchecked requires that you click the "Search" button on the Volunteer Connection Tab to execute your default search.
Click the "Save Settings" button at the bottom of this screen to save any changes to your display preferences.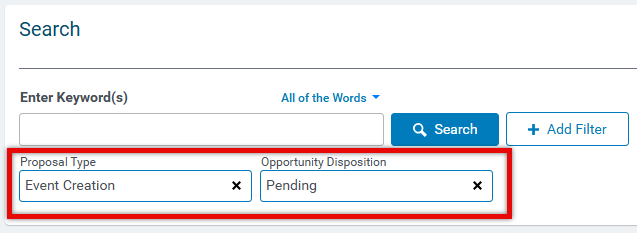
Once your preferences are set, you can start to perform searches.
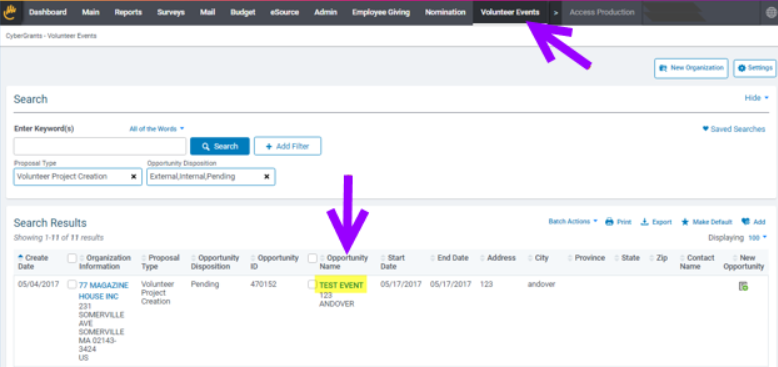
- Select the ‘Proposal Type’ and the ‘Opportunity Disposition’ and then press the ‘Search’ button.
- Proposal Type: Volunteer Event Creation
- Opportunity Disposition:
- External – submitted by an external organization from the NPO portal
- Internal – submitted by an employee through the donor-facing site
- Pending – if the approval rule auto dispositions events to pending
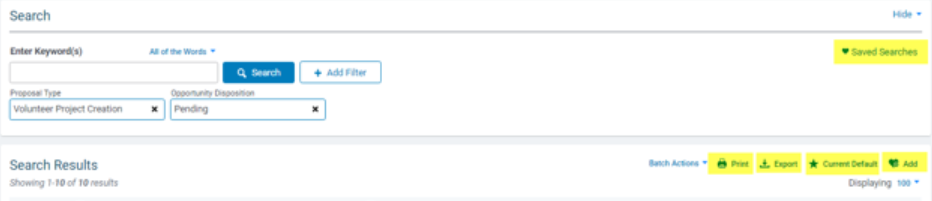
On this page, you can use the “+ Add Filter” dropdown to use additional search filters, set a default search, create Saved Searches that will provide you a list to click and the search will run automatically, as well as print and export the results.
Opening/Rejecting a Volunteer Event
An ‘Opportunity Disposition’ of ‘Pending’ means the event is awaiting approval, so it can display on the event calendar/show up in the event search to sign up for. To open/approve the event, first make sure you are on the ‘Volunteer Events’ tab, search by the ‘Volunteer Event Creation’ and the ‘Pending’, ‘External’, and/or ‘Internal’ Opportunity Dispositions. Within the search results, click on the ‘Opportunity Name’ that you want to review the event for.
Review the details of the event and when ready scroll to the bottom or click the ‘Event Approval Information’ tab from the navigation bar to the left of the screen.
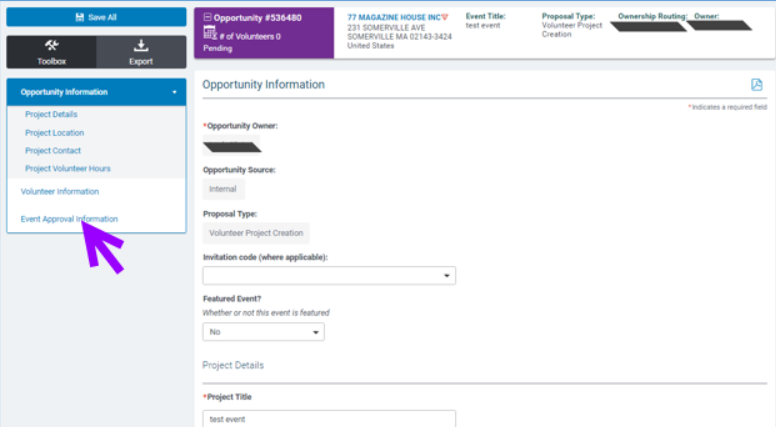
Depending on the status of the event, you may need to click on the “Submit for Approval” button to start the approval process. Click the button, then click the “Event Approval Information” tab in the navigation.
You will now see a ‘Comments’ box and an ‘Open’ and ‘Reject’ button under the ‘Event Approval Information’ section. To open the event, press the ‘Open’ button. To reject the event, press the ‘Reject’ button. If you have any comments to add, then add them to the ‘Comments’ box before you press the ‘Open’ or ‘Reject’ button. (If you reject the event, then the comments you add to the ‘Comments’ box will be added to the email event that is sent to the donor.)
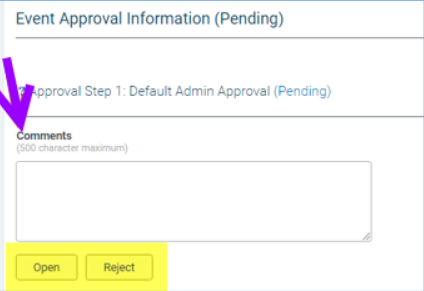
Once you ‘Open’ the event, you will see that the ‘Pending’ status will update to an ‘Open’ status. At this point, the event is open, and you do not need to do anything else to the event. If you want to reset the approval process and turn the event back to ‘Pending’ status, then press the “Submit for Approval” button again it which will reset the approval workflow.
-The thumbs down icon highlighted in red represents that the event was ‘Rejected’. If that was done accidentally, you can reset the process by clicking the “Submit for Approval” button.
Looking for training?
Explore this feature at your own pace - access training video content or watch a recorded webinar by clicking the link below.


