Review Process
When an application is submitted, the appropriate people must go through a set of steps to properly disposition the request and move it to the next phase in the process. During this set of examples, the screenshots will be taken from the account of the request owner or reviewer who has the action item.
**Note – all screenshots and examples are taken from the Sandbox (test) environment. None of the examples are real-life applications. The examples follow the most basic workflow, but requests with multiple approval steps still follow the same process.
Request Ownership
There is a 1:1 relationship between a request and a request owner. Every request that has been submitted is automatically assigned a request owner based on certain criteria within that application. Generally, the request owner is determined by proposal type or some other criteria within the request. This request owner is responsible for the request, to ensure it meets specific requirements and ultimately reaches a final disposition or approved or rejected. Before an application can start the review process, it must first be submitted for approval by the request owner.
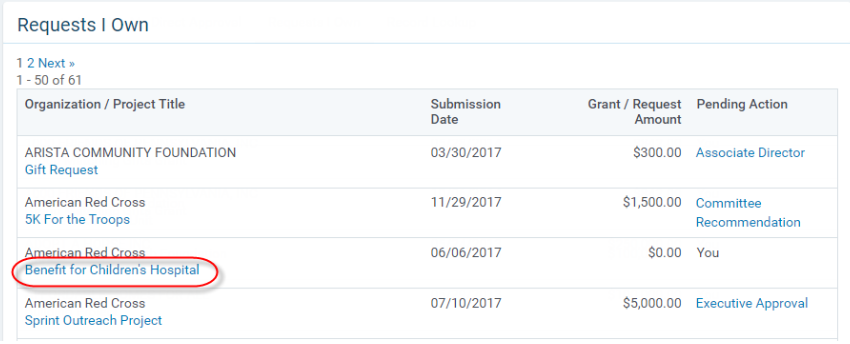
For request owners, pending requests can be found on either your Dashboard under the Pending Requests portlet or your Main Tab which will can be customized to only display requests that are important to you (requests pending your review, requests in your market, requests that are rejected, etc.). Open the request by clicking the dollar amount from the Main Tab or the Project Title from the Dashboard.
Main Tab:
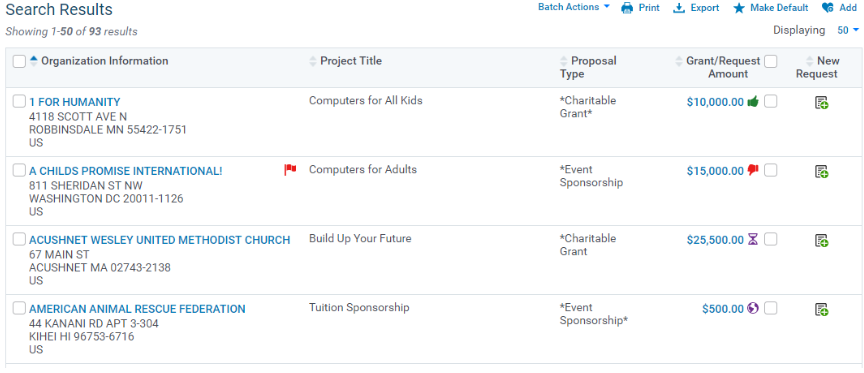

- External – submitted by a grantseeker from the application
- Pending – has been saved internally, even if no changes have been made. “Pending” is also the first status of a request has been created by an internal user as opposed to submitted externally by a grantseeker
- Approved – request has reached a final disposition of Approved
- Rejected – request has reached a final disposition of Rejected
Dashboard:
Submitting for Approval
The request owner should complete any internal fields that will be pertinent to reporting and future impact reports and the payment information. Request owners may have a specific required set of fields that need to be completed in order to be ready for the approval workflow.
After you have reviewed the information provided by the applicant AND have completed any required Request owner fields, you are ready to start the approval process. Scroll to the bottom of the page to the Approval section, enter a Recommended Amount and click the “Submit for Approval” button to move it to the first step in the approval process. You will see the projected approval steps that are required for that particular request:
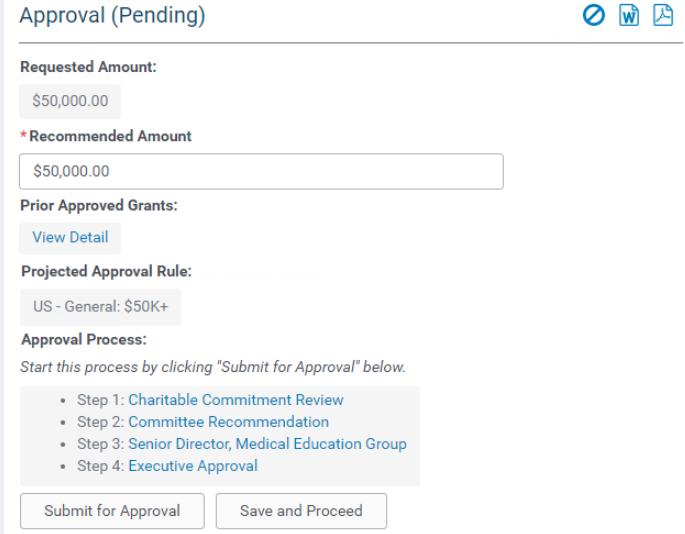
You can click on all of the approval steps to see who has authority to perform the step, and who has editor-linked authority over that user to perform the step in their absence. Once you submit for approval, the request moves to the first approval step.
Reviewers – Approval Steps
The reviewer will have the request display on the Dashboard under the portlet displaying requests assigned to them for a decision:
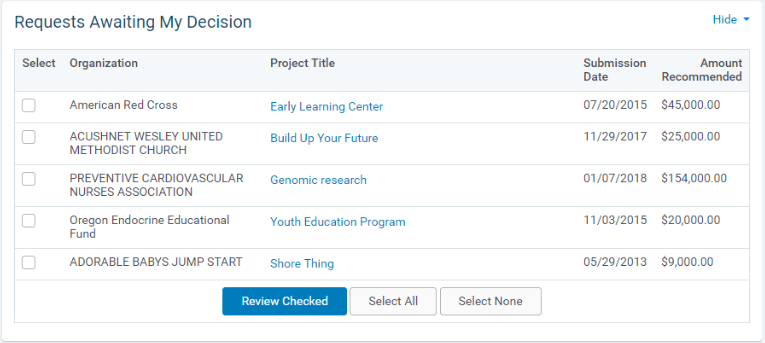
You can also find them on the Main Tab if searching by Request Approval Status for requests Pending My Approval Only:
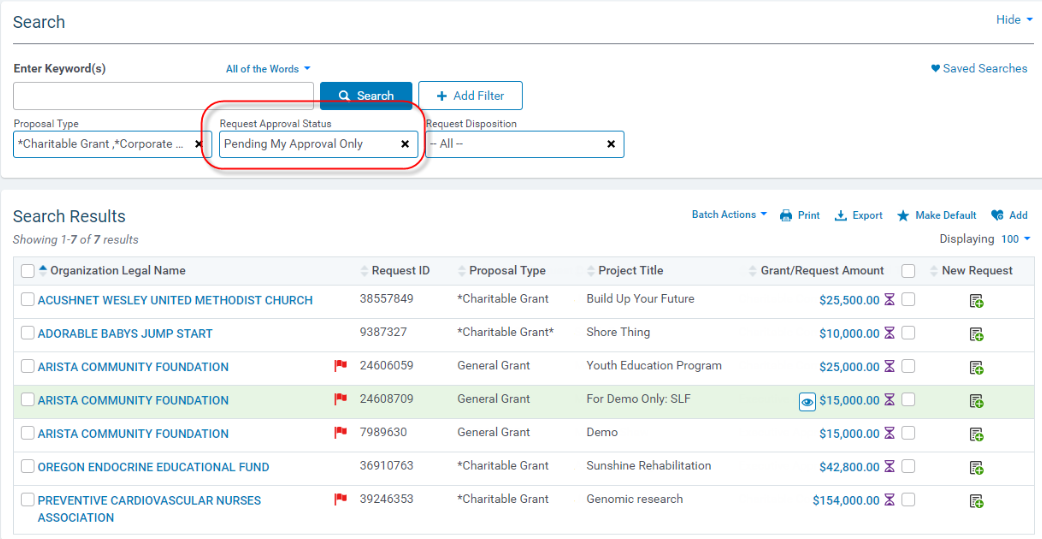
After opening the request, the reviewer can view what has been entered by the applicant and the request owner; depending on account priviledges, no changes can be made to the application. The reviewer can provide their decision in the approval step.
Within a workflow, each step can be a hard decision (approval or reject) or a soft decision (recommendation, data capture). Negative soft decisions will still move on to the next step of a workflow. Negative hard decisions stop the process immediately and end the request as Rejected. Approving the request moves it to the next approval step (if applicable) or ends the request in a final disposition of Approved.
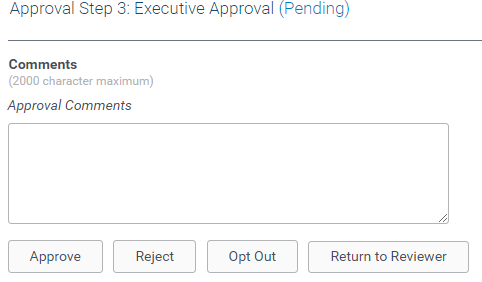
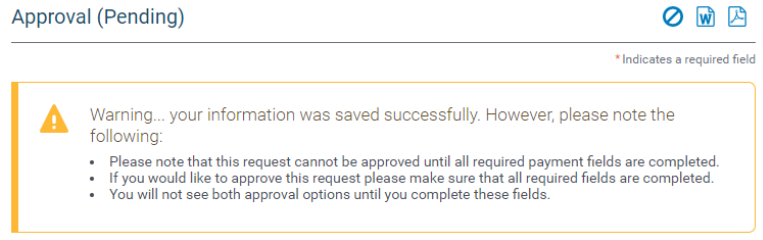
Some steps may have requirements that will prevent you from approving. A Payment step, as an example, might require that a payment be created before both Approve and Reject buttons appear. Only the Reject button will appear if not all requirements have been fulfilled. The system will tell you what is missing:
Creating Payees and Payments
In order to approve, you must have a payment within the record that includes the following required items:
- Payee
- Payment Type
- Payment Status
- Budget
- Requested Payment Date
- Payment Amount
Create/Select Payee Record – By default, the payee information will mirror the organization information until/unless a different payee is established. The default setting will be to use the default payee. However, you can create a new payee for the organization/request by un-checking the option to use the default:
New fields will populate to allow you to create a new payee.
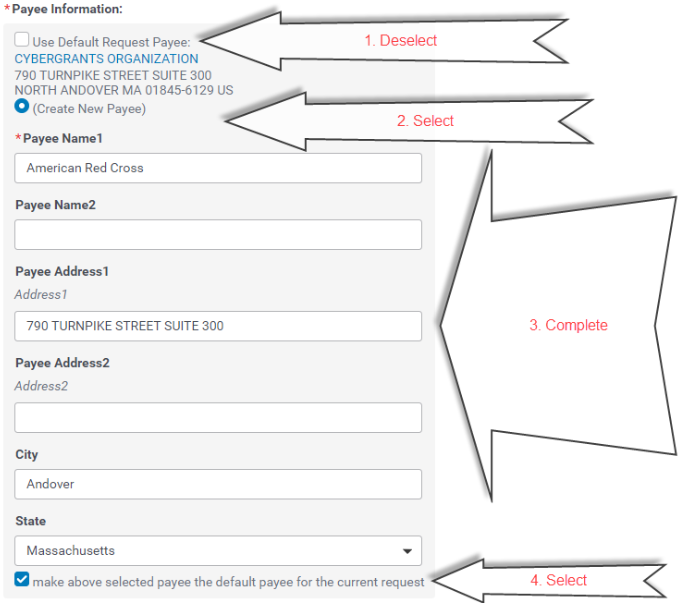
Once you save this new payee record, you will not be able to edit it. You can create as many payees as necessary, but you cannot edit once saved.
Select Payment Type – there is generally one type of payment, but there could potentially be multiple. Choose the applicable payment type.
Indicate Payment Status – When creating a payment that needs to be picked up by the AP feed, you must select a status of “Scheduled.”
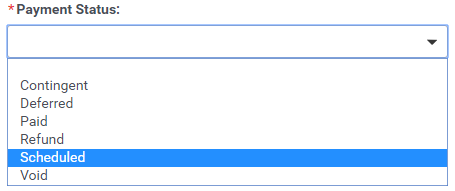
A payment status of “Contingent” or “Deferred” is essentially a payment that needs some sort of manual intervention before it gets put into “Scheduled” status. It will draw against your budget so that the funds get allocated, but is in on hold for one reason or another.
Select a Budget – By default, the system will assume you are creating a budget against the current budget year. If you have access to previous budget years, you can select that budget year and change it.
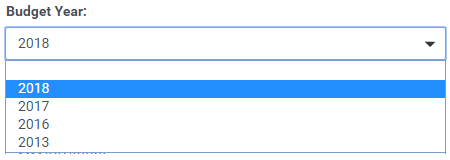
You will only see budgets that you have permission/authority to create payments against. When you select a budget, you will see how much is still available in that budget:
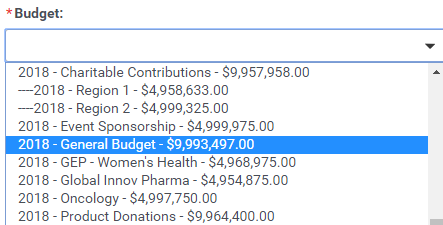
Enter Date and Amount of Payment – The Requested Payment Date is generally the current date unless you are setting up a payment that will be paid in the future. If using ACH, the Payment Amount will be the dollar amount of the check or ACH payment:
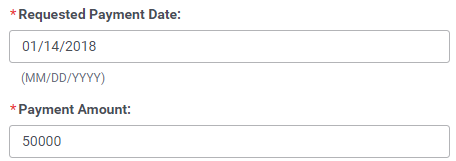
The system will allow you to enter a lesser amount than the amount you plan to approve. However, you will receive a warning that your payment amount is less than your Recommended/Granted amount. You will see this warning if, as an example, you are paying out of two different budget lines or multiple years.
The system will prevent you from creating a payment that is greater than the Recommended/Granted amount.
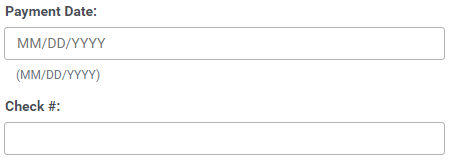
Payment Date and Check # should be left blank for check and ACH payments. This information will be populated by the feedback file once the payments have been processed.
Once all required information has been completed and saved, a new payment record will appear in the request record:
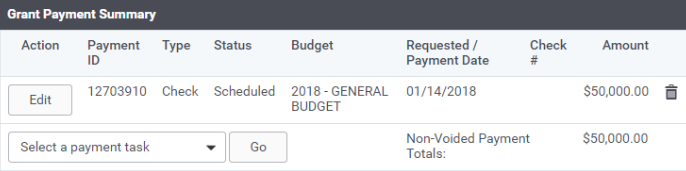
You can create a new payment for this same request by clicking the “Select a Payment Task” from the dropdown list to create a new payment from scratch.
Important Note: When working with an automated feed that picks up your payments to be processed, the system generally looks for payments with these three criteria:
- Request is an a final disposition of Approved
- Payment Status = Scheduled
- Requested Payment Date is current date or earlier
The system will assume any payment that does not meet these three criteria is not ready to be picked up by the feed.
Final Disposition
After all requirements have been completed, the Approve and Reject buttons will appear on the last step of the workflow.
Approving the last approval step or rejecting at any approval step will change the request disposition from Pending to either Approved with a thumbs-up icon or Rejected with a thumbs-down icon.


Approval Resetting and Rollback of Steps
Request owners have the ability to reset the approval process at any time. By
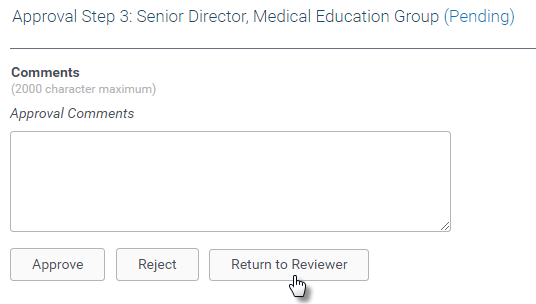
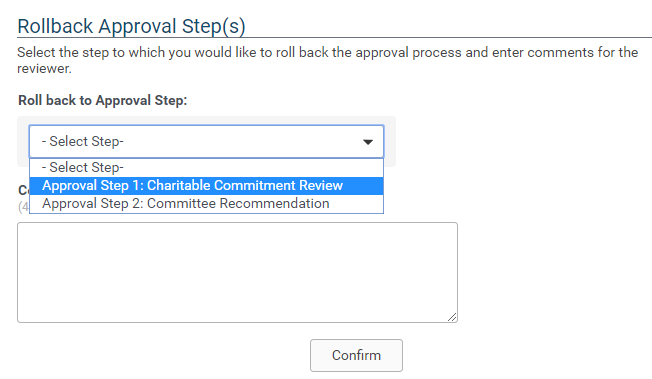
Some approval steps and/or reviewers may have the ability to Return to Reviewer. If the reviewer can do this, they can roll the request back to any of the previous steps, or just approve or reject the request.
**Note – this may not be a permission within your program, but it is a function of CyberGrants software.