There can be mulitple payment types in your account depending on what forms of payment are offered. They are generally:
- Check
- ACH/Wire
- Product Payments (for GrantMakers with Products only)
Required fields are labeled with an asterisk (*) and must be completed to save the payment information. Required fields include “Payment Type”, “Payment Status”, “Budget”, “Requested Payment Date”, and “Payment Amount”, but the Administrator can designate additional fields as required.
NOTE: The default mode for payments is “New Payment”.
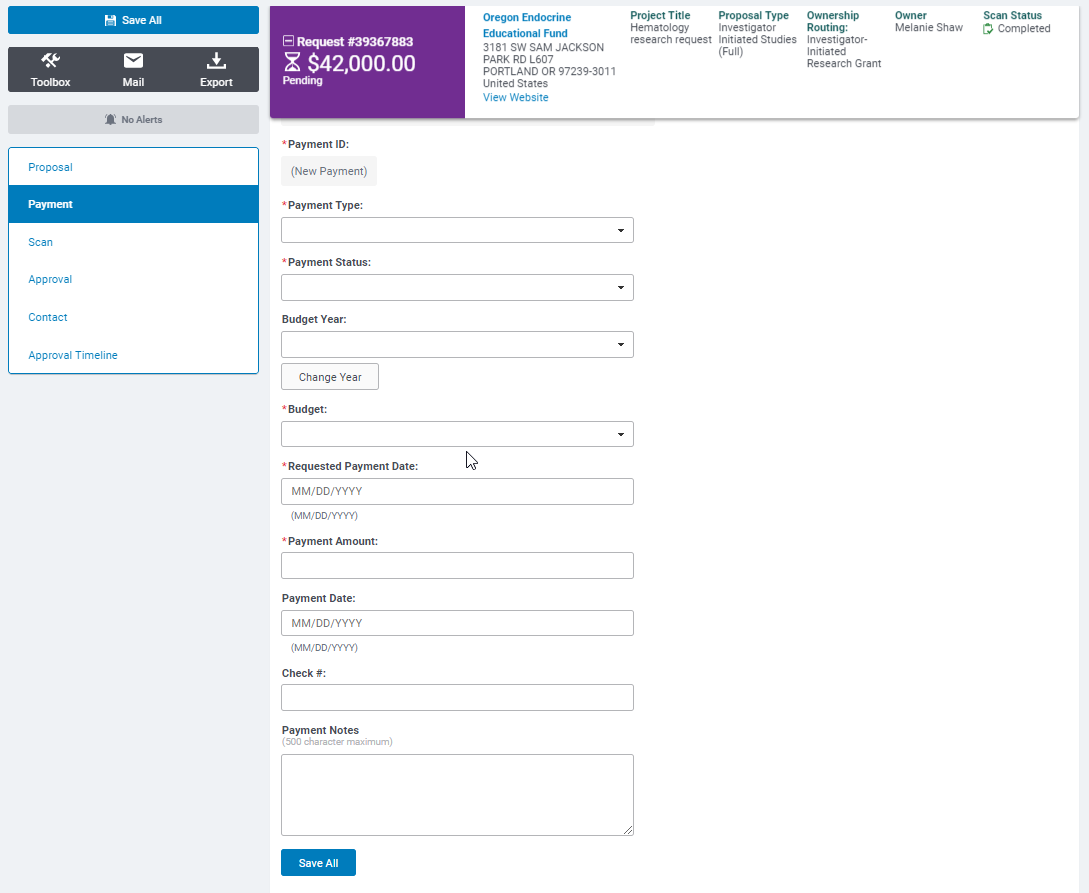
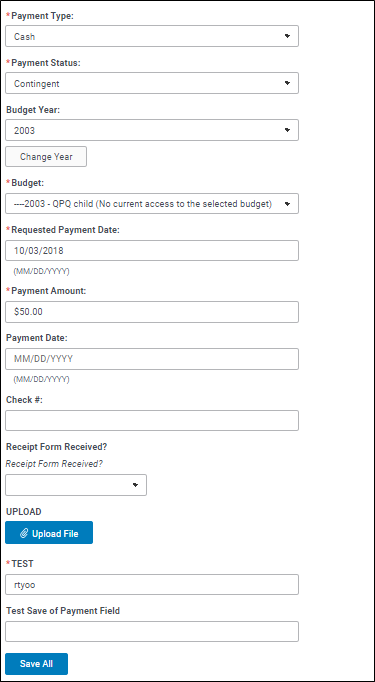
To create a single payment for a request: Select a “Payment Type”, “Payment Status” and budget from the corresponding dropdown lists then enter the “Requested Payment Date” and “Payment Amount”. Complete all required fields and other fields that are relevant. Before proceeding to the Approval section, click the “Save All” button.
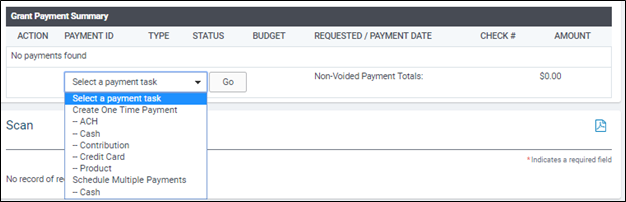
To create multiple payments for a request: Click the arrow for the “Select a payment task” dropdown. If the Administrator has selected payment types to schedule multiple payments, they appear beneath “Schedule Multiple Payments”. Highlight the payment type then click the “Go” button.
A payment form displays with the standard payment fields plus 4 new, required fields to schedule multiple payments, if your settings allow them:
- Installment Amount
- Number of Payments
- Frequency
- Starting Payment Date
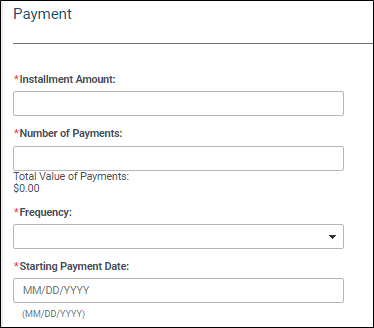
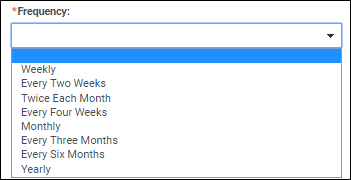
The “Total Value of Payments” field is a calculated field equal to the amount in “Installment Amount” times the value in “Number of Payments”. “Frequency” is a dropdown menu that allows a user to select the time span between payments and has the following options:
After filling out these payment fields, click the “Save All” button in the utility navigation or the “Save Payment Schedule” button at the bottom of the payment form. If all required fields are entered and no error results, the payments display in the Grant Payment Summary section:
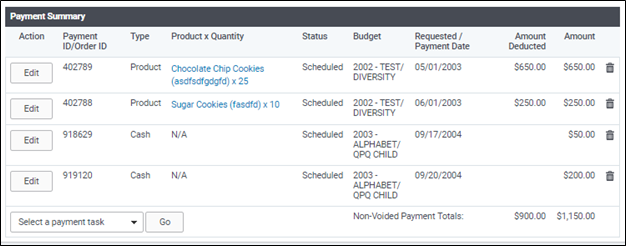
To edit an existing payment, click the “Edit” button to load the payment information into the editable fields for revision. To create a new payment when payment exists, click the “New” button to load a blank payment form.
Click the “Generate Receipt” icon  located in the blue Payment Information Header Bar to generate a charitable contribution acknowledgement form for individual payments.
Click the “View Payment Log” icon  while the payment is loaded to see all system activity associated with a particular payment.
Click the “Delete” icon  to delete a payment. Payments can only be deleted by an Administrator.
A user can create a payment for a cash grant through the use of the “Clone” button within an existing payment. Click the “Edit” button to the left of a payment to be cloned. The cloned payment contains the same information as the original payment with one exception – the “Payment Status” is set to “Contingent”. Select the appropriate status, make any additional changes as needed, then click the “Save” link or the “Save All” button.
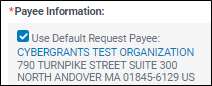
The “Payee Information” can be edited by the user in cases where the organization information associated with the request is different from the payee. Uncheck the “Use Default Request Payee” box to expand Payee Information.
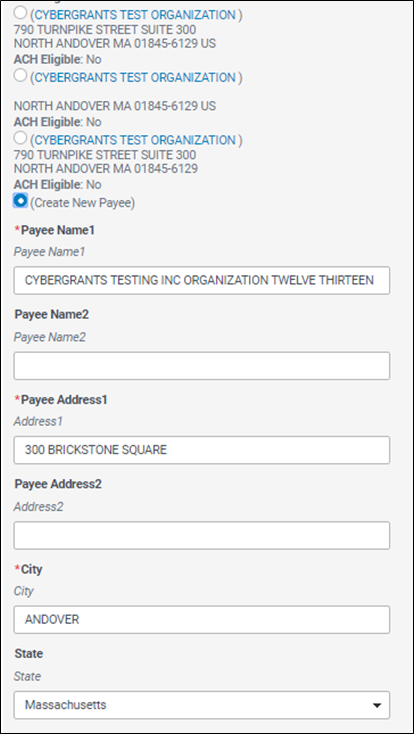
Choose another payee (if one exists) or create a new payee by selecting the radio button and completing the appropriate fields.
Payment Fields to Note
- Payment Status – There are six payment statuses:
- Contingent indicates that a payment is being held until an event takes place. An example would be an impact report that has yet to be completed by the organization. Once the information arrives from the organization, the status should be manually changed to “Scheduled”, prompting payment.
- Deferred indicates payments are being held for a given time. The payment status would need to be manually changed to “Scheduled” for the payment to process when using an AP feed.
- Paid indicates that a payment has been sent to the organization.
- Refund indicates money has been returned to the GrantMaker from the organization due to an erroneous payment or an over-payment. Any payment with a status of “Refund” must have a negative payment amount; conversely, a negative payment amount may only have a payment status of “Refund”.
- Scheduled indicates the payment is scheduled for a date in the future. A “Scheduled” status prompts a check to be cut when using an AP feed, once the scheduled payment date is reached and the grant is approved.
- Void indicates a payment was not received by the organization. The original dollar amount will be held in the payment field for reporting purposes on "Void" payments, but will not reflect in the budget totals.
- Budget is the specific budget to which the payment is assigned. A user must pick the lowest level in the appropriate budget hierarchy from the dropdown box. A user may only select a budget that has sufficient funds to cover the payment unless the Administrator or Budget user allows a negative budget amount. Users may only select from budgets that they have been given access to by an Administrator or Budget level user.
- Change Budget Year allows a user to change the budget year of a previously saved payment, enabling the selection of a budget from an alternate budget year for payment. A user may select from all budget years with a budget status of “In Process” or “Open”. After the appropriate budget year is selected, click the “Change Year” button. When the request screen reloads, all budgets available to the user from the newly selected budget year are displayed in the Budget dropdown.
- Payment Date & Check Number (#) should be completed for reference purposes once the payment has been made.
- Quid Pro Quo Payments are required for Quid Pro Quo requests. These payments require that the user break the payment amount into Fair Market Value and Deductible Amounts. These fields will only appear on proposal types where the Quid Pro Quo amount is accepted.
NOTE: CyberGrants does not permit the following conditions:
A single Payment Amount in the Payment section (or the total of all non-voided Payment Amount values in the Payment section) cannot exceed the Amount Recommended in the Approval section.
If the Amount Recommended in the Approval section is blank, a single Payment Amount (or the total of all non-voided Payment Amount values) cannot exceed the Request Amount in the Proposal section.
A payment cannot exceed the balance of a budget unless a Budget user or Administrator configures the budget years to be driven negative.
Working with Product Payments
Using product payments works in conjunction with the “Products Requested” area in the Request Section.
The Cost Price (amount the product costs for the company to produce) and the List Price (fair market value price) appear in the Products Requested area. The information from the Cost Price field will appear in the “Amount Deducted” field in the Payment Summary. The amount in the List Price field will appear in the "Amount" field in the Payment Summary.
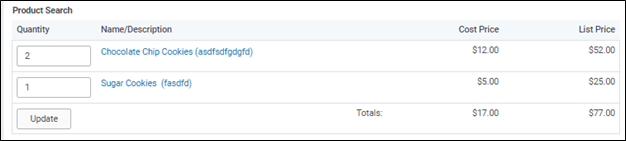
Once the Quantity for products is entered in the Products Requested area, Product payments are automatically calculated for each product and placed in a product order. The product order, however, does not include the Budget or the Requested Ship Date. Click the “View Order Detail” link in the “Product X Quantity” column to see the items contained in the order.
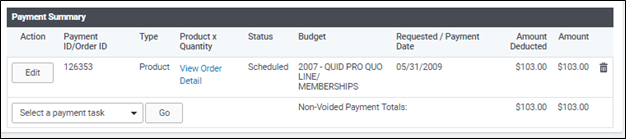
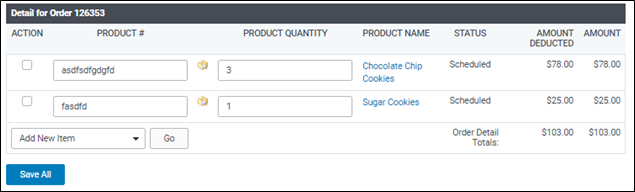
Click the “Edit” button associated with the order to edit the items in the order and to set the Budget and Requested Ship date. Add a Budget and a Request Ship Date to the payment and press the “Save All” button. Here the User may also change the quantity of products, add additional products, and transfer products to additional orders.
Click “Save All” at the bottom of the Order Detail section.
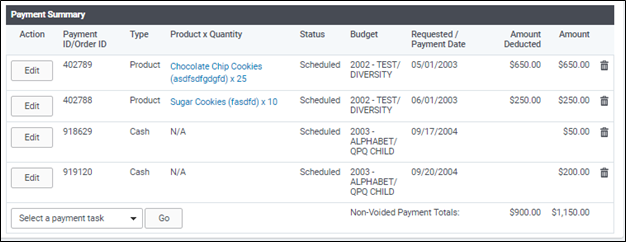
Each payment or order can have a different Budget line and Requested Ship Date by editing the line individually. Click the “Edit” button to the left of the payment or order, add Budget and Request Ship Date information then click the "Save All" button.
Notice below the the Product payment is associated with the 2002 –Test Diversity budget and has a requested Payment date of 05/01/2003, while the Cash payment is associated with the 2003 Alphabet/QPC Chile Budget and has a requested payment date of 9/17/2004.
Note
If the request is to be approved for both, cash and product, the cash payment must be created manually by clicking the “Select a Payment Task” menu at the bottom of the payment summary and creating the payment separately.
Back to Payments and Disbursements
Back to Homepage


