The Approval section captures all request-related approval information, including the amount recommended for funding and any prior approved grants for the organization. The approval process performs a dual role:
- Dictates the total amount for which the grant will be funded.
- Approves the grant for funding.
Beginning the Approval Process
A user must enter a value in the Amount Recommended field before submitting the request for approval. The amount entered is the actual amount that is approved for funding. It may or may not be the same as the amount originally requested.
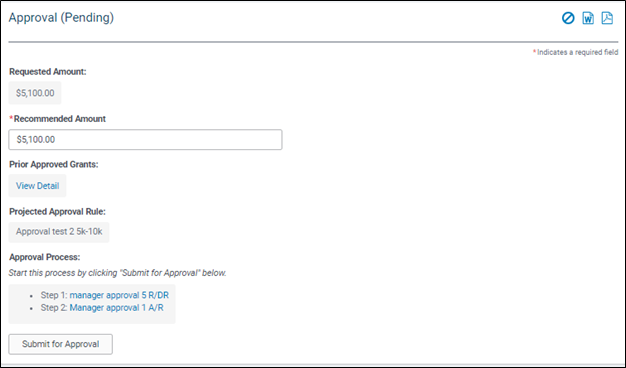
By default, the payments must be created before the Approval Process begins. The total of the non-voided payments must add up to the Amount Recommended if the Request is to move forward to be approved.
NOTE:
The Approval Process can be set to bypass the payment requirement. Please contact your CyberGrants Client Manager for details.
Click the “Submit for Approval” button to submit the request for approval. Once the “Submit for Approval” button is clicked, it disappears, indicating that the request is currently in the approval process. The “Submit for Approval” button re-appears once the request approval process is completed and the request is either approved or rejected. By default, the Amount Recommended cannot be changed unless appropriate permissions have been applied.
Approve a Request
At each step of the process, a user has the option to enter comments, complete any custom fields, and register a decision concerning the request. Depending on the approval process configuration, CyberGrants displays icons that allow a user to either Approve/Reject, Recommend/Do Not Recommend, Define Steps or Record Input for the request.
CyberGrants also displays the Required Approval section, which lists the steps in the approval process. These steps depend on the approval process that each GrantMaker has established. (To set up a multi-step approval process, please contact your CyberGrants Account Coordinator.)
The “Approve”/“Reject”, “Recommend”/“Do Not Recommend”, “Define Steps” or “Record Input” icons appear depending on the approval authority of the user. When a user clicks any of these icons, the user’s name, current date, and comments are saved as part of the approval record. No changes may be made to the approval step after the user has registered a decision by clicking the appropriate icon.
The “Approve”/“Reject” icons allow the user to indicate a decision. If the user clicks the "Reject" icon, the approval process ends and the request is marked Rejected.
The “Recommend”/“Do Not Recommend” icons allow the user to indicate an opinion, but do not permanently affect the request’s disposition. Depending on settings, you may also have the option to return to a previous reviewer.

The “Record Input” icon allows a user to add comments without rendering any decision or opinion.

Initiating the Approval Process prior to entering payment information
If payment information is required and the user selects the “Submit” icon before the payments are entered, only the “Reject” option will appear. If the user wants to continue, they can complete the Payment Information section to receive the "Approve" icon or click the “Reject” icon.
Completing the Approval Process
When an approval step is completed, a user may view the decision and comments of that step if the approval process is configured to allow viewing. (Your CyberGrants Account Coordinator may assist you in limiting the display of the approval details.) The request continues to pass through the various steps of the approval process and is considered “Pending Approval” until all authorized approvers complete the approval steps or until the request is rejected.
Once the approval process is completed, a user may revise the Amount Recommended field. If the Amount Recommended is increased, the grant is automatically resubmitted for approval.
Dynamic Approval Process
If the approval process is configured to allow dynamic approval steps, the designated user can select one or more persons to complete each approval step from a list of eligible users. First, click on the “Define Approval Process” button.

A pop-up Approval Process Definition box will display. Select from the list of names or enter each user ID or user name in the Reviewers box separated by commas.
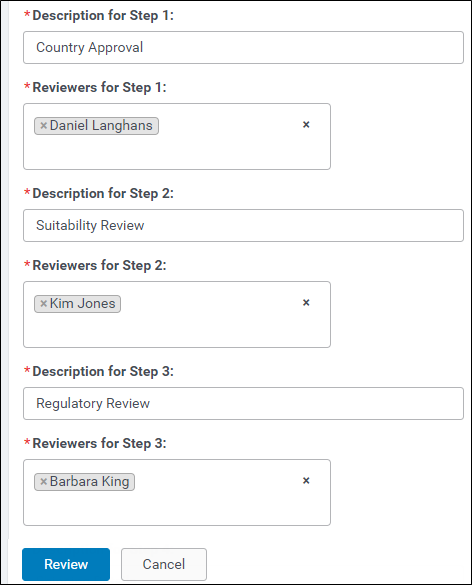
Once the appropriate names are selected for each step, click “Review” to preview the choices. Click “Change Definition” to make further changes, or the “Save” button if it is complete. Click the “Done” button to exit the window.
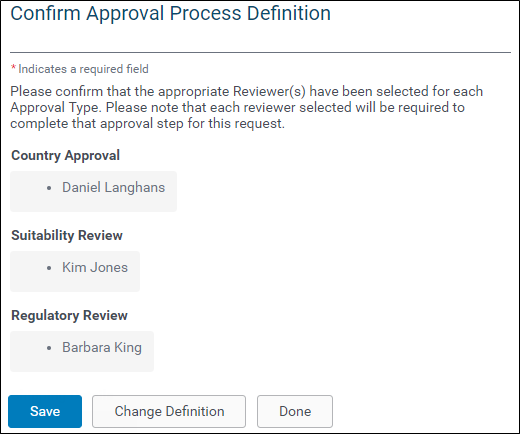
Approval steps are created for each selected user and are represented by a link to the approval type. When the “Pending” link is clicked, the names of the users authorized to complete that approval step are displayed.
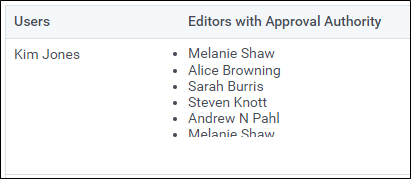
Once a dynamic approval process is defined, it can be modified. Approvers can be added to a step, removed from a step, and a step can be removed. If an approver is added to a step, even the current approval step, a “Pending Your Approval” email is triggered to the added approver to indicate that a new request is awaiting approval.


