Preview Report

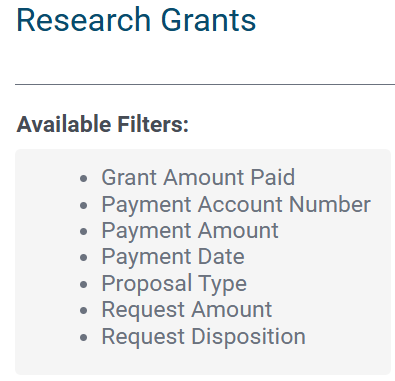
For ad hoc reports, upon clicking on the report preview, the filters will be displayed for your report.
For example upon clicking on the Research Grants Preview:
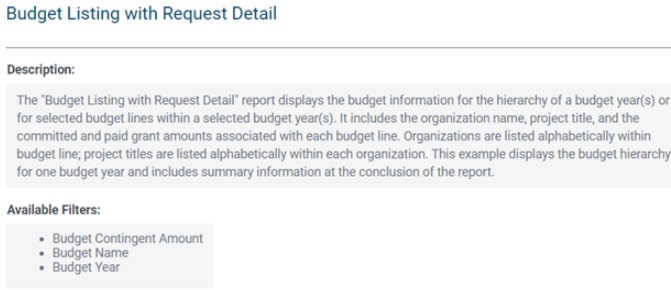
Standard Report for Budget Listing with Request Detail
Helpful Tip: Preview image is also available for certain reports.
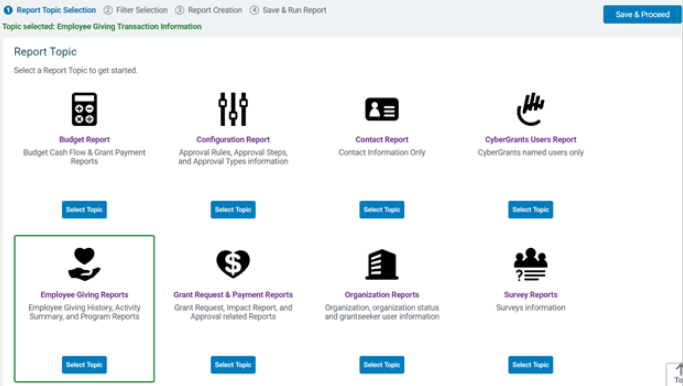
Edit Report

Upon clicking Edit Report, the current topic will be highlighted (as shown in the image below) for the report selected. The current report topic will display in the upper left corner under the timeline. To edit the filters or the report fields using the same report topic, click on Save and Proceed from this page. The Save and Proceed button is in the upper right hand corner of the screen. To change the report category and/or the report topic, select the new category and/or the new report topic from this screen. This will change the fields in your report based on the new report topic selected.
Configure Report Settings

Upon clicking on Configure Report Settings, the user can change the attributes of reports that they own. The user can modify the report, ie. name, category, tag, and description. The user can also clone the report, as well as, add/or remove access for other users and transfer ownership of the report.
To change the name of the report, enter the new name of the report in the Report field. 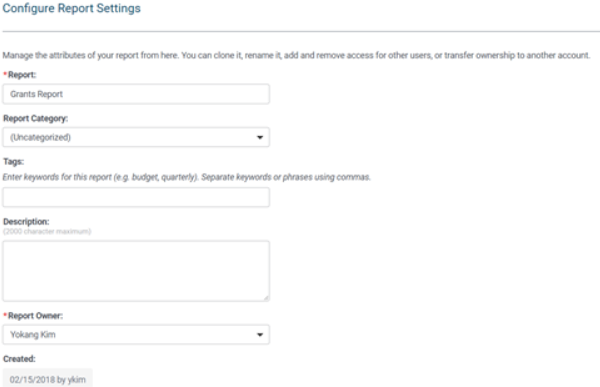
Sharing the Report
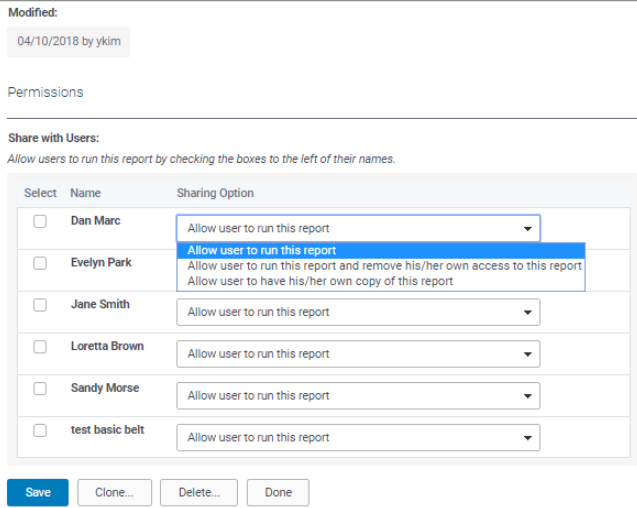
Sharing Options
- Allow user to run this report.
- Allow user to run this report and remove their own access to this report
- Allow user to have their own copy of the report
For all 3 options, the shared report will display in the user’s My Ad Hoc Reports. For options A and B, if the original owner of the Ad Hoc report deletes the report from their list, the report will no longer be available to the users they have shared it with.
|
Sharing Options
|
|
PERMISSIONS
|
A
|
B
|
C
|
|
Run Report
|
X
|
X
|
X
|
|
Edit Fields
|
|
|
X
|
|
Edit Filters
|
X
|
X
|
X
|
|
Delete Report
|
|
X
|
X
|
|
Clone Report
|
|
|
X
|
|
Share Report
|
|
|
X
|
|
Add Tags
|
X
|
X
|
X
|
|
Add to Favorites
|
X
|
X
|
X
|
|
Modify Report Name
|
|
|
X
|
|
Modify Report Format
|
X
|
X
|
X
|
Clone Report

Step 1 - Enter a new report name
Step 2 - Click on the clone button. If successful, the “Congratulations!” message will display, and the user will have access to configure report settings.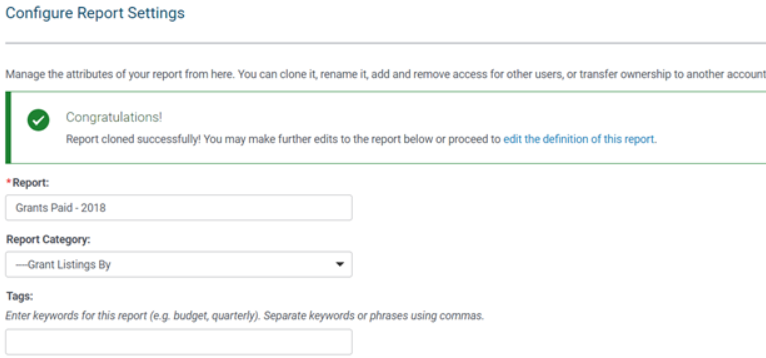
Delete Ad Hoc Reports
The user can delete reports from the My Ad Hoc Reports portlet or the Report Library.
Important: Deleting an ad hoc report is permanent; this report will no longer be available in Ad Hoc Reports list, the Report Library, My Favorites, My Tags, or My Scheduled Reports. Users are unable to delete reports that have been shared with them via the Sharing Option: “Allow user to run this report”. This will be evident by the absence of any Delete check box.
Step 1 – Find the report that the user would like to delete, and check the box next to the name of the report
Step 2 – Click on the red “Delete Checked Reports” button.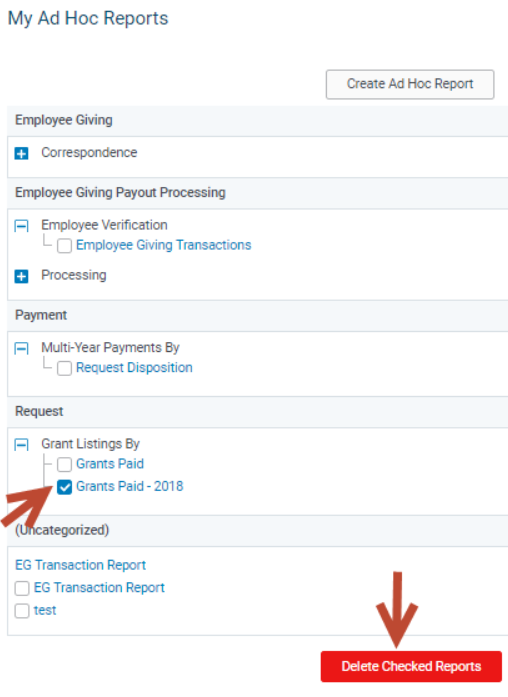
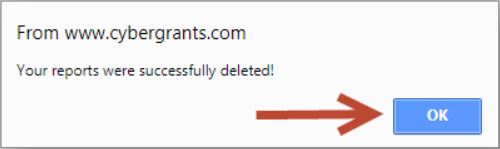
Step 3 – Select the report, click on delete report, then the user will get a pop-up message confirming that the report was deleted. Click OK.
Add Favorite

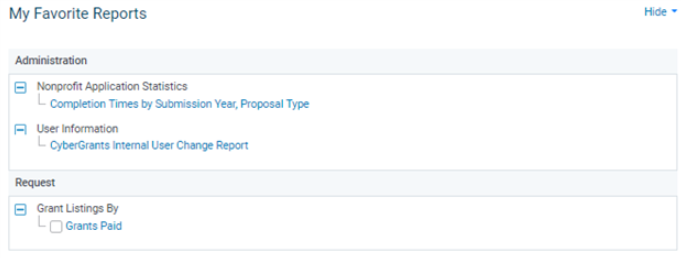
Click on Add Favorite Icon, and the report will automatically appear in the My Favorite Reports portlet. The user can add Standard and Ad Hoc reports as favorite reports.
Tag Reports

A Tag is a label, which may be a single keyword or phrase, assigned to a Report as a means of grouping or classifying similar report types. Assigning a Tag to a Report helps to describe reports and allows them to be found easily. Tags are user-defined. Users can assign Tags to individual reports by clicking on the tag icon after any report. A window will display and allow you to enter or edit existing tags. Click on the Tag Report icon for an Ad hoc report. Enter a name to tag the report with, multiple reports may have the same tag.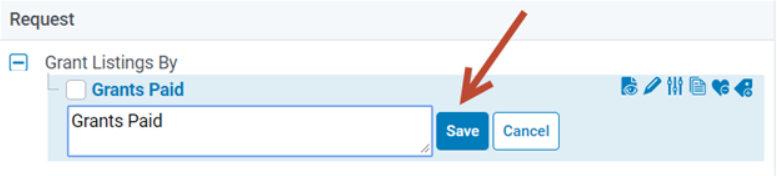
Tagged Reports will be displayed in the My Tags Portlet.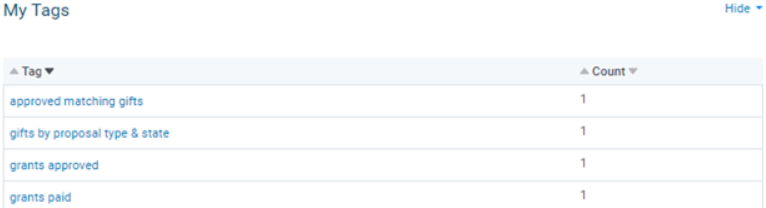
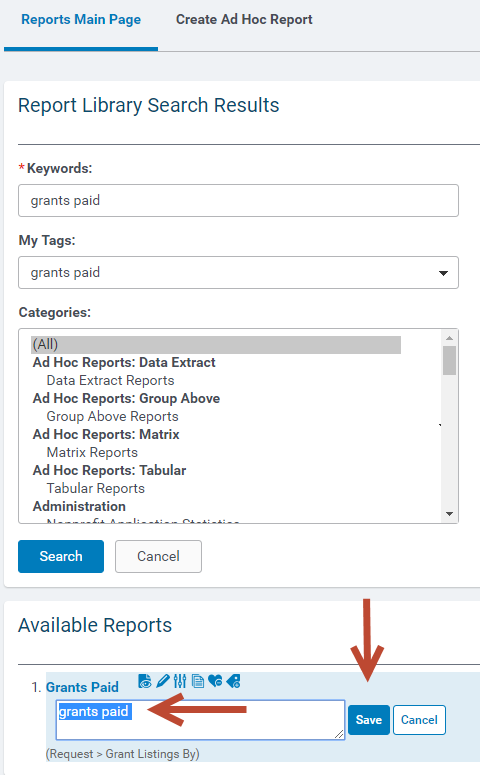
To remove a tag from a report.
- Click on the name of the tag from the My Tags portlet
- Then enter the name of the tag in the keyword search
- Click on the Search button
- Then click on the tag icon next to the report
- Remove the name of the tag, Click on Save
One Click Report
Reports (and filters used) can be configured to run with a single click.
Step 1 From the My Report Activity portlet, click on the mouse icon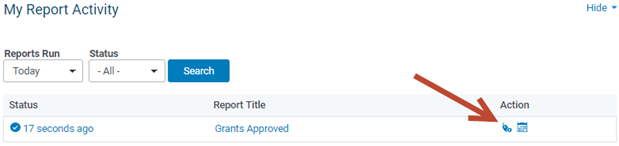
Step 2 - Highlight the name(s) of the user(s) with whom to share the report
Step 3 – Click on Create One-Click Report
Step 4 – Click Done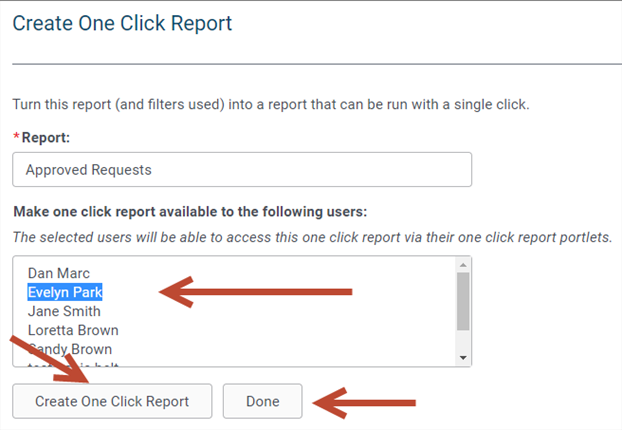
The report will be displayed in the My One Click Reports portlet.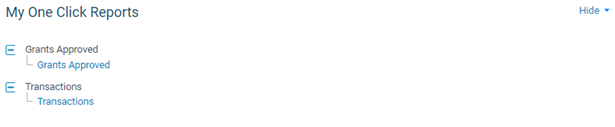
Schedule Report
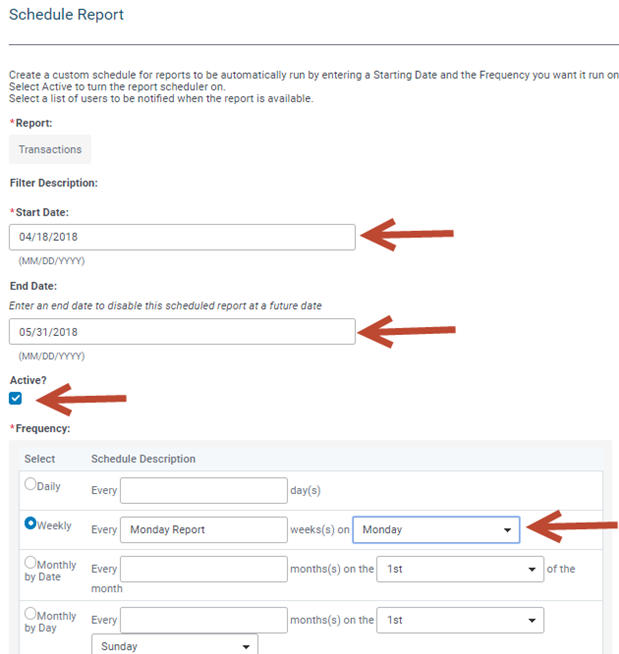
Create a custom schedule for reports to be automatically run by entering a Starting Date and the Frequency for running the report.
Step 1 – From the My Report Activity portlet, click on the Calendar Icon portlet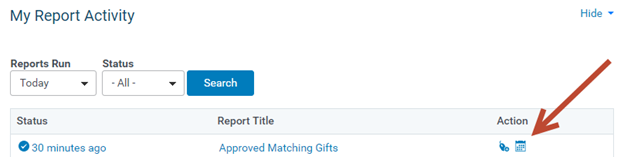
Step 2 – Configure the report scheduler
- Enter the start date
- Enter the end date (optional)
- Click on Active Flag
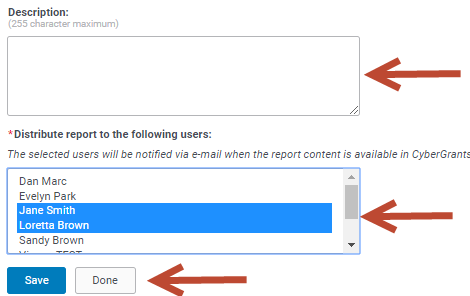
- Set the Frequency, Description
- Select the user(s) with whom to share the report
- Click Save, then click Done
The report will be displayed in the My Scheduled Reports portlet. Helpful Tip: Users who do not have any scheduled reports will not see the portlet.


