Portal pages are the different pages within the employee facing site. You can create a portal page for each program the employees can access.
Portal pages can be configured to show in the navigation bar where clicking on the portal page name brings the employee to that specific page.
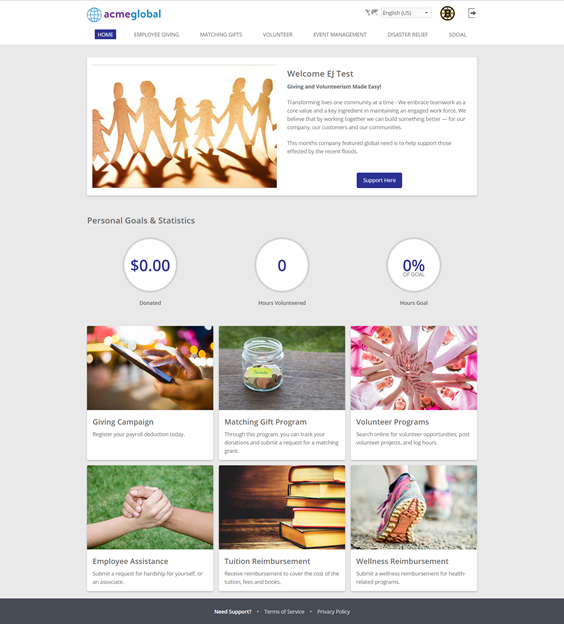
See the navigation starting with the highlighted HOME, MATCHING GIFTS, VOLUNTEER OPPORTUNITES … each of these are portal pages.
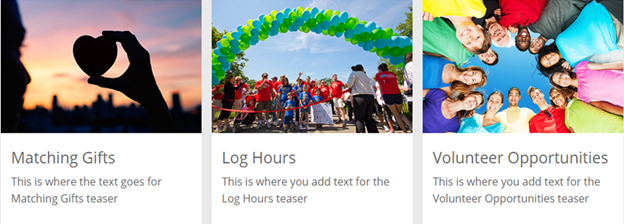
You can also use portlet teasers to direct to hidden pages. See the three teasers to the right. Each one directs to a portal page. The Log Hours option brings you to another page not selectable from the navigation above.
Portlets
Portlets are what make up a portal page. They are the different containers within the page that allow the employee to search for an organization, host a client image, or provide matching history.
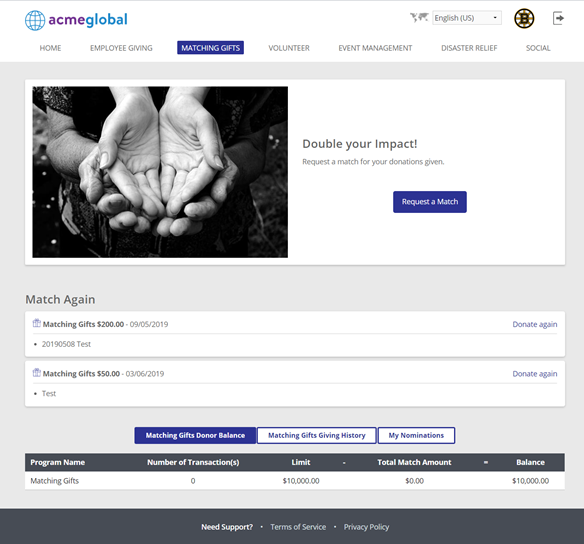
There are 5 portlets on this portal page:
- The teaser banner with the image
- Match Again
- Matching Gifts Giving History
- Matching Gifts Donor Balance
- My nominations
The last three portlets are ‘stacked’ together so you can toggle between the three. This keeps the page from becoming over crowded as well as prevents too much scrolling on the employees end.
A WYSIWYG (What You See Is What You Get) editor is available for the Introduction text in some of the most commonly used portlets — Teaser, Giving History, Quick Search, and Hero. This editor allows administrators to format text (for example, bold or hyperlink) without using HTML code.
Portal Page Layouts
| On your portal page (if in E2 platform) you will see you now have a *Layout option in place of the Style Sheet.This is a required value when working in E2. | 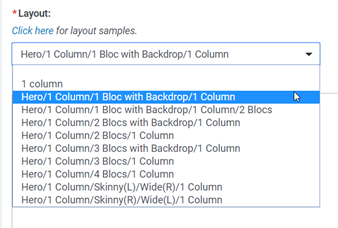 |
Example:
Hero /1 Column /1 Bloc with Backdrop /1 Column
In this example, the teaser elements are located in the 1 column sections of the Layout.
If we wanted to add an additional teaser to this format, that teaser would fall below the current 3 teasers and be larger than the sizes of the above three teasers combined OR you can change to the 4 bloc layout for them to order in the same row. As you can see we only allow up to 4 teasers in one row.
Currently we are not utilizing the last 1 column.
Teasers
Teasers are the square blocks of images and text that display information about the different CyberGrants programs and normally link to other pages.
Adding and Moving Teasers
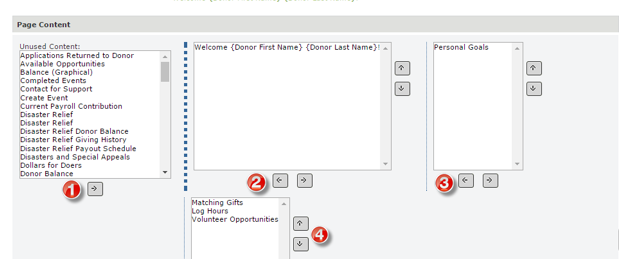
- To add a teaser to your page, select a teaser from the Unused Content: section of your portal page. Teaser names normally start with the name of the text that shows in the frame, though it may be different depending on your setup. If you cannot find the teaser in the list, contact CyberGrants support.
- Use the right arrow button below the Unused Content: section to move the teaser to the next box. Moving Teasers, this is indicated with a red number 1.
- Your teaser will now be located in the second box and you can use the right arrow button below that to move it to the third box .
- Continue to move the teaser to the box containing the teasers, in this example it is the fourth box.
- Once your new teaser in its correct container, you can use the up and down arrows to order the teasers. The first one at the top of the list will fall the left of the page and the bottom one to the right of the page.
The Teaser portlet’s Introduction text field supports a WYSIWYG editor, which allows easy formatting of teaser descriptions and links without HTML.
Removing a Teaser
If you need to remove a teaser, select the teaser and use the left arrows below each container/box to move the teaser to the Unused Content: section.
Horizontal Teaser View
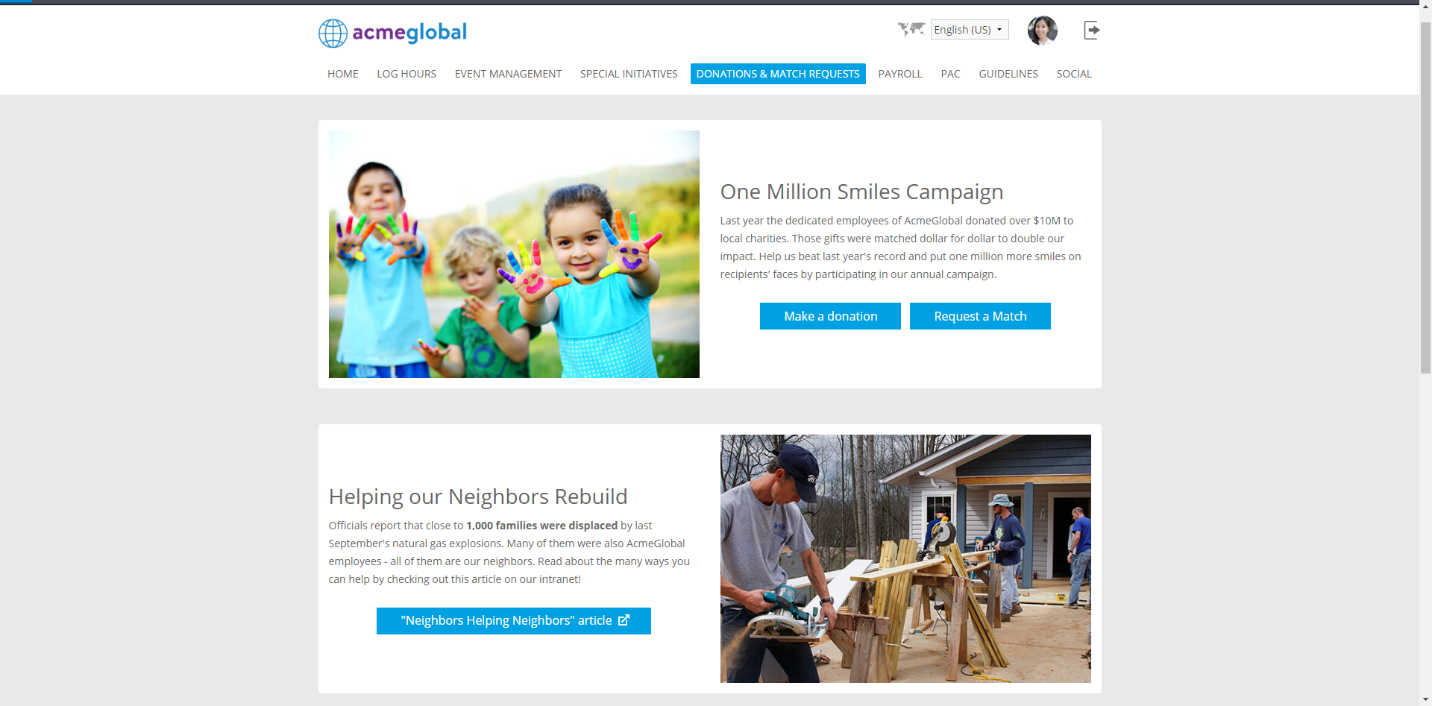
Teaser portlets placed in a one column container will automatically display horizontally rather than vertically. This makes them a nice alternative to our Hero banners because they also feature compelling photography but also don’t consume as much vertical space. This makes them the ideal choice when you want to tell multiple stories on the same page.
If multiple horizontal teasers are included on the same page, they will appear in an alternating [f]pattern that is both familiar and appealing. Varying the layout between the rows also helps each individual teaser stand out more clearly to the user.
Portals featuring our original vertical Teaser will continue to work as normal.
Portal Page Layouts
The portal page allows the CyberGrants Client Manager to configure the Layout of the Donor Portal Pages.
This is a required value when working in E2.
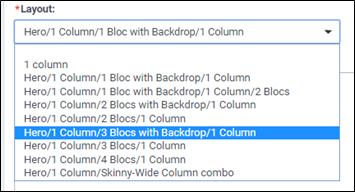
Hero /1 Column /3 Blocs /1 Column
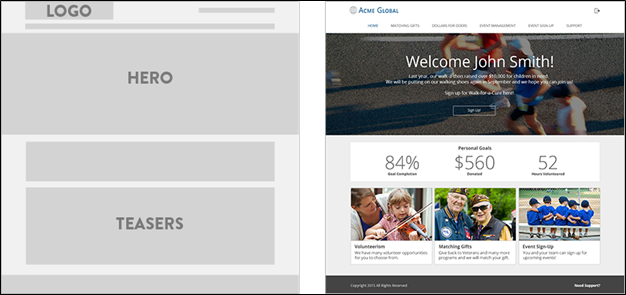
In this example, the teaser elements are located in the 3 Bloc section of the Layout.
If we wanted to add an additional teaser to this format, that teaser would fall below the current 3 teasers and be larger than the sizes of the above three teasers combined OR you can change to the 4 bloc layout for them to order in the same row. As you can see we only allow up to 4 teasers in one row.
Click here to download a sample list of donor portal configuration options.


