The WYSIWYG (What You See Is What You Get) editor allows program administrators to format and manage Introduction text in select donor-facing portlets—Teaser, Giving History, Quick Search, and Hero—without using HTML.
The visual editor provides a simple, code-free way to apply styling, create lists, and add links directly within the editing interface.
Review the instructions below to learn how to access and use the WYSIWYG editor within these supported portlets.
Step 1: Access Portlet Configuration
While logged into the Sandbox environment, access the Donor Portal > View/Edit Portlets configuration page to view and select the portlets you plan to edit.
- Locate any one of the supported portlets: Teaser, Giving History, Quick Search, or Hero.
- Before cloning, back up the content in your portlets, as migrated content may not transfer successfully. Cloning is optional—existing portlets can continue to be used without reconfiguration if you do not wish to enable the WYSIWYG editor.
- To reconfigure a portlet using the WYSIWYG editor, click Clone at the bottom of the Edit Portlet page. The editor will appear in the Introduction text field for any newly created or cloned supported portlet.
- Delete the cloned portlet after use to maintain an organized and uncluttered workspace.
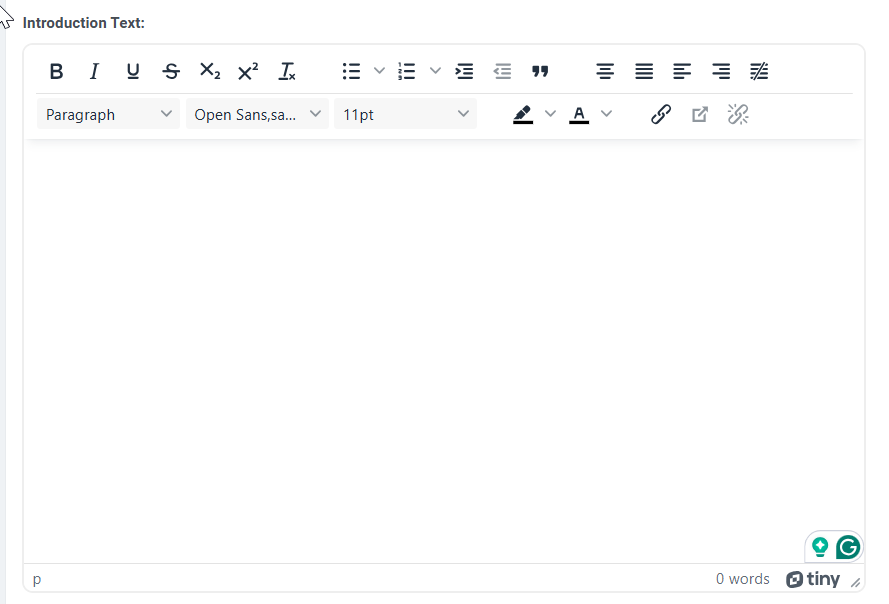
Step 2: Locate the Introduction Text Field
Find the Introduction text section within the portlet configuration where you can enter your content.
- The new field will automatically load the WYSIWYG editor interface in supported portlets.
- If the editor does not appear after you cloned an existing portlet, confirm that you are working within one of the supported portlet types.
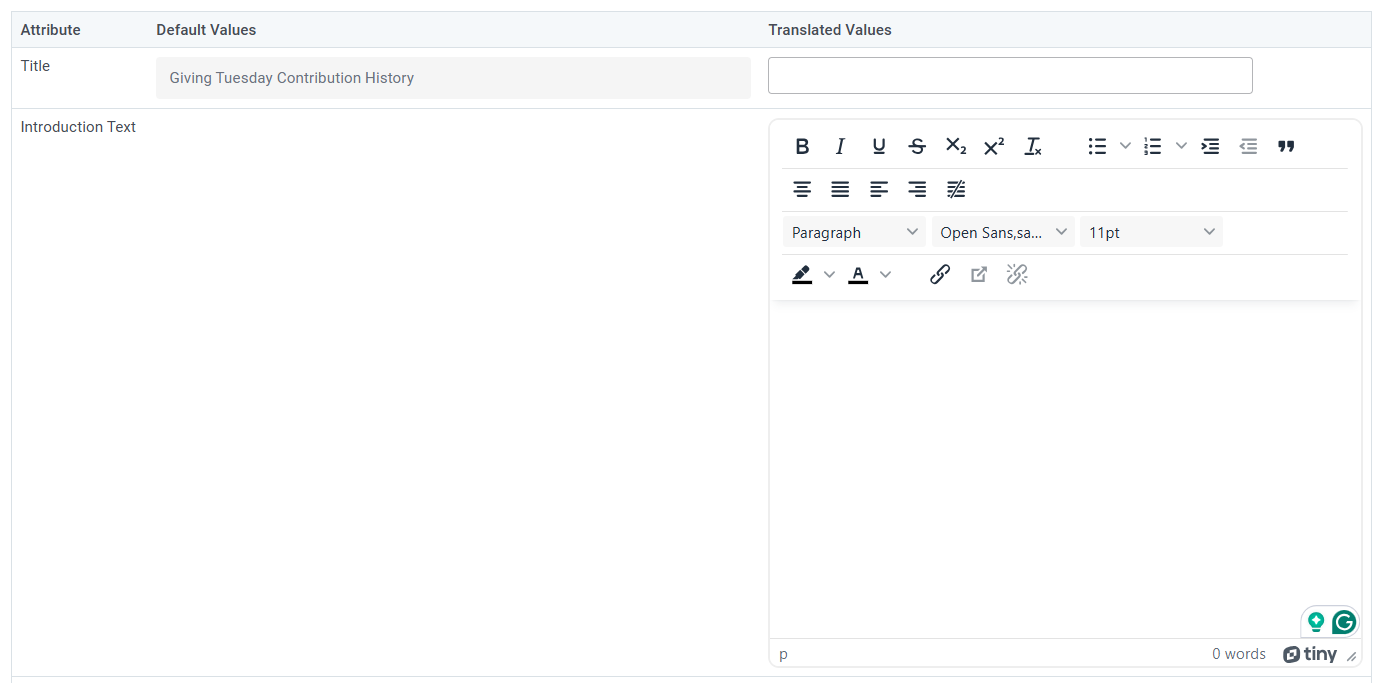
Step 3: Format Translated Content (optional)
If your site includes translated content, use the WYSIWYG editor to format translations for supported languages. The editor supports basic formatting options for each translation field, allowing consistent styling across all language versions.
Step 4: Format and Edit Text
Use the WYSIWYG editor to create and format content in the Introduction text field.
- Type directly in the text area to add new content or click within a paragraph to edit existing text.
- Use toolbar options to apply formatting such as bold, italic, underline, bullet or numbered lists, and text alignment.
- The toolbar also includes options to:
- Insert and remove hyperlinks.
- Adjust text and background colors.
- Apply headings and paragraph formats.
- These functions work similarly to standard text editors and display changes immediately in the preview field.
Step 5: Review and Save Changes
Verify that your content displays correctly, adheres to formatting standards, and functions as intended.
- The editor does not support <script> or <style> tags. Unsupported code will not be saved or displayed.
- When pasting text from another source, use plain text mode or clear formatting to prevent unwanted styles.
- Check all links to confirm they open in the correct window or tab.
- Ensure that colors, headings, and fonts are consistent.
- When finished, click Save and Publish. Review the donor-facing page to confirm that the Introduction text displays as expected.
- Return to the editor if any adjustments are needed.
Additional resources
Not what you're looking for? Navigate to Understanding Employee Engagement Portlet Configuration


