The CyberGrants System captures all relevant information pertaining to non-profit organizations' requests for funding. This information consists of the organization’s original proposal, general request information, contacts associated with the request, payment and other accounts payable information, impact reporting, and approval information.
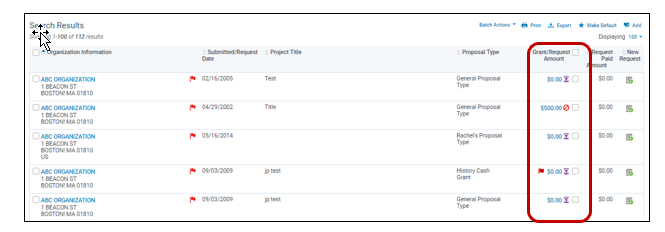
The Search Results section enables a user to locate an organization and its existing requests. (If an organization does not already exist, see the “Main Tab” section of this manual for information on creating an Organization Record.) If the organization is found, a user may look at any existing requests. To access the Request Record, click the dollar amount link in the “Grant/Request Amount” column.
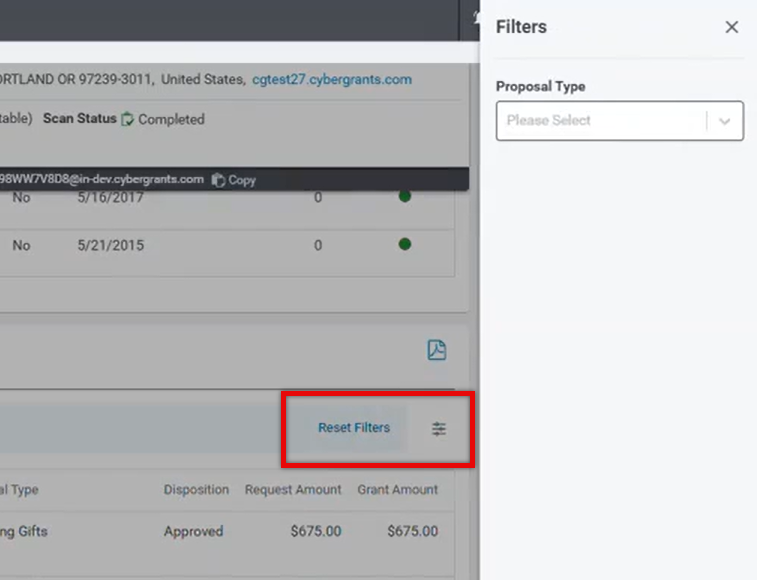
Through the Request History section of an organization record, admins can use the Proposal Type filter to narrow results and locate specific requests.
The Request Record is comprised of two panes/panels:
- Request Summary Panel contains basic information about the request record.
- Information Pane displays detailed information pertaining to the request.
Request Summary Panel
The Request Summary Panel at the top of the screen lists in the header the Request ID number assigned by the CyberGrants system, Grant Amount and Grant Status. The body of the panel lists the Organization Name as a link to the Organization Record, the Project Title, the Proposal Type, Request Owner, and Scan Status. If the Request Record is scanned, the scan status will turn to “Completed” with a “Check” icon if there are no matches , or “Matches Found” with a “Red Flag” warning icon displayed under the Scan Status if matches are found.

The Request Record is comprised of two panes/panels:
- Request Summary Panel contains basic information about the request record.
- Information Pane displays detailed information pertaining to the request.
Clicking on  icon in the request summary header collapses/expands the pane so there is more room to see the Information Panel. The Summary Panel will remain static at the top of your screen as you scroll through the Information Pane to other sections within the request.
Request Utility Navigation Panel
To the left of the Summary and Information Panes is the Request Utility Navigation Panel. Similar to the Organization Utility Navigation Panel, it will remain on the screen at all times and give access to:
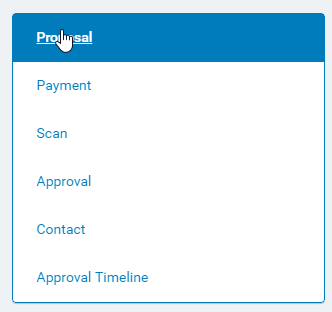
The Information Frame for the Request Record is organized into six sections:
- Proposal
- Payment
- Scan
- Approval
- Contact
- Impact Report (if any are scheduled)
- Approval Timeline
Note
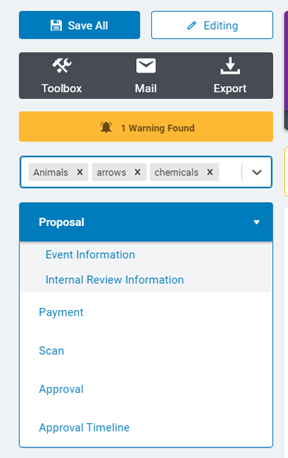
Request Sectioning allows a user to reorder and/or create more request sections in the Request Record. The request section panel will indicate all of the sections of your proposal type. The number of sections will depend on the configuration of your proposal type. You can navigate through the request by either scrolling or clicking the request sections on the panel. If you scroll, the system will recognize which section you are in and highlight the appropriate section. You will see a red indicator in the section panel if there are missing/invalid values.
View-Only and Edit mode for Requests
Users with access to edit requests can toggle between 'Editing' - allowing entry of information and 'Viewing' - read-only to minimize scrolling.
- On the request page, on the top-left corner above page links is the readability toggle.
- This is set to Edit mode by default for users with edit access.
- If the user clicks the new function, they can select "Viewing", which takes them to a read-only view of the request. The user can then click "Viewing" to transition back to “Editing”, which enables the user to enter data.
|  |
Organize and locate requests with Tags
- Above the request navigation on the left of the screen, an "Add Tags" section will allow users to enter existing (in the drop down) or new Tags to the request.
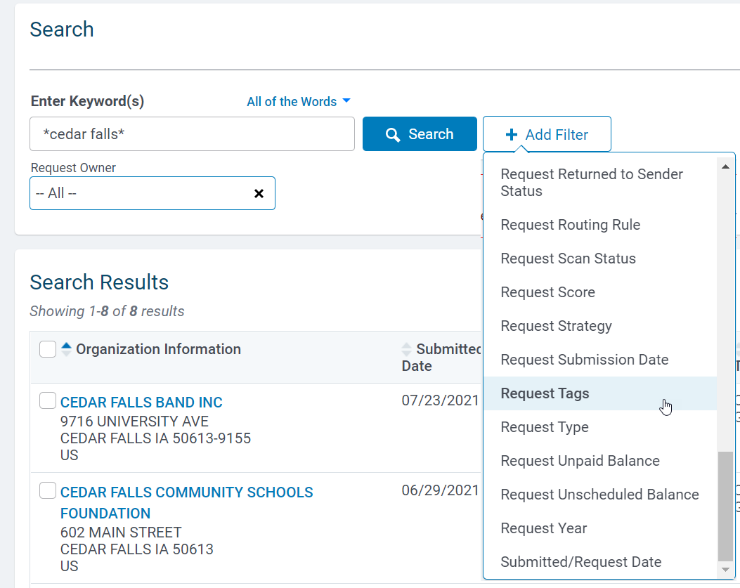
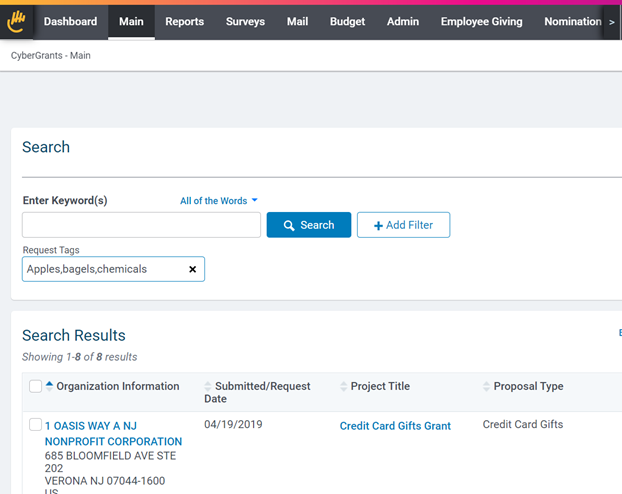
- Users can also add "Request Tags" as a filter in the Main tab, with access to any Tags currently assigned to requests.
 Note
Note
View-only users will be able to see the Tags on a request, but not add/remove them.
Adding Tags to requests
Adding Request Tags filter
Searching requests by Tag
Conventions
Several conventions apply among the different request sections:
- At the right of each section title bar icons display:
The  icon generates a Word RTF version of that section’s information.
The  icon generates a PDF version of that section’s information.

- Required information is identified with an asterisk (*) before the field name.
- Dates must be entered in MM/DD/YYYY format.
- Amount fields accept numbers, commas, periods, and dollar signs.
Request Toolbox
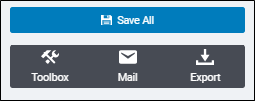
Depending on your user role and permissions, you will have access to different functions of the request toolbox:
- Change Owner allows you to change the CyberGrants request owner.
- Scan Manually performs an immediate WatchList scan on select fields in the request to assist with Patriot Act compliance. (Displays only for GrantMakers who have enabled WatchList Scanning.)
- Change Organization allows you to move a request from one organization record to another.
- Change Proposal Type gives the option to change the current proposal to a different type.
- Schedule Impact Reports allows a user to add an impact report to this request. This link displays only for GrantMakers who have created Impact Report Types.
- Clone Request copies request information, but not Payment, Approval or Impact Report information, into a new request for the organization. The Request Date of the new request defaults to the current date.
NOTE: Only the request owner or a user with editor linking has access to the “Clone Request” link.
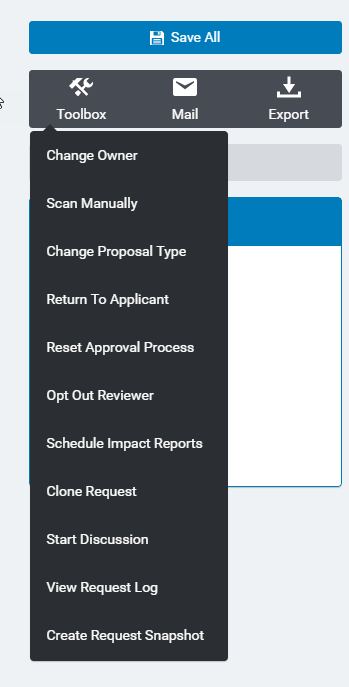
- Return To Applicant gives the option to return a request to an external applicant for revision. This link displays only if a GrantSeeker is associated with the request.
- The “Return to Applicant” button allows a GrantMaker to return the proposal to the GrantSeeker Editor via e-mail with comments, suggestions, or to indicate missing information that is necessary for the GrantSeeker to complete.
- This function is available for both active and completed approval steps. Users with the required permissions can initiate a return even after an approval step has been completed, ensuring smoother collaboration and allowing issues to be addressed without interrupting the workflow. This expanded access maintains all existing permission controls and configuration settings.
- “Cancel Return to Applicant” is also available to Administrators in the Request Toolbox when an application has been returned. When returned to the applicant, all fields appear in read-only mode. Click the “Cancel Return to Applicant” button to reload the request back to edit mode for the request owner. The nonprofit applicant is no longer able to revise the request.
- View Request Log allows a user to view the system activity (Record Created, Record Deleted, Record Updated) and correspondence (Emails and Letters) associated with this request. A user can search by selecting values for one or more filters (“TimeFrame”, “Action Type”, and “Performed By”). The “TimeFrame” criterion is required and limited to one time period. The search result screen displays the following columns: “Select”, “Type”, “Transaction Type”, “User”, and “Description”. The “Description” column displays a link if the “Type” is Email or Letter; the link allows a user to display the content.
- Create Request Snapshot: Click the Confirm button below to create a snapshot of this request and its associated fields.
Mail
Click on the Mail  icon to display links to the following functionalities:
- Create New Mail allows a user to create a letter or e-mail message to send to the organization or request contacts. (Please see the Mail Tab in this manual for more information on creating letters and e-mail.)
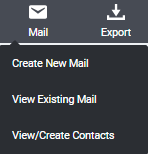
- View Existing Mail retrieves a current list of all mail activity associated with the request.
- View/Create Contacts opens a new window to edit the contact information, or create new contacts.
Export
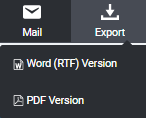
Click on the Export  icon to display links to the following functionalities:
- Word (RTF) Version prints the request information in Word rich text format
- PDF Version displays the request information in PDF format.
Request Record Sections
Proposal
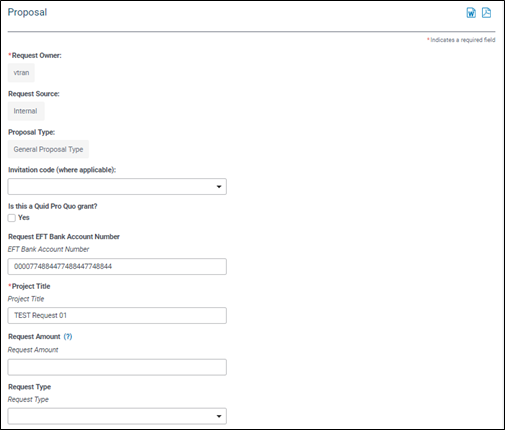
The Proposal Information section captures the content of the request for funding. A nonprofit can enter the information directly through the public web site or a user from the GrantMaking organization can enter it internally. Required fields (typically Project Title, Request Date, and Requested Amount) must be completed and saved before any payment and approval information can be entered.
Proposal Fields to Note
- Request Owner indicates the owner of the proposal. To change the request owner, click on “Change Owner” under the Request Toolbox, select the appropriate name from the dropdown list in the Request Owner field, click the “Change Owner” button then click the “Save All” button.
- Request Source indicates whether the request was submitted from the web (External) or entered by a GrantMaker (Internal). If the request was submitted from the web, the date on which it was submitted appears next to the “Request Source”.
- Proposal Type indicates the proposal type and determines the fields associated with the request. To change the proposal type, click on “Change Proposal Type” under the Request Toolbox, select the appropriate proposal type from the dropdown list in the “Proposal Type” field and click the “Change Proposal Type” button.
- Invitation Code allows you to restrict the request to a predefined group by providing the code.
Audited Fields
Administrators can easily identify which fields were changed for clarification or troubleshooting by accessing the audit log. This, also, fosters a more enhanced visibility into improving processes. The audit log captures data in the following standard and custom fields across the product:
- Number fields
- Text fields
- Date fields
- Paragraph and Long Paragraph fields
- Single-select fields
The type of change made in the system, such as the order of fields changed, the field name, workflow, etc., will not be included in the audit log.


