Insights Analysts can enhance their data analysis by adding filters to custom measure fields within an Insights Explore when creating or editing a custom measure. This feature allows you to refine your custom measures to gain a deeper understanding of your program's data.
Proceed as follows to add a filter to a custom measure in an Insights Explore.
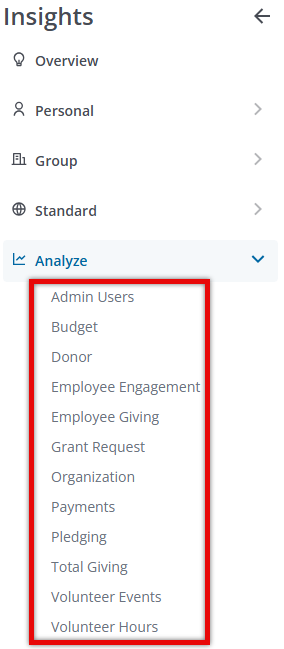
Step 1: Access Insights and Choose an Explore
Log into CyberGrants and navigate to the Insights platform.

Then, select the desired Explore to begin your analysis.
Step 2: Access a Custom Measure
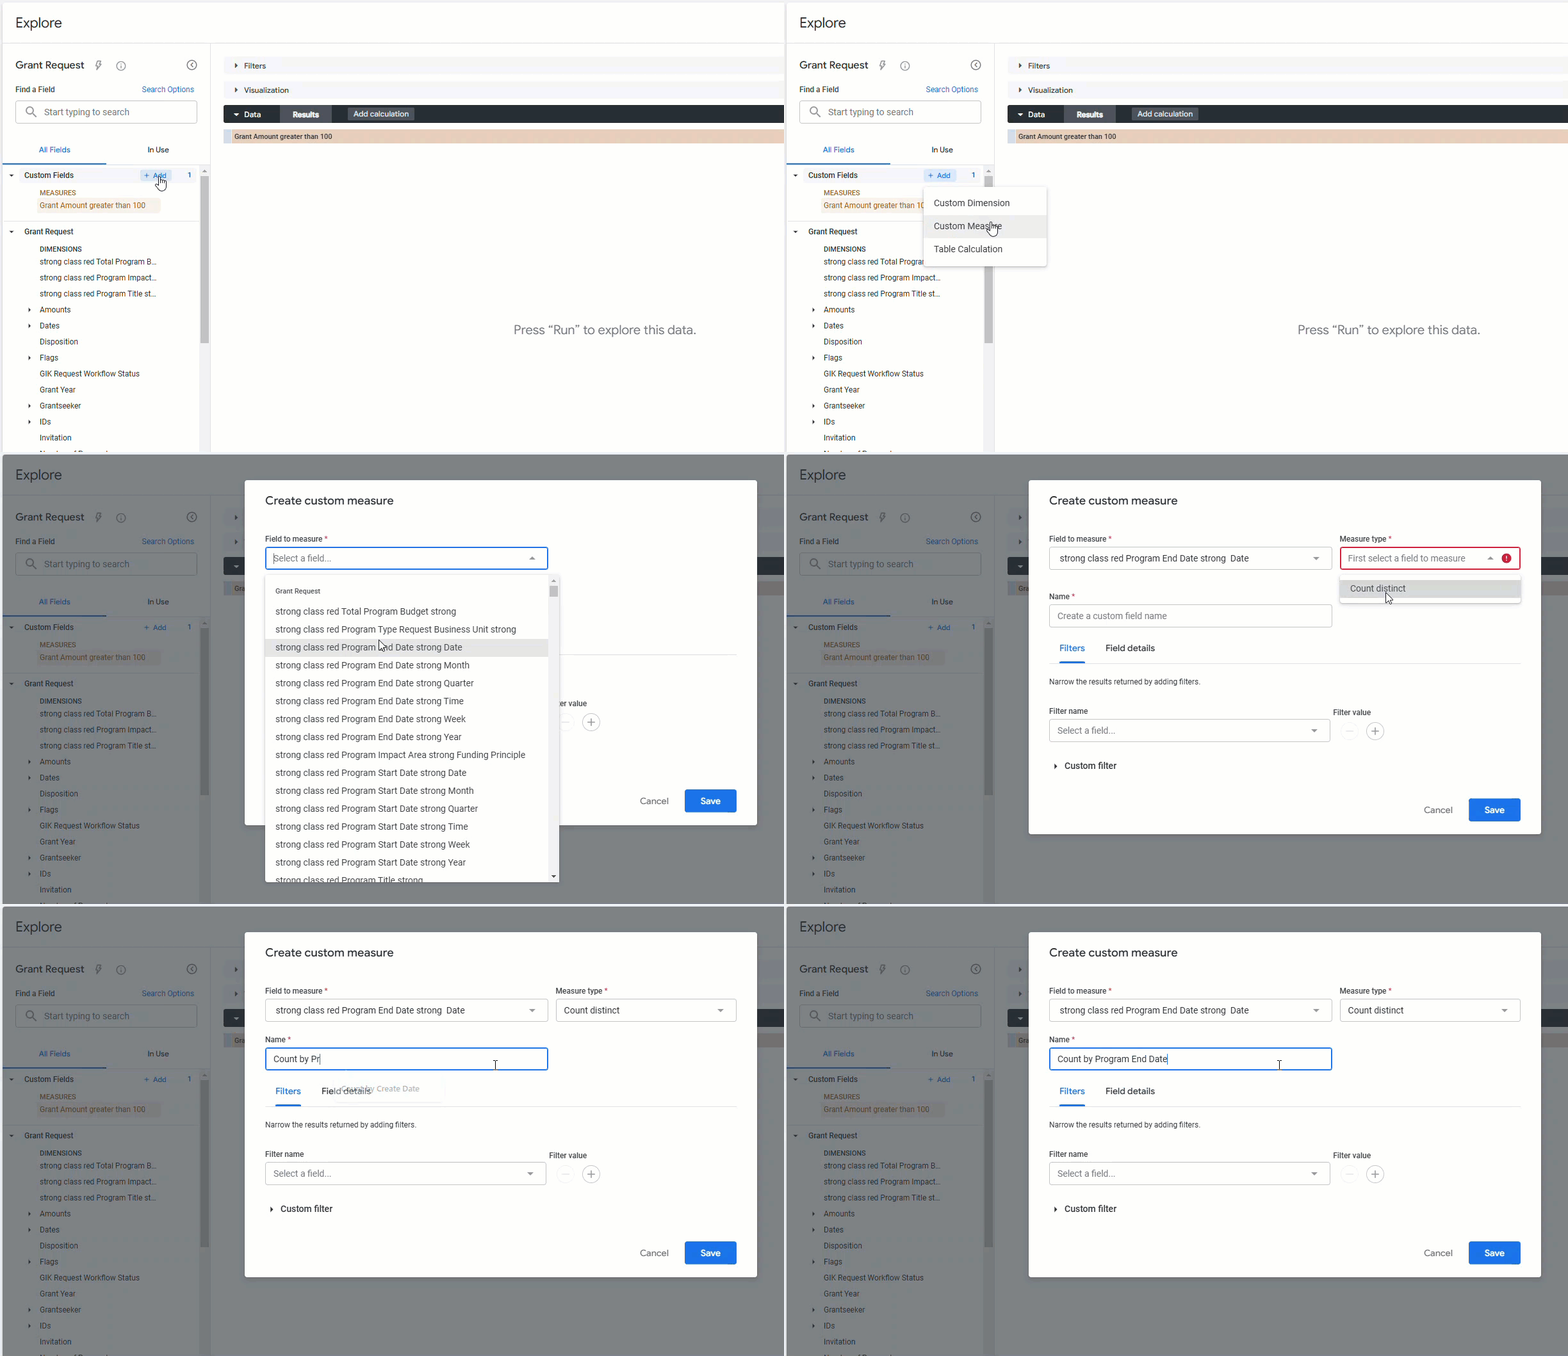
Begin by expanding the Custom Fields section from the left field picker. Then, select the link to either "Add" a new custom measure or "Edit" an existing custom measure.
- Add a custom measure - Create a new custom measure by adding a "Field to measure by", the "Measure Type," and a "custom field name".
- Edit an existing custom measure - Edit an existing custom measure using the vertical ellipses menu.
-
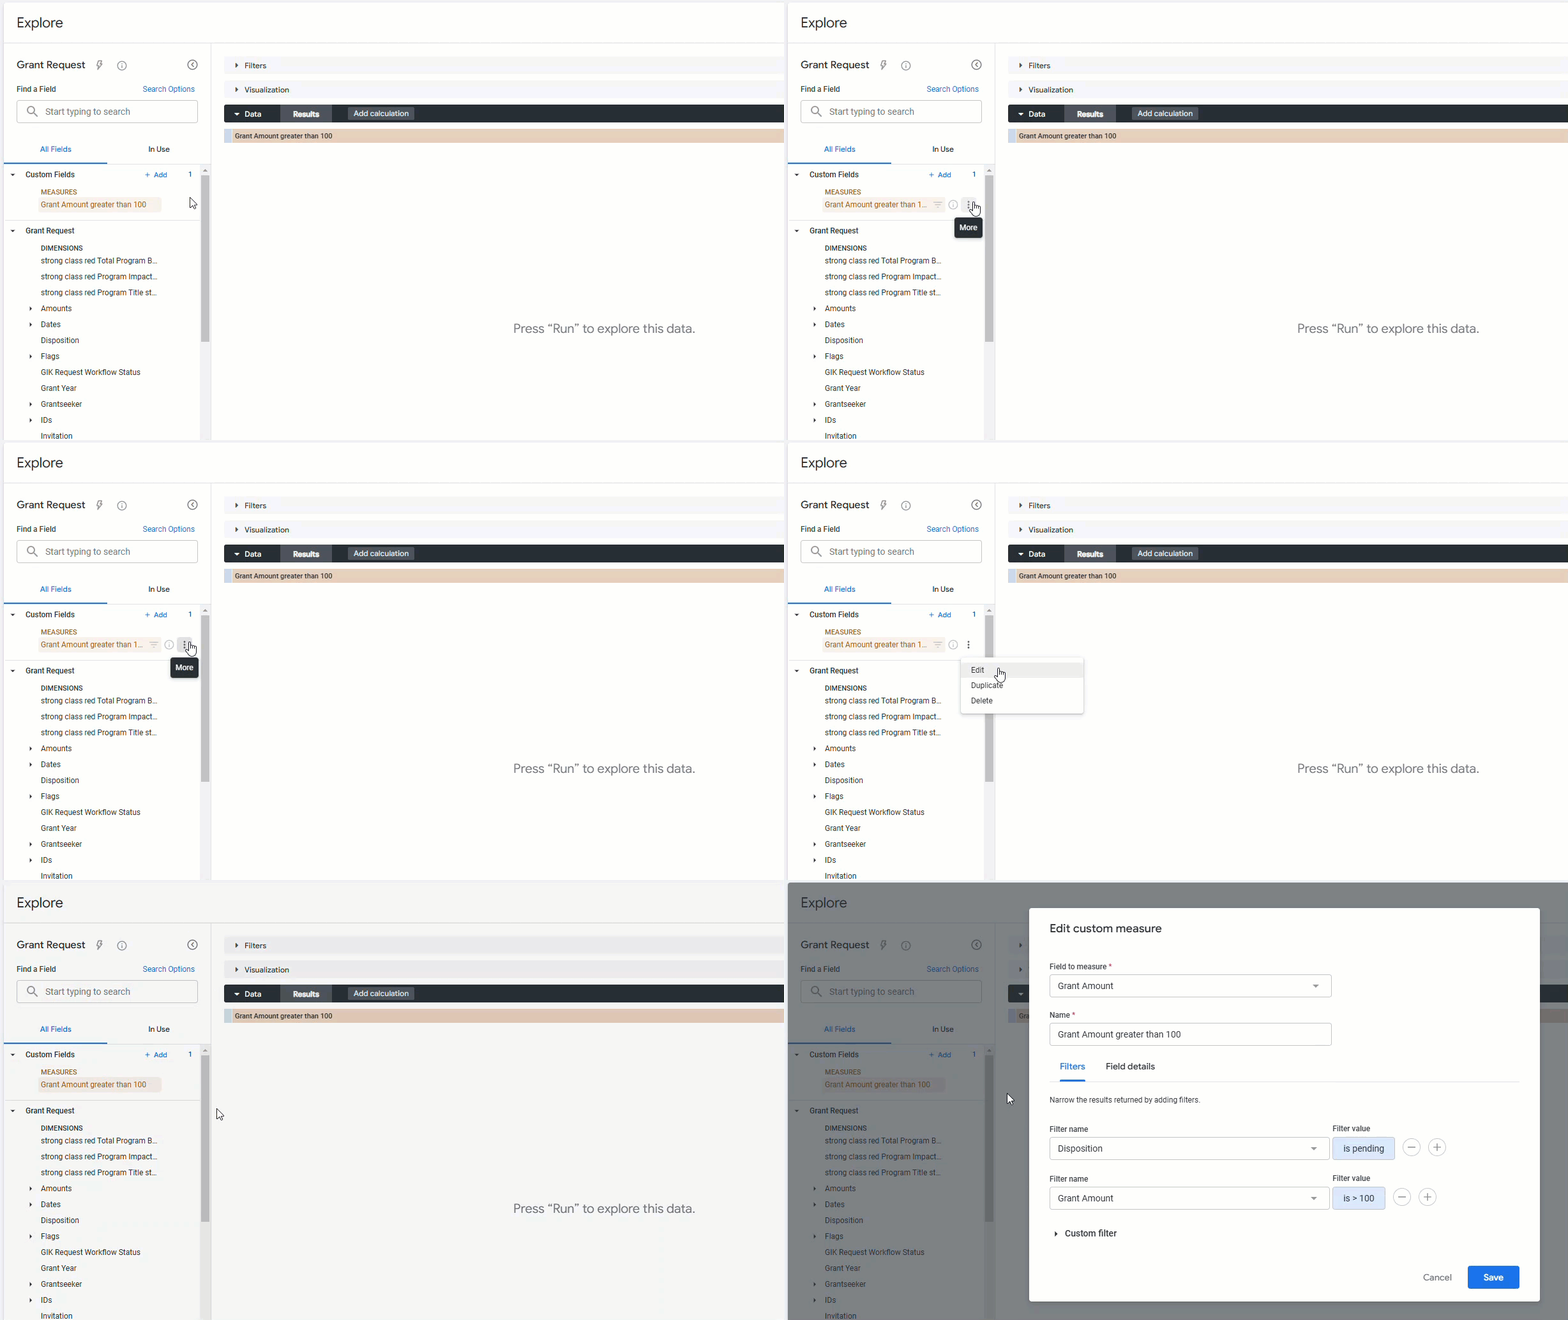
Whether you are applying a filter to a standard or custom measure, the following steps remain the same.
Step 3: Choose a Filter
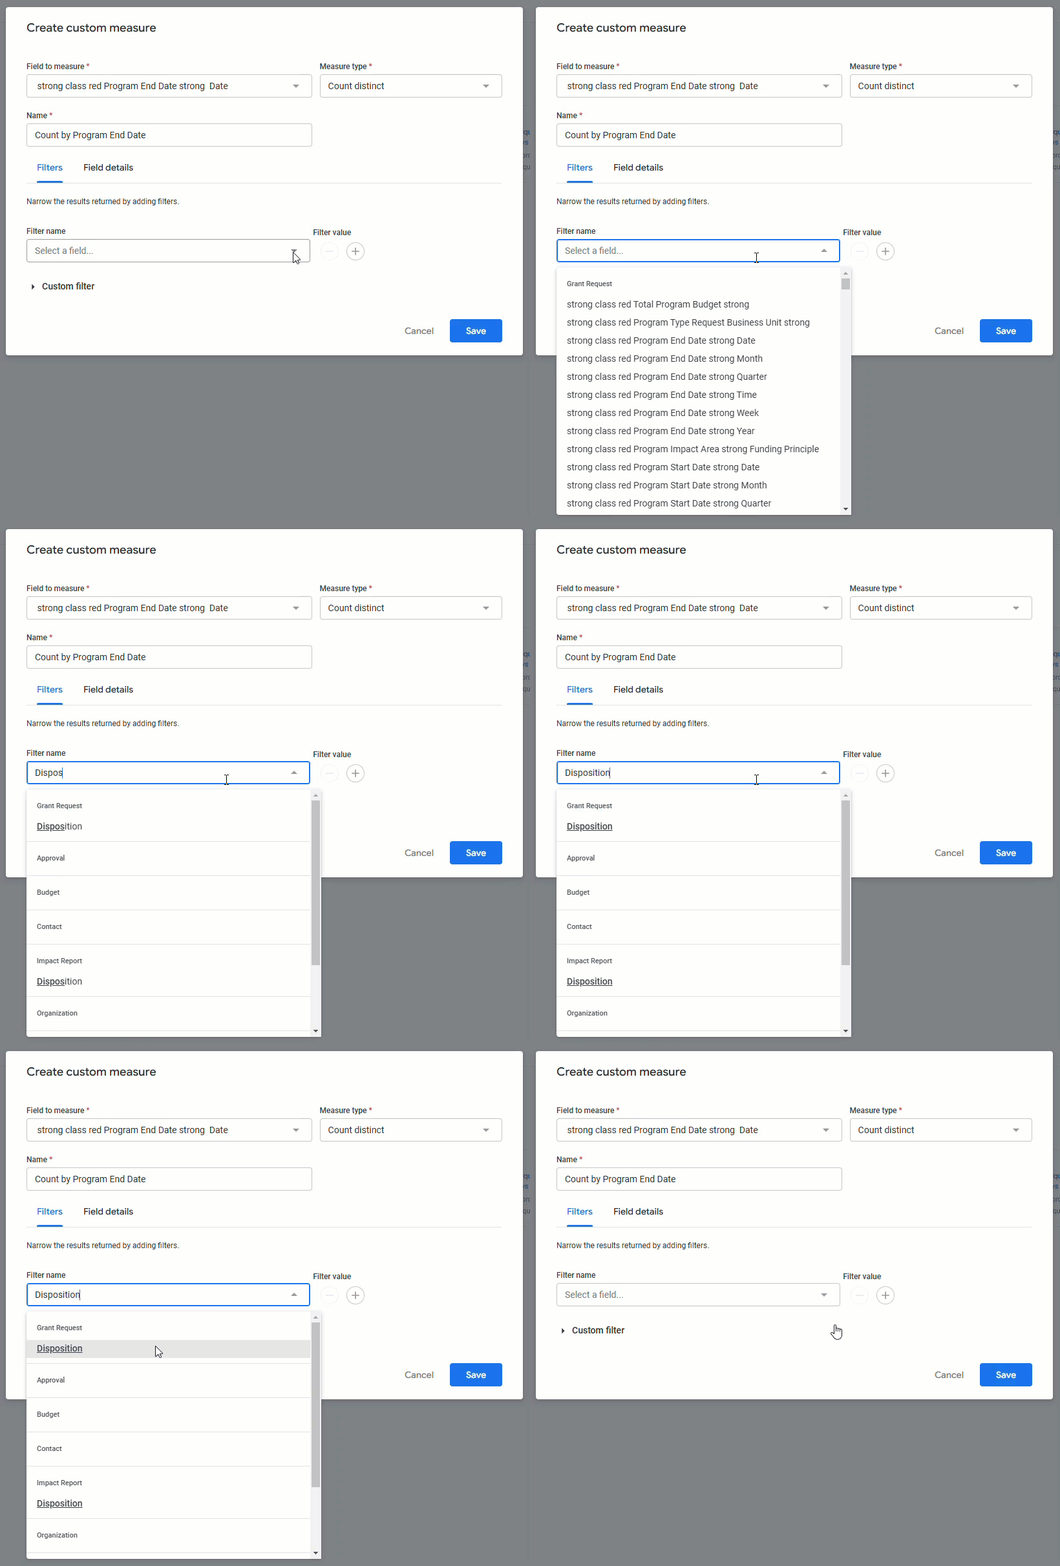
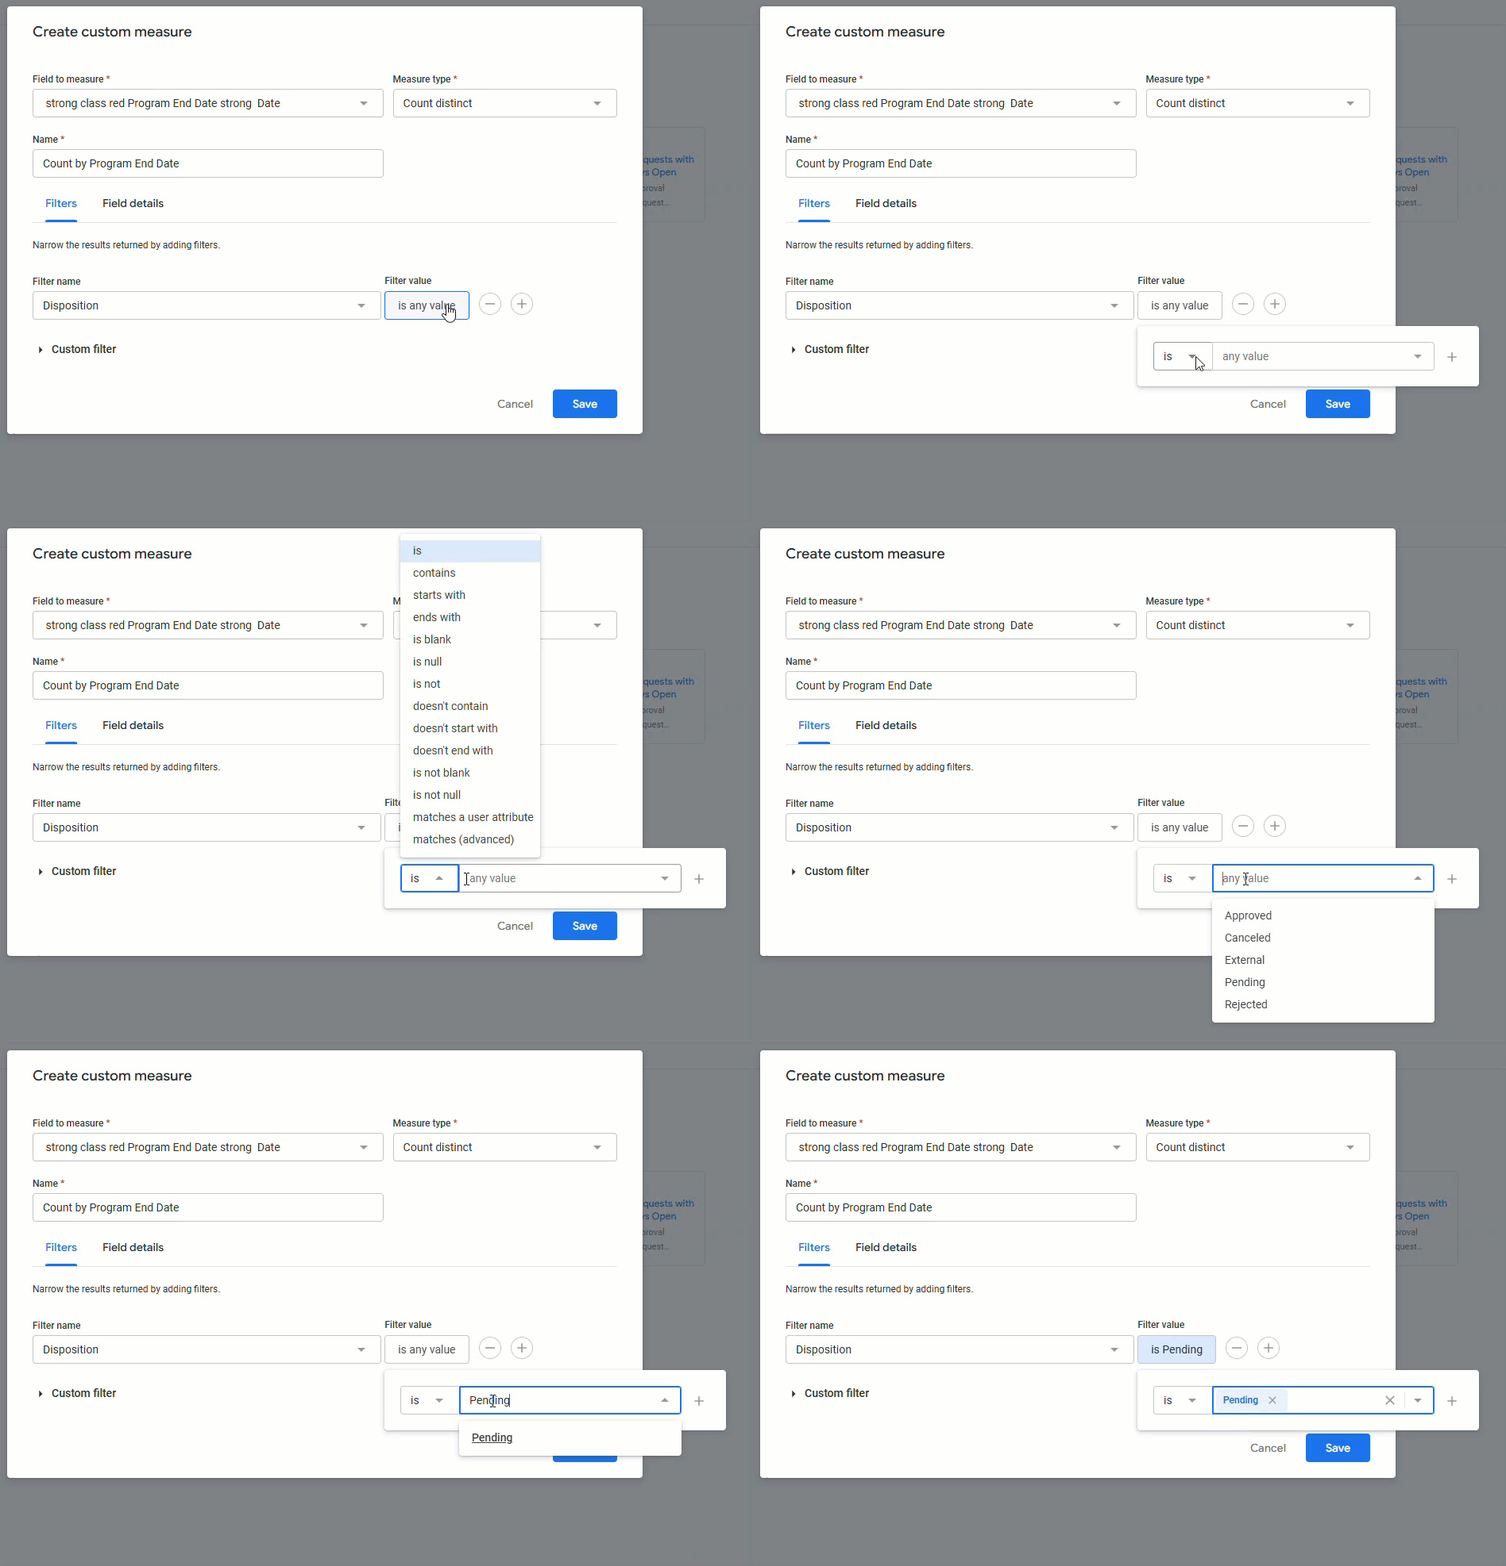
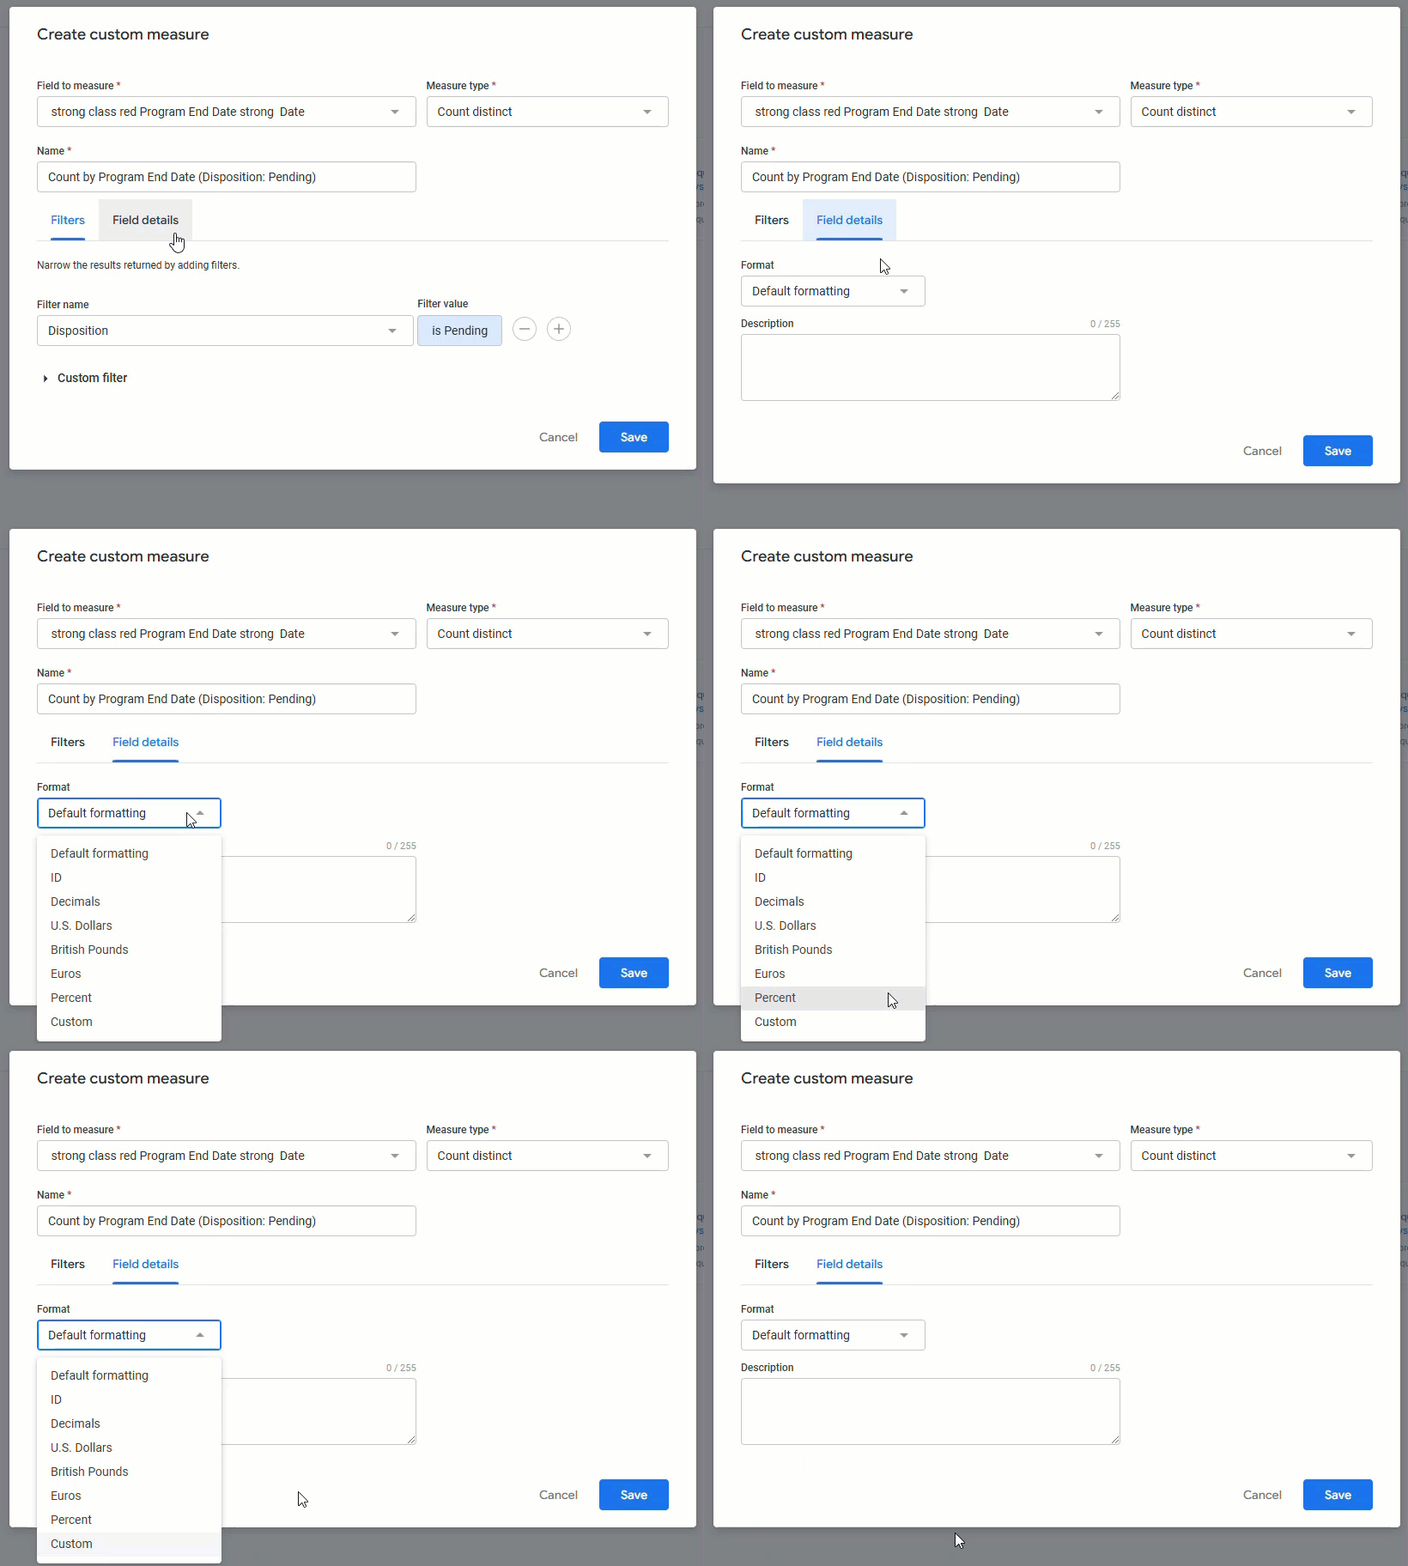
In the "Filter name" section of the "Edit custom measure" modal, select the field you want to filter by from the dropdown. In this example, we'll use the "Grant Request: Disposition" field.
Step 4: Set the Filter Condition
Click the "Filter value" option to select from a list of available filter conditions and choose the appropriate condition for your use case. In this example, we'll select the "is" condition and include "Pending" dispositions.
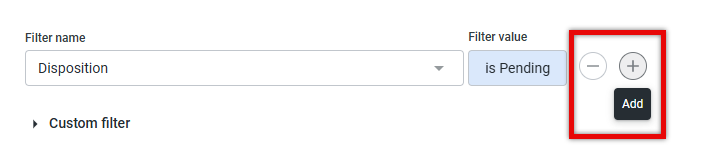
You can add multiple filter conditions by clicking the plus (+) sign. To remove filters, click the minus sign (-).
Insights will automatically apply SQL conditions like AND or OR logic based on the field types, conditions, and values specified.
Step 5: Create a Custom Filter Expression (Optional)
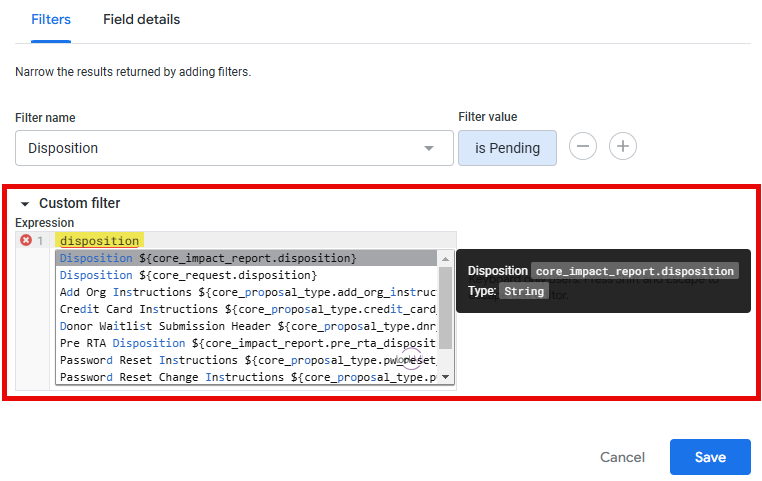
Insights Analysts, also, have the option to add a "Custom Filter" to their custom measure. Click the downward-facing arrow next to "Custom filter" to create a custom filter expression using Insights functions and operators.
- The Insights expression editor will provide field name suggestions and syntax help for the available functions.
- Fields that are both currently used in an Explore and eligible for the field type are marked with a black circle.
Click here to learn more about expressions and the available functions and operators.
Step 6: Rename the Custom Measure
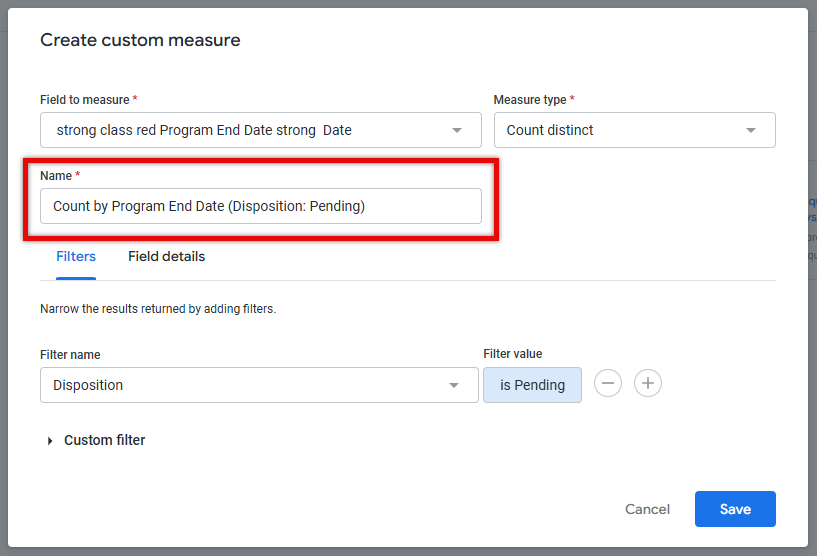
We highly recommend updating the custom measure's name to reflect the filter condition, for example, "Count by Program End Date (Disposition: Pending)." The field name will appear in both the field picker and the data table.
Step 7: Update Field Details
On the "Field details" tab, you can set the format and add an optional description (up to 255 characters) to provide additional context about the custom measure, including its intended use.
Step 8: Save and View the Custom Measure
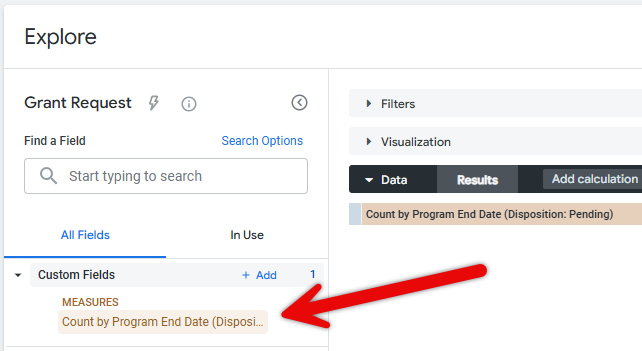
Click "Save" to apply the custom filter to the measure. The new custom measure will now appear in the "Custom Fields" section of the left field picker.
- You can now click the custom field's name to add or remove the measure from your data table, add it as a filter, or include it in visualizations as needed. Note that custom measures cannot be used to create dashboard filters.
What else do you need help with?
Not what you're looking for? Navigate to Add a Filter to a Measure in an Insights Explore


