Program administrators with permission to access Manage Hosted Content can leverage the platform's tools to upload documents that can later be linked within a portlet on their Donor or NPO program website.
Proceed as follows to initiate a file upload, store the file in the appropriate folder, and copy the link to your clipboard for future reference when adding the file to a portlet.
Step 1: Access the Admin Tab
Navigate to the Admin Tab in the Production environment.

Step 2: View "Manage Hosted Content"
Under General Settings, select the "Manage Hosted Content" option.
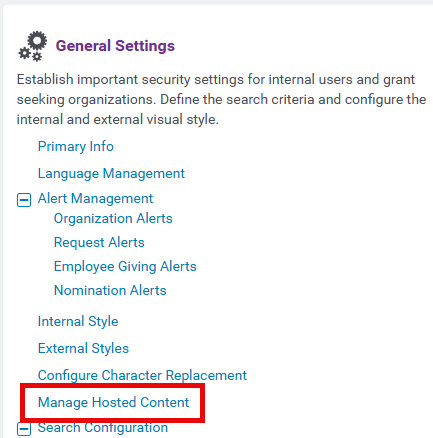
NOTE: If you do not see the "Manage Hosted Content" upload link, contact a team member who has access or reach out to CyberGrants for assistance with gaining access.

Step 3: Navigate to the Appropriate Folder
You are now within the folder of files and documents hosted for your account.
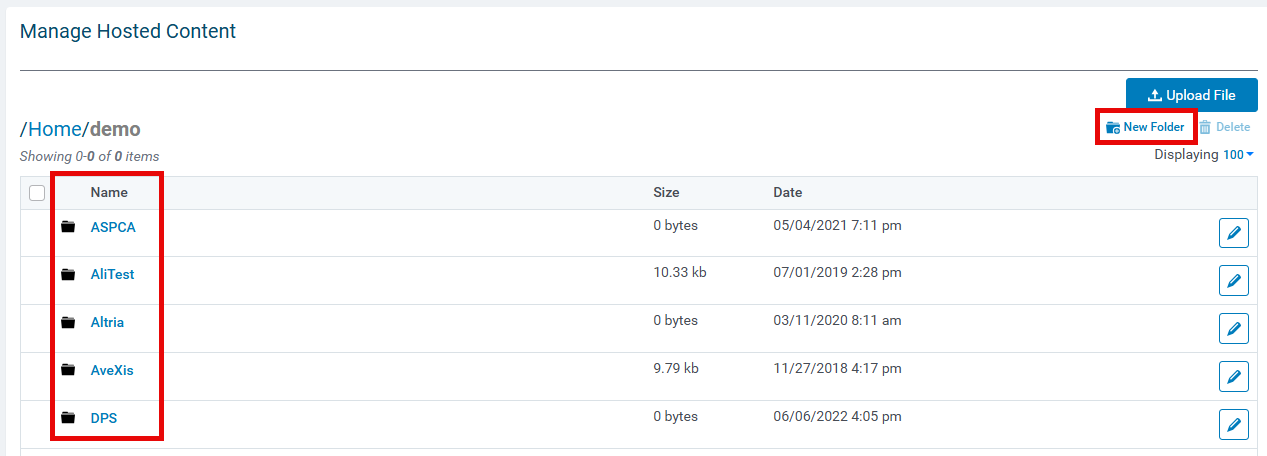
Navigate to the folder location where you wish to upload your file. (I.e. Location: "Home/demo/docs".) Users can, also, create a new folder to upload their files. The following naming requirements apply when creating a new folder:
- Naming Requirements: Letters (Aa-Zz), numbers (0-9), underscores, and dashes only. No spaces.
NOTE: Avoid deleting items unless you are confident about their purpose.
Step 4: Initiate the File Upload
Click the "Upload File" button in the top right corner. This will cause the upload modal window to appear.
Step 5: Prepare the File for Upload
Follow the instructions to rename the file, ensuring there are no spaces or special characters besides underscores and dashes.
- Naming Requirements: Letters (Aa-Zz), numbers (0-9), periods, underscores, and dashes ONLY.
- Files are case-sensitive.
- 20MB maximum per file.
Drag and drop your file or click the green box to locate the file for upload. Click the "Upload" button to initiate the file transfer.
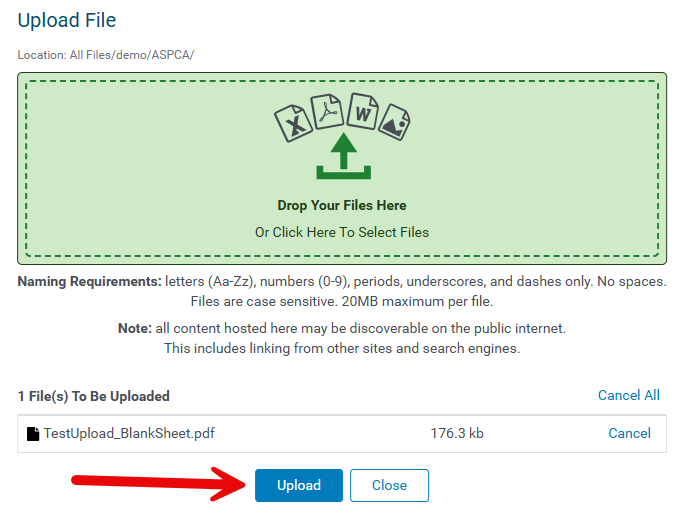
Once a file has been uploaded, the filename will appear as a clickable link. Clicking the filename will open the file in a new browser tab for preview (if supported by your browser). If the file type is not supported for preview, it will download automatically. The download option remains available.
Step 6: Obtain the File Link
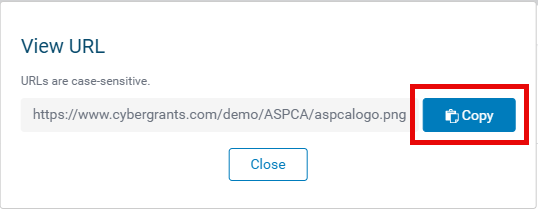
Once the file is uploaded, click the link button on the right.

In the modal window, click the "Copy" button to copy the link to your clipboard. This link can be used for future reference when adding the file to a portlet.
What else do you need help with?
Not what you're looking for? Navigate to Understanding How to Update a Document Link on a Portlet


