In production, click on the Nominations Tab:

To configure columns see: How to Add Columns to a Tab
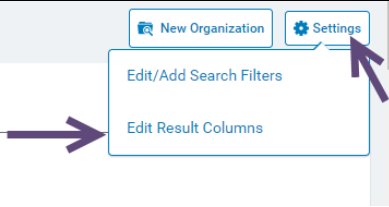
To configure filters see: How to Set Filters on Tabs
Approving or Rejecting a Nomination
- Go to the Nomination tab.
- Enter the Proposal Type and Nomination Disposition and then press Search.
- Proposal Type: The options may differ based on your program names. E.g. Credit Card Match, Donate now via credit card, Request a match for a previous donation, Dollars for Doers, or Special Initiatives.
- Nomination Disposition:
- External: Means the nomination was entered by an employee from the employee site.
- Pending: Means the organization completed their portion of the nomination form and the nomination is now ready for Admin review to be approved or rejected.
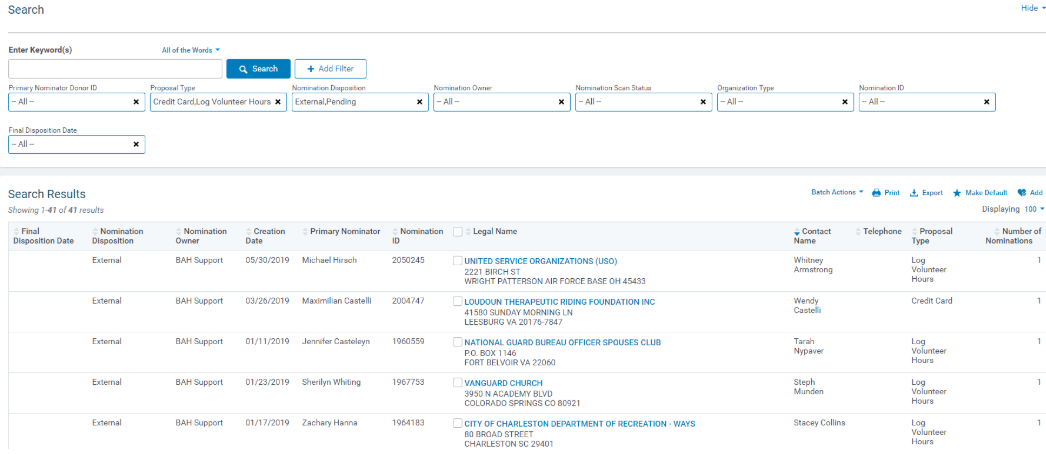
- Click on the Legal Name link to open the nomination record and review the data. When ready scroll down to the Approval Information section.
- Click the Submit for Approval button to start the approval process. Scroll back down to the Approval Information section.
- Enter in any approval or rejection Comments.
NOTE: These comments will be will be added to the email that is sent to the employee to inform them the reason for the rejection.
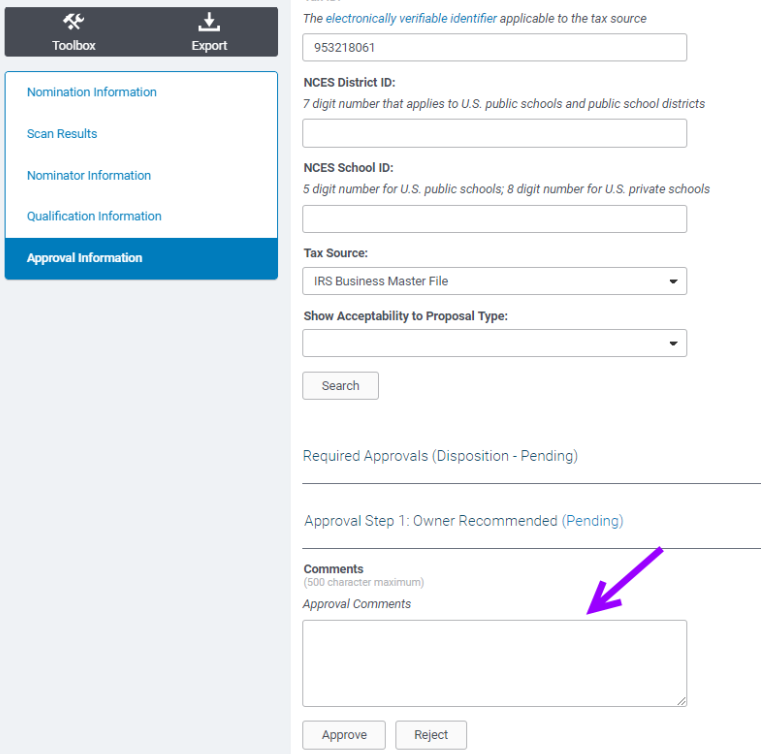
- Choose the Approve or Reject
Changing an Approve Status to Rejected
If you meant to approve the nomination instead of rejecting it, you can then press the Submit for Approval button at the bottom of the page to reset the approval process.
- Note that when rejected the email is triggered to the employee, so if you then approve it, they will receive both.
- You will see the thumbs down icon (Rejected) switches back to the hour glass icon (Pending), and the Comments box and the Approve and Reject buttons reappear. You can now click the Approval
- The hour glass icon (Pending) switches to a thumbs up icon (Approved).
Rejecting a Nomination cannot be reverted in the same way. If you meant to reject the nomination instead of approving it, you will need to complete a separate process off of the now created organization record.
- Note that when approved the email is triggered to the employee. An secondary email is not sent to the employee if you reject the organization as it is not part of the same process. The employee would have only been notified of the approval.
- You will see the thumbs up icon (Approved) on the Nomination record along with a Organization #. This number is a link directly to the new organization record created from approving the nomination. Click the link to open the Org record.
- On the Organization profile, scroll down to the Review Information There you will see a dropdown for Proposal Type
- Find and click on the proposal/program name for which the nomination was submitted for.
- Click Load button
- Status for Current Proposal Type will show as Approved
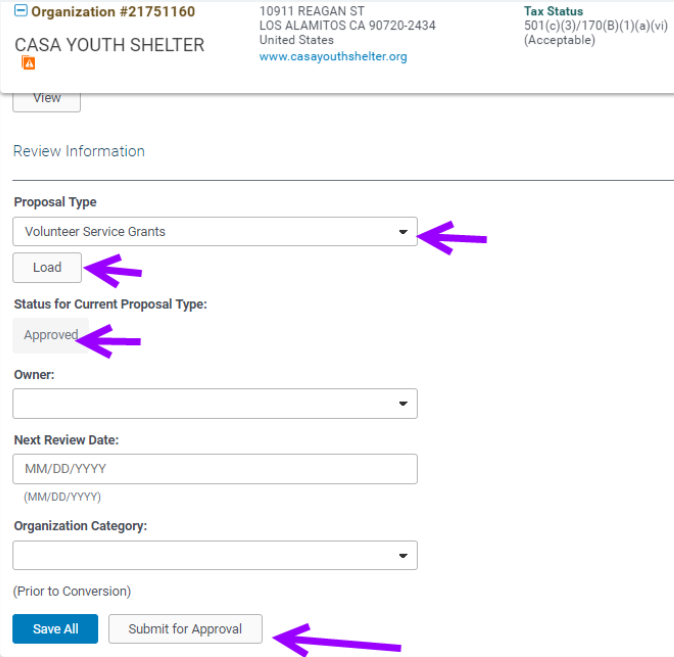
- Click the Submit for Approval button to reset the Approved status to
- Click Reject
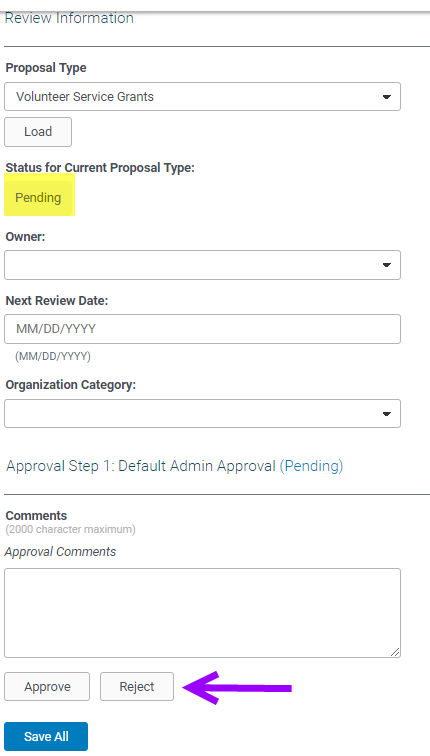
- See that the proposal/program you select now shows a status of Rejected with a thumbs down.
NOTE: You can reject/approve organizations on a program level this way.
“Unmap” Option for Nominations
There are times when a donor creates a nomination for a previously existing organization that the administrator reviewing the information decides that an entirely new organization record instead. In these instances, they can use the new "Unmap Nomination" option in the Nomination toolbox. When this button is clicked, the current nomination will become disconnected from the original organization record. If the administrator approves the unmapped nomination, then a new organization record will be created.
Manual Verification Tax Status - Nominations
Most programs routinely require the manual verification of exempt information when organizations are too big, too small, or too new to appear in official databases such as the IRS Business Master File. Currently the authorized users can set the specific tax status for manually verified nominations after a nomination has processed and a new organization record has been created. Now the capability is available on the nomination record, removing the need for a two step process of first approving the nomination, then setting the manual tax status on the organization.
The process is similar to the organization interface. If a user’s role has the permission to “Ability to manually verify organizations", then they can perform a manual verification. Once you determine that an organization meets your company’s manual verification requirements, check the “Manually Verify Tax Status” checkbox in the Qualification Information section of the nomination record. You can then optionally choose the correct option from the “Manual Tax Status” dropdown box. This will tell CyberGrants to treat this organization as that specific tax status when the actual organization record is created.
Setting a Manual Tax Status within the nomination also causes CyberGrants to automatically set a Manual Tax Verification Expiration Date that is two years from the current date. If a different time period is desired, it can then be changed from the newly created organization record if needed. The original nomination will retain the original values, regardless of the status of the organization in the future.


