The Geographic Areas Served standard field enables grantseekers to enter one or more geographic locations benefiting from a funded project. Administrators can configure the field, add it to grant proposal types and Impact Report types, as well as report on submitted entries.
Step 1: Create a Geographic Areas Served Field
- In Sandbox, open the Admin tab.
- Go to Application Configuration > Data Fields > Request.
- Select Create New Field.
- Enter a Field Name and Description.
- Set the Field Type to Geographic Areas Served Listing.
- Mark the field as Active, save, and publish.
Step 2: Configure Global Settings for the Field
A new Geographic Areas Served configuration link appears in Application Configuration after creating the field.
- Adjust global field labels
- Set fields as required internally, required externally, or internal-only
- Reorder address and amount columns
- Address
- Address Line 2
- City
- State
- Province
- Zip Code
- Country
- Amount
- Amount (Local Currency)
- Amount Currency Code
Step 3: Add the Field to a Proposal Type
- Open the relevant Proposal Type.
- Select the request section where the field should appear.
- Add the Geographic Areas Served field. Note, you can only include one geographic area served field per proposal type.
- Save the section.
A Geographic Areas Served Configuration tab appears once the field is included in the proposal type.
- Select which columns appear for this proposal type
- Add any optional instructional text
- Set the order of the columns within the component
Step 4: Add the Field to an Impact Report Type
The Geographic Areas Served field can also be configured independently on Impact Report types.
Follow a similar process as above:
- Go to the Admin tab to access Impact Report Types and open the relevant type.
- Select the report section where the field should appear.
- Add the Geographic Areas Served field.
- Save the section.
A Geographic Areas Served Configuration section appears once the field is included in the Impact Report type.
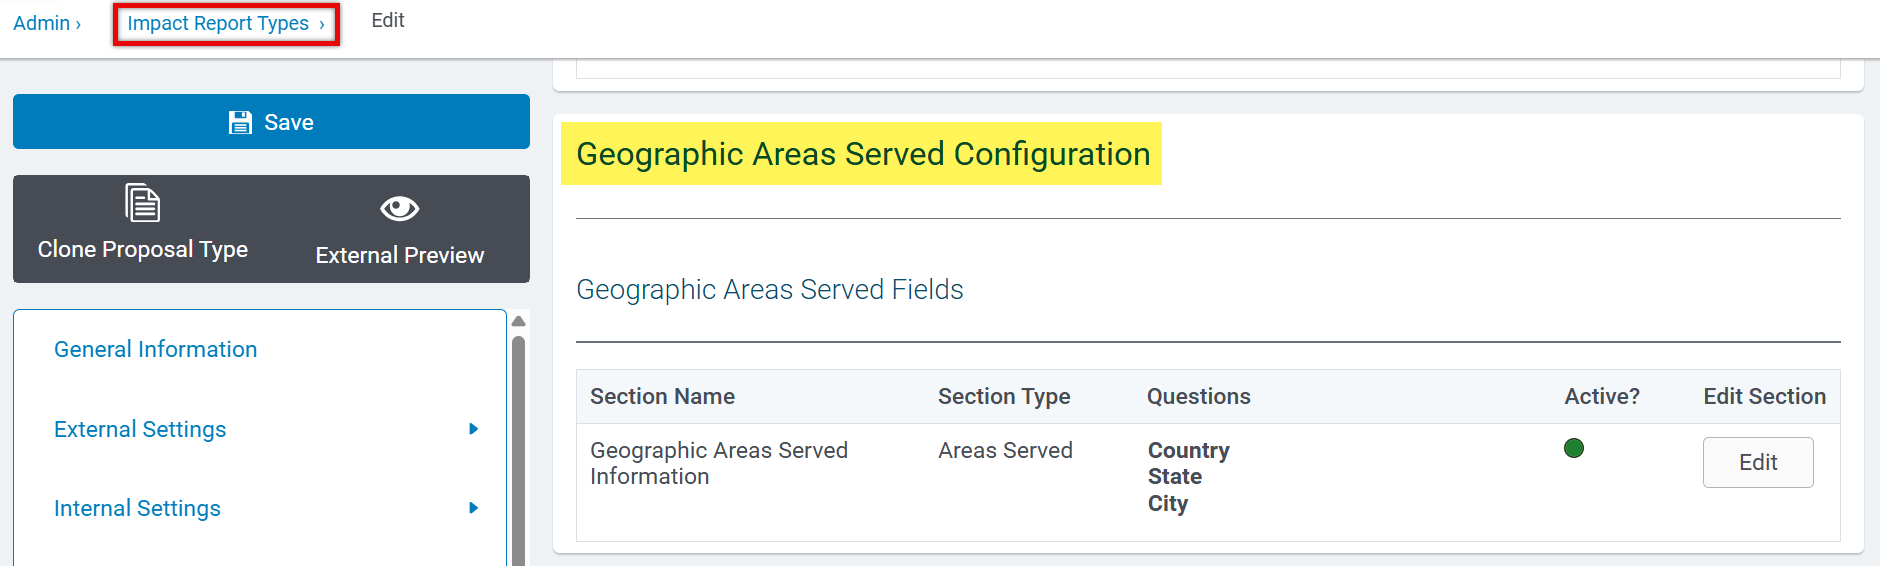
Configuration works the same way as for proposal types:
- Select which columns appear for this Impact Report type
- Add any optional instructional text
- Set the order of the columns within the component
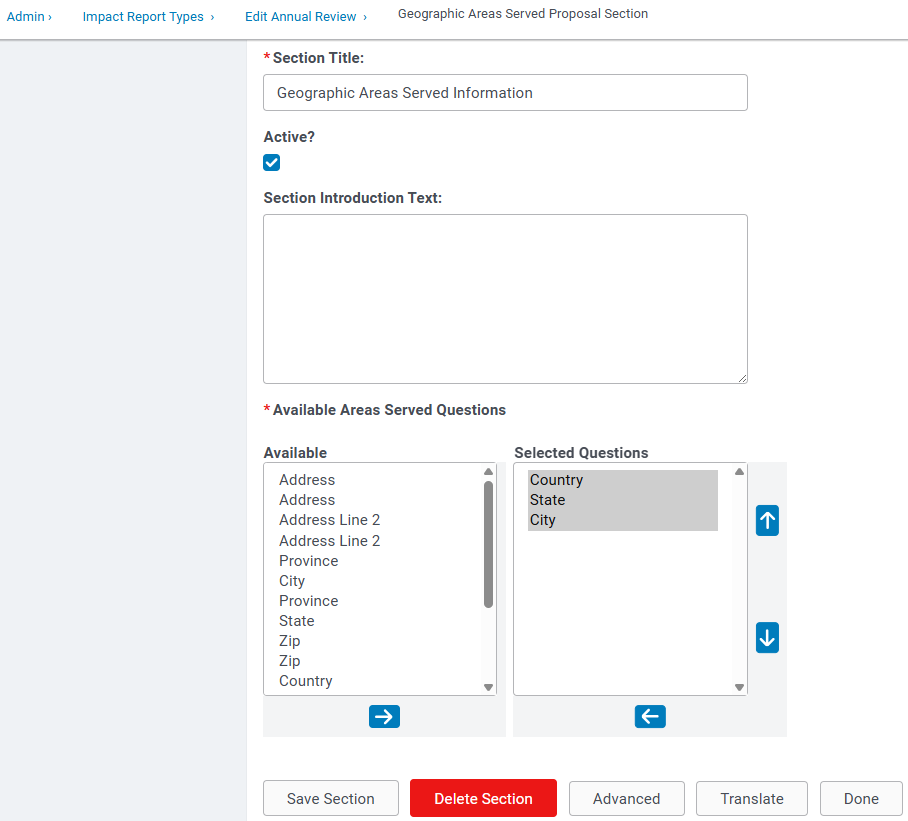
Note: Proposal type and Impact Report type configurations are independent. You can use different columns and requirements on each.
Step 5: Grantseeker or Grantee enters Geographic Areas
- Add one or more entries
- Enter address data based on the required fields
- Assign an amount to each location
- Use Save and Done to add each entry
Amounts do not need to total the Request Amount. This is because the full request amount may include funds for things like operational expenses that may be separate from the funds directly benefitting a population.
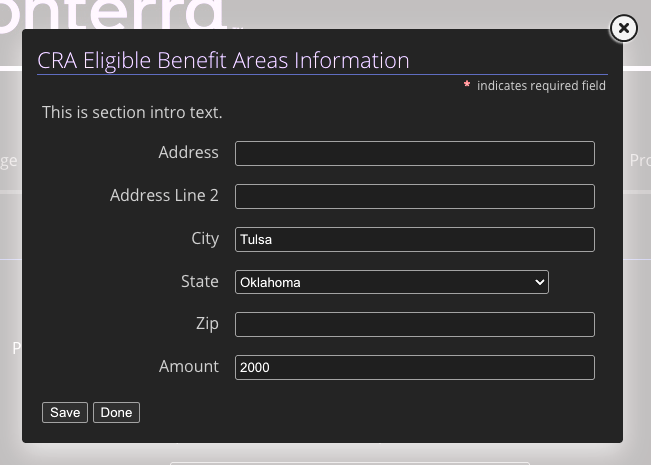
On Impact Reports, the grantee adds one or more entries indicating where benefit actually occurred, which may differ from the areas entered on the original grant proposal. Both sets of entries are stored independently, enabling planned-vs.-actual reporting.
Step 6: Review and Manage Submitted Entries
Administrators and reviewers (for both proposal and Impact Report entries) can:
- Edit entries
- Delete entries
- Add new entries
Each entry appears as its own row in the internal view. See the example below from the request view.
Step 7: Report on Geographic Areas Served
Ad Hoc Reports
- Start a report under Grant Request & Payment Reports
- Or select "Impact Reports and Geographic Areas Served Information"
- Add geographic fields such as Address, City, or Amount
- Combine these with other request or organization fields
Each location entry appears as a separate row.
Insights
- Navigate to Analyze > Grant Requests
- Add Geographic Areas Served dimensions (City, State, Country, Amount, Local Currency Amount, etc.)
- Join geographic data with other request or organization details
- Use mapping visualizations for supported fields
Geocode-related fields (such as census identifiers and geocoding accuracy indicators) are available within Insights for use in custom reporting and visualizations.


