Want to see how it’s done? Watch this video to learn how to create Table Calculations in an Insights Explore.
Insights Analysts have the ability to construct custom metrics within the Looker platform to extract meaningful information from their program's data by creating Table Calculations through an Explore.
Learn how to leverage this feature by proceeding through the following steps to create a Table Calculation within an Insights Explore.
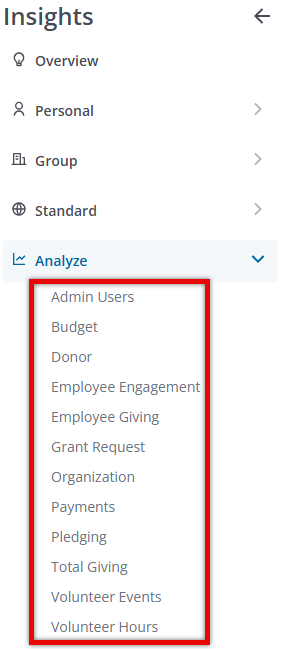
Step 1: Access Insights and Choose an Explore
Log into CyberGrants and navigate to the Insights platform.

Then, select the desired Explore in the Looker platform to begin your analysis.
Step 2: Select the Table Calculation Feature
The Table Calculations model can be accessed through various different methods, including the following:
- Locate the left field picker to view the "Custom Fields" and, from the available options, choose the "Table Calculation" feature.
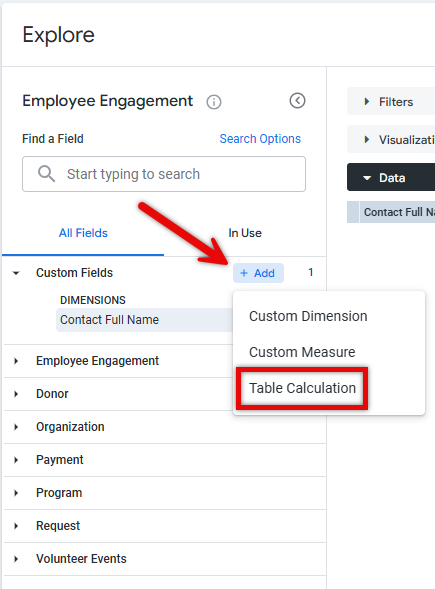
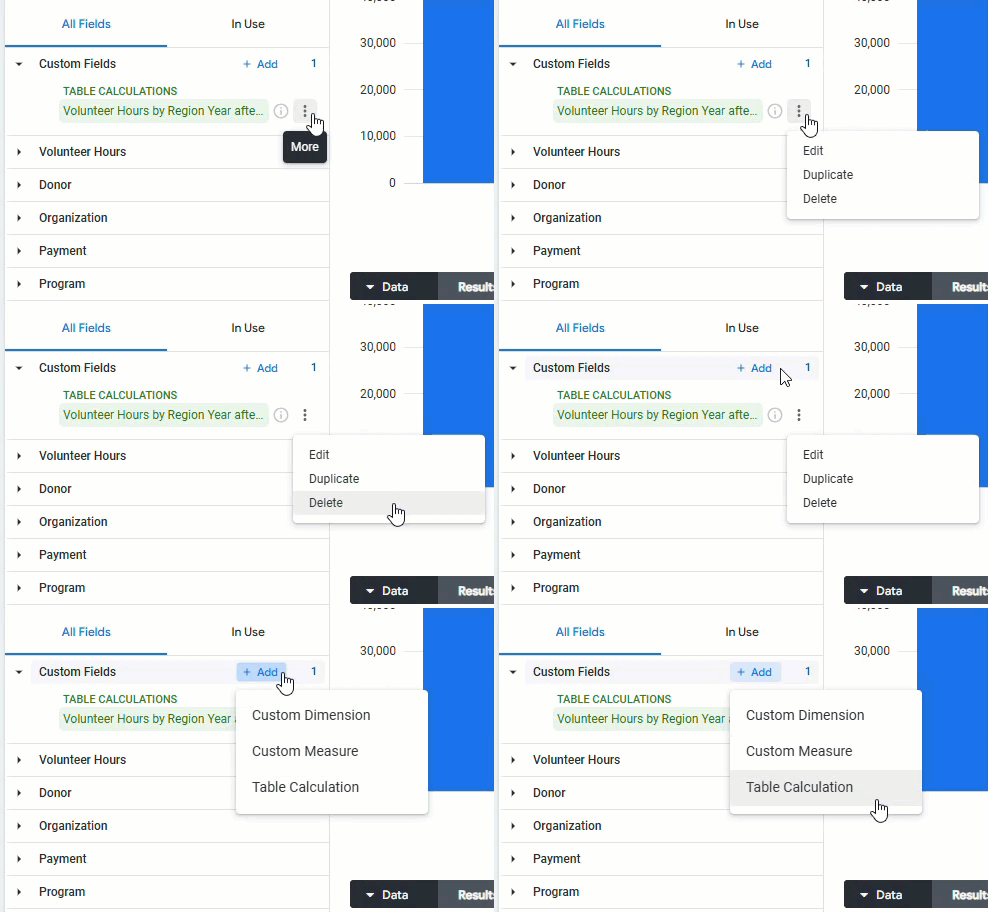
- If you have already defined other table calculations, you can edit, duplicate, or delete the calculations, as well as click "+Add" to create an additional table calculation.
- Add a Table Calculation from the Data Table by selecting "Add calculation" or by clicking the gear icon when generating a data analysis.
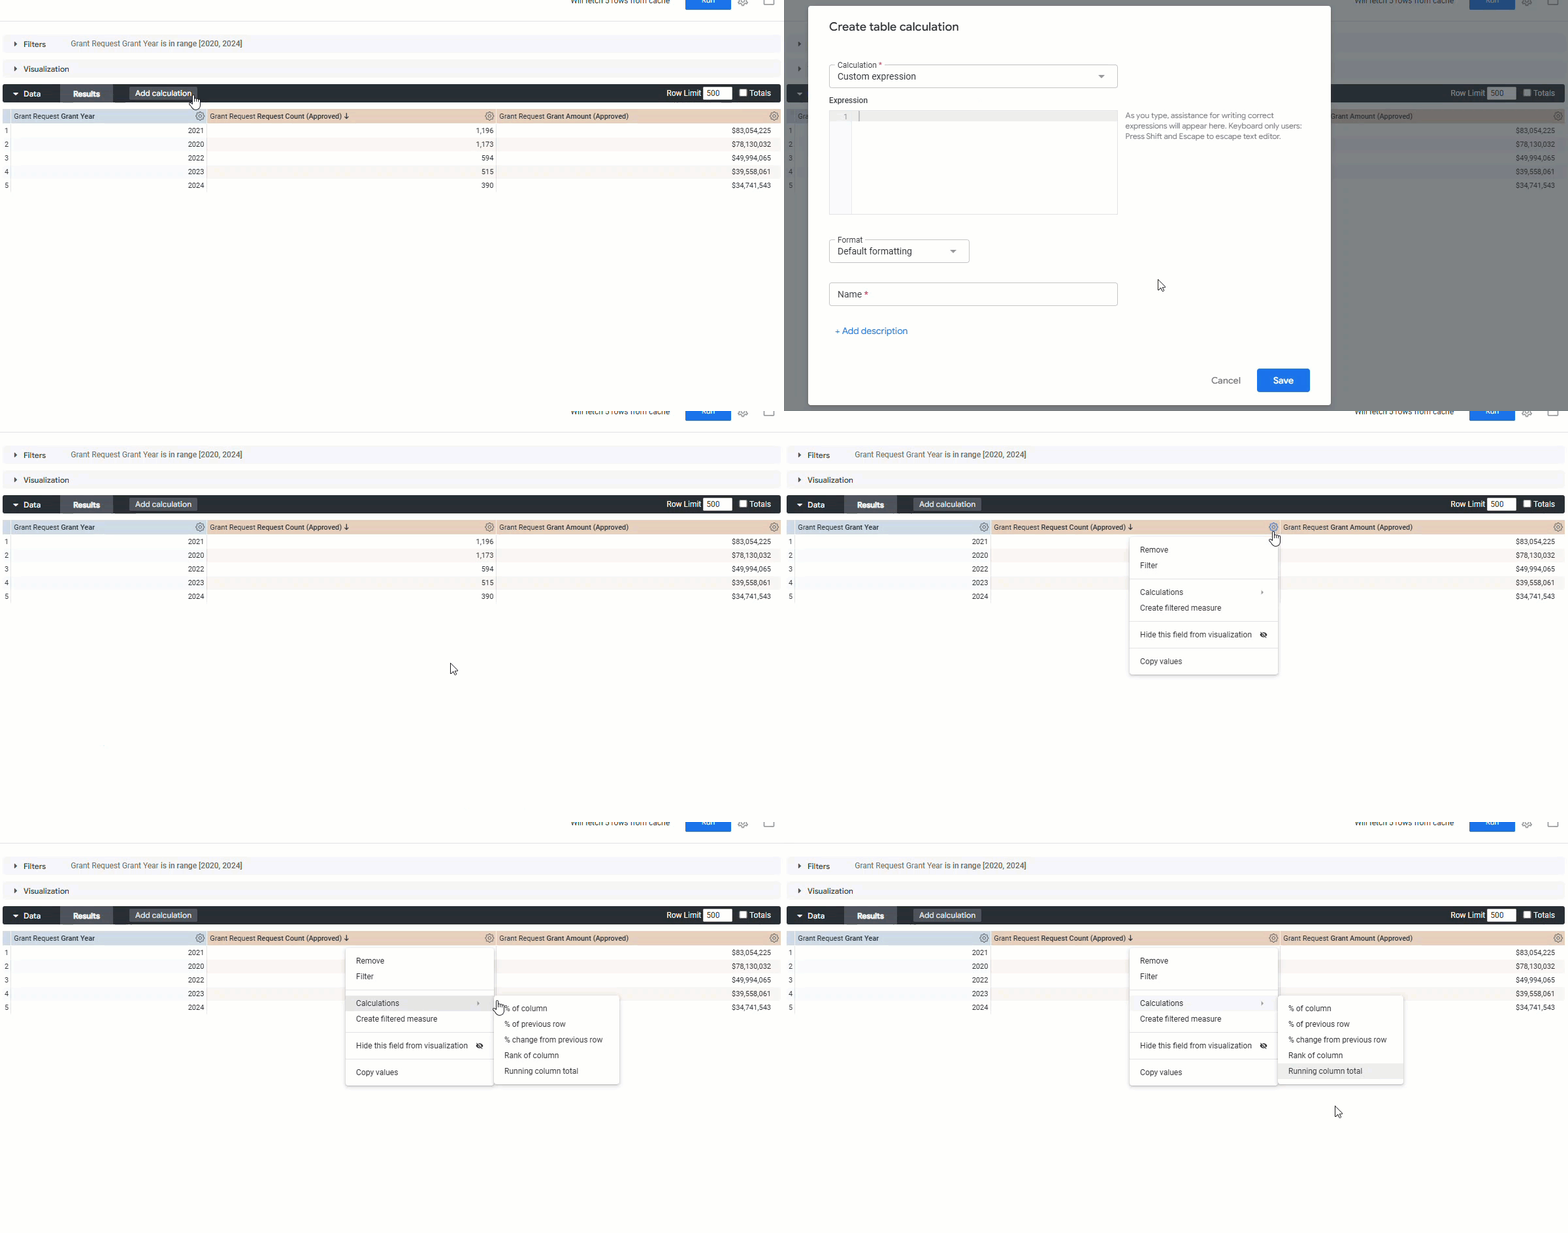
Add as many table calculations as needed to meet your business requirements.
Step 3: Customize the Table Calculation
When adding or editing a Table Calculation by selecting the "Add calculation" link or adding from the Custom Fields section, the "Edit Table Calculation" pop-up window will appear allowing you to construct your custom metrics using the available fields, functions, and operators.
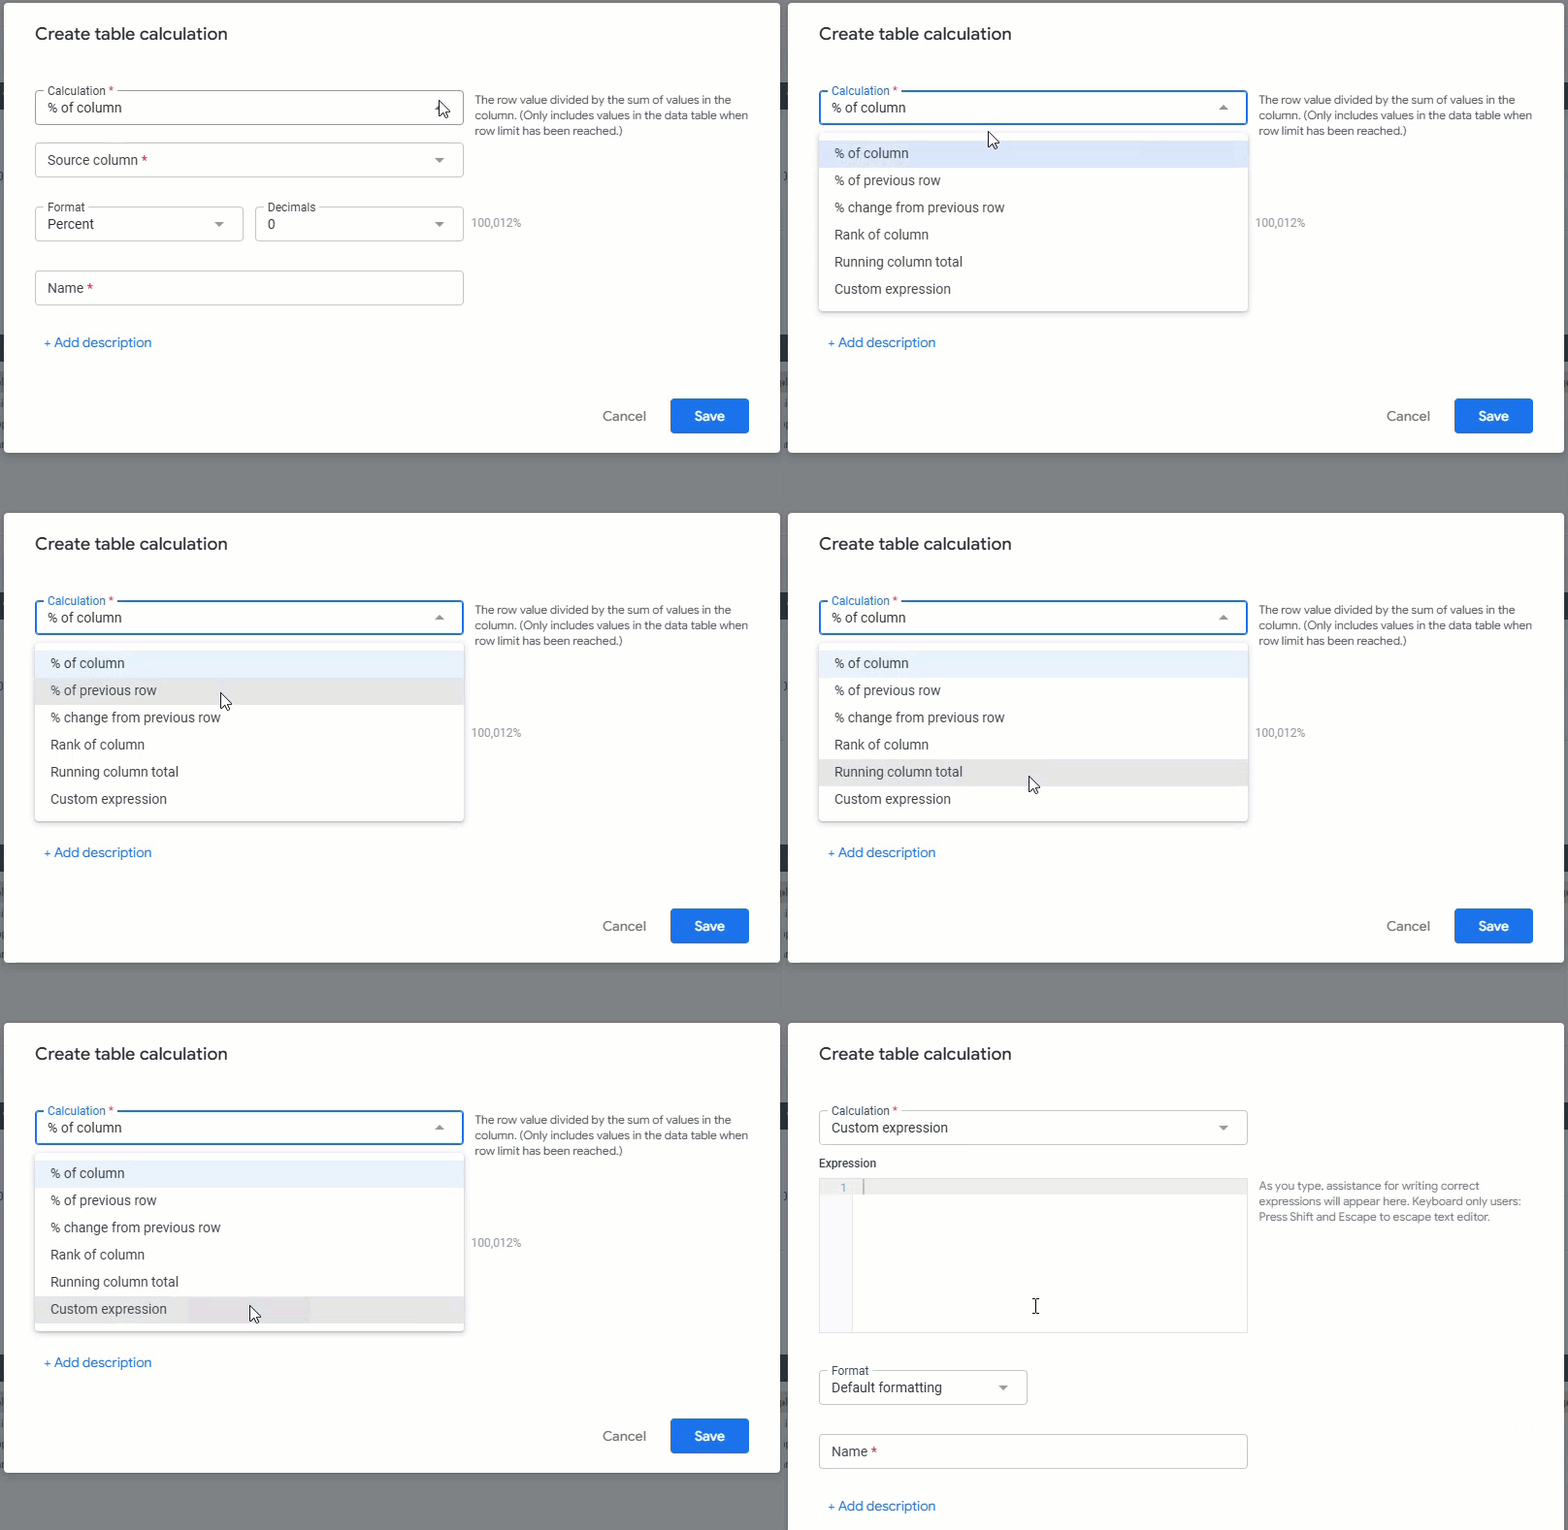
- Select a Calculation or enter a custom expression. To use a custom expression, start typing an expression in the large text box to form your calculation. Expressions can be simple or complex using as many fields, functions, and operators as your business logic requires. The expression you create can assess a number, date, string (text), or Boolean (true/false) value.
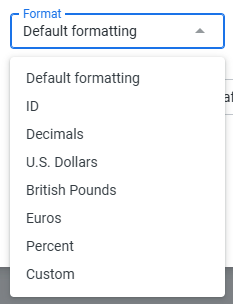
- Optionally, click the "Default Formatting" button to choose a predefined format or create a custom format for the results. If no selection is made, Looker will use a default format.
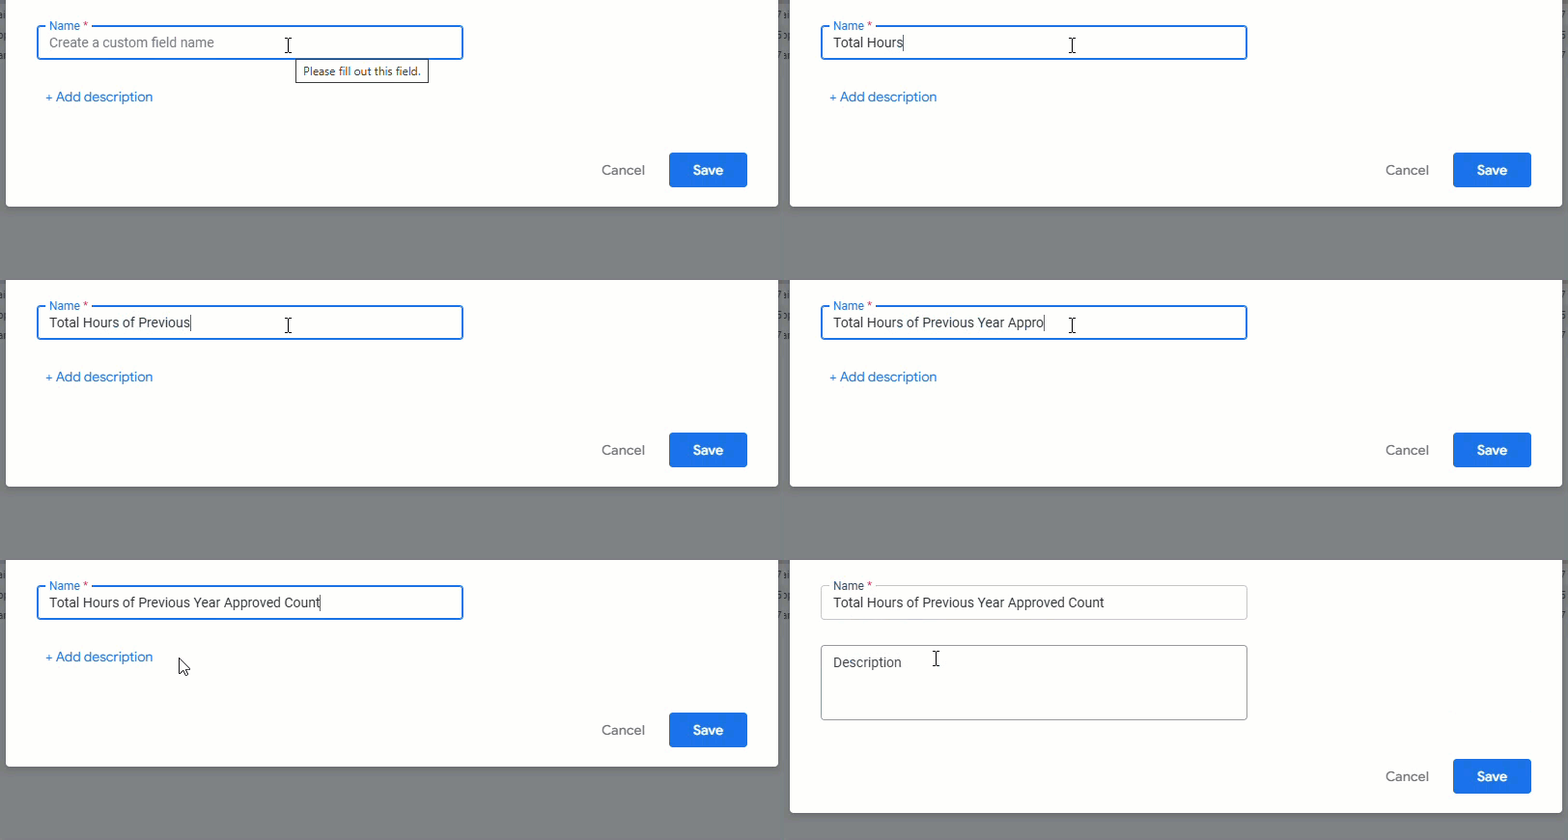
- Rename the table calculation from the default name and add a description, if desired.
Step 4: Save the Table Calculations
Once you have finished adding and configuring the table calculations, click the "Save Table Calculations" button to apply the changes to the Explore.
What do you need help with?
Not what you're looking for? Navigate to Understanding Insights Table Calculations


