The Insights platform provides a streamlined process for Insights administrators to add new users, allowing them to search by name or email address and assign the appropriate access level, whether Analyst or Viewer. This self-service functionality empowers Insights Administrators with the necessary permissions to efficiently manage user accounts and ensure the platform is tailored to your program's needs.
Insights Analysts with permission to manage Insights users can proceed through the following steps to grant user access to Insights.
Step 1: Access the Insights tab
Navigate to the Insights tab.
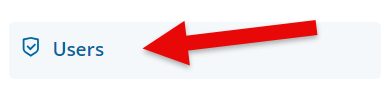
Step 2: Locate the Users Section
Click on the Users link located in the left-side panel.
Step 3: Click "+Add new user"
Click the “+Add new user” button on the right side of the screen under Viewer Licenses to begin the process of adding a new user. The "+Add new user" button will be disabled if there are no "Remaining" seats (Analyst & Viewer).
Step 4: Search for the User
In the search field that appears, locate the new user by entering their name or email address. The user must have an existing account in the system.

Step 5: Select Access Level
Once the user is found, choose the appropriate access level for this user, selecting either Analyst or Viewer. The available options will be based on the remaining licenses.

Step 6: Click Add user
After selecting the access level, click the "Add user" button to grant the new user their assigned Insights permissions. The new user should then appear in the list of existing Insights users.
What else do you need help with?
Not what you're looking for? Navigate to Understanding the Insights Self-Service User Management Portal


