Multi-factor authentication (MFA) provides an essential security layer for grantseeker accounts in Apply Online (funder-specific NPO sites), helping prevent unauthorized access even if passwords are compromised. In case grantseekers lose access to both their authentication device and recovery codes, support staff can assist them.
The ability for grantseekers to access their multi-factor authentication security settings enables them to maintain their account and avoid interruptions with their login.
The following steps detail how grantseekers can manage their Multi-Factor Authentication settings and secure their access to Apply Online applications.
Step 1: View MFA Settings
If Multi-Factor Authentication is enabled, the grantseeker may access their settings by visiting their profile page within the Apply Online portal.
If they set up MFA using the email method, they will see that indicated.
If they set up MFA with an authenticator app, they will see a link they can click to manage their device(s).
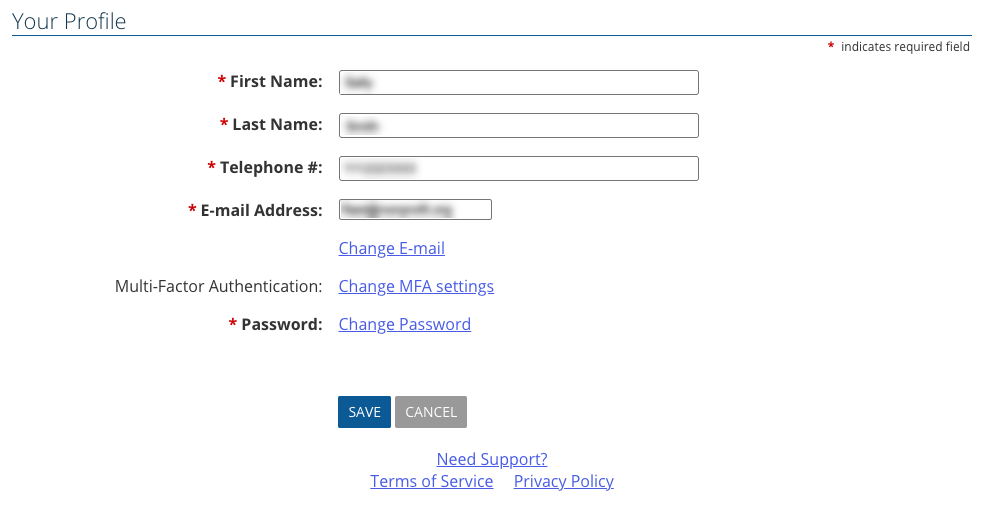
Note: Grantseekers will receive email notifications when changes are made to their MFA settings.
Step 2: Manage MFA Devices (Authenticator App Users Only)
If MFA is configured using email-based authentication, device management does not apply. Email-based MFA sends a one-time code to the user’s email address at login and does not require adding or removing devices.
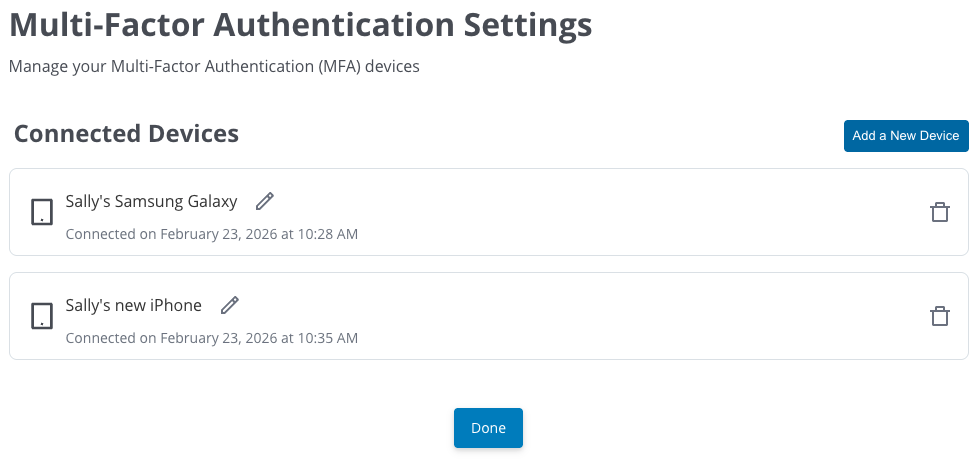
Grantseekers who use an authenticator app can manage their connected authentication devices through their account settings.
Enter Your Password to Access MFA Settings
For security purposes, grantseekers must input their account password (not their MFA app code) to view and make changes to their MFA device settings. This prevents unauthorized changes if someone gains temporary access to an unlocked device.
- After five incorrect password attempts, the user will be logged out.
- Users attempting to make MFA changes without proper authentication will be directed to contact support. Support staff will verify the grantseeker's identity through standard verification protocols before assisting.
Add a New Authenticator Device
Grantseekers can connect multiple devices to use for added convenience and security through their account settings.
The system will generate a unique QR code for each new device to scan with their authenticator app.
Grantseekers must verify their new device by entering a code from the authenticator app.
Users can also remove existing devices. When removing a device, any recovery codes associated with that device will expire.
Step 3: Download Recovery Codes
Recovery codes are available after the new device has been added and provide grantseekers with backup access to their accounts if they lose access to their authentication device. 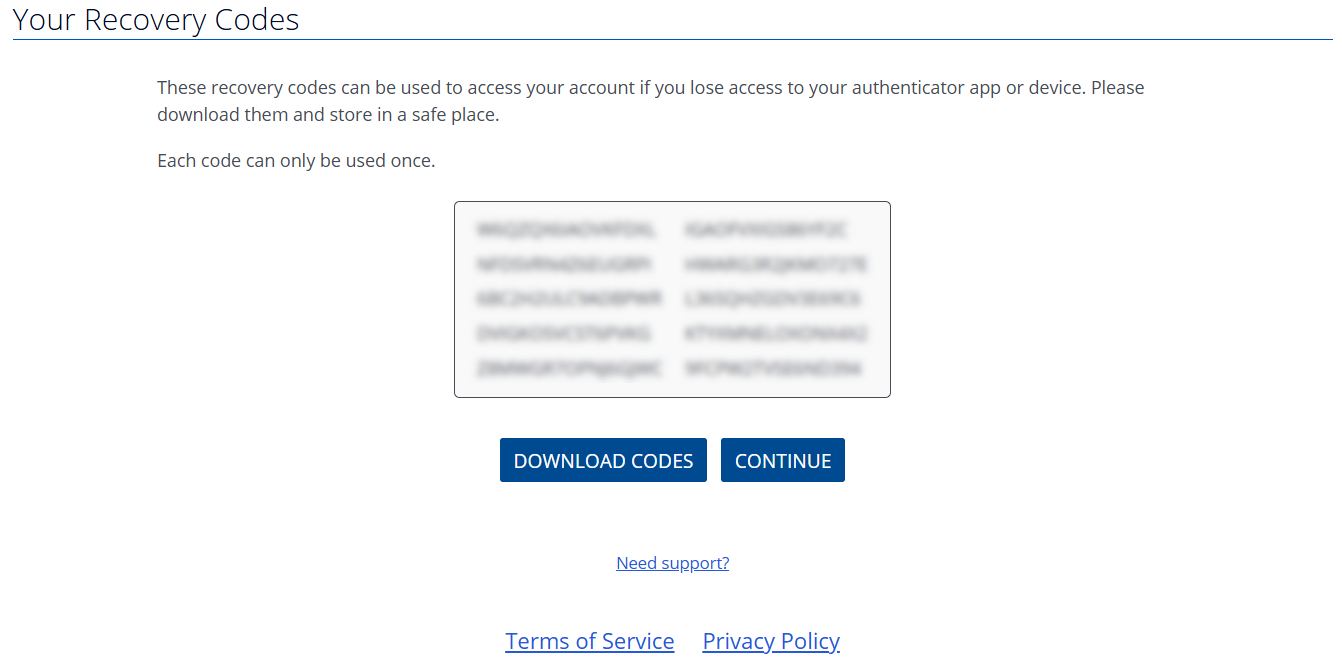
Each recovery code can only be used once to access the account.
Recovery codes should be stored securely in a separate location from the authentication device.


