Through this product feature, administrators can create a template, map fields to the template from an existing proposal type, and preview, publish, and upload the template for Grant Program eSignatures.
Looking to manage eSignature Templates for Grant Programs? Check out this video that guides you through the process.
Table of Contents:
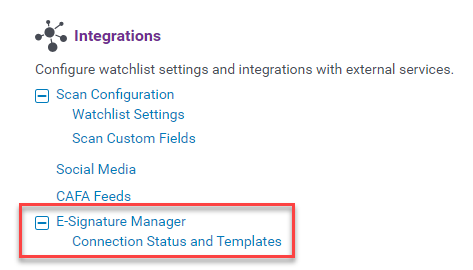
Step 1: Go to the Admin tab
Log in to the CyberGrants platform and navigate to the Admin tab.
Step 2: Access the E-Signature Manager
Scroll down to the E-Signature Manager under Integrations and select the link to access the feature.
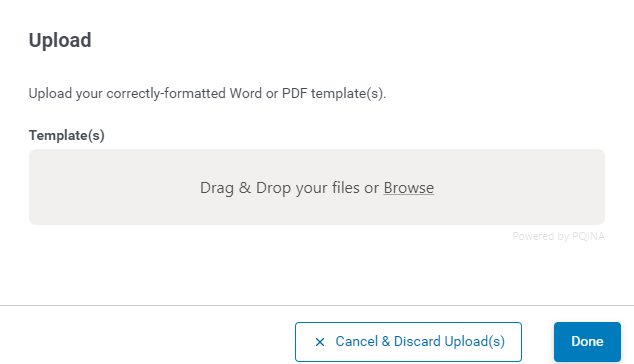
Step 3: Upload a Template
Program admins must produce a document to upload as a template linked to fields within a Grant proposal for the document to be sent to the eSignature provided and then signed by required signatories. The format and content included are used as a baseline when generating agreements to be signed as part of a grant application. PDF templates will typically need to be prepared utilizing a PDF editing tool, such as Adobe Acrobat.
NOTE: File names cannot exceed 96 characters. For further information on merge fields and signer fields, visit What are the eSignature Field Descriptions? Additional examples of appropriate formatting are available to the user through the eSignature Manager “Getting Started” section.
The following eSignature template formats are accepted:
- .pdf (most common for AdobeSign)
- .docx
Admins with eSignature user permissions can upload eSignature templates, select proposal types, and map the template to merge fields within the proposal.

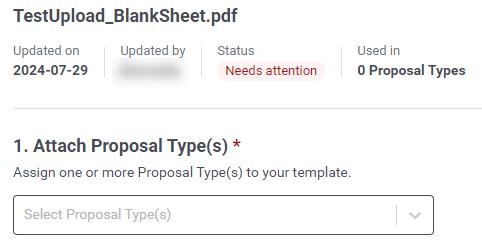
1. Attach a Proposal Type:
To choose one or more Proposal Types to link to the document, select from the “Attach Proposal Type(s)” dropdown while setting up the template.
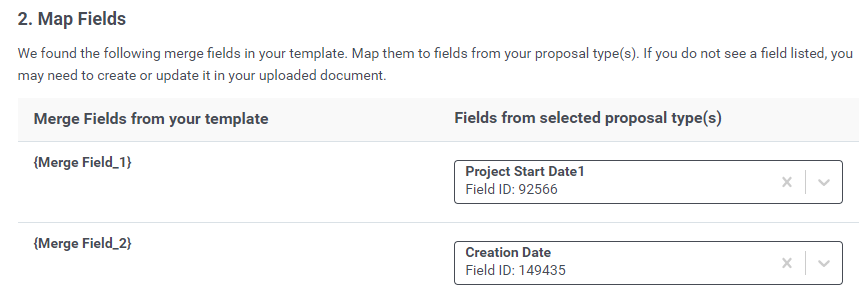
2. Map a Template to Proposal Type Fields:
To auto-connect the template to the eSignature provider, the uploaded template must map to merge fields populated in the agreement. To map the fields in the template, admin users must first select the proposal type(s) they want linked to the template, select eligible merge fields in the proposal to map to a template, and the system will then link the fields to pull data into the template. Users can search for fields by name or by field ID. If multiple proposal types are selected for a single template, the user will only view the fields common across both proposal types. For example, if Proposal Type A and Proposal Type B share only 1 field, admin users will only be able to map the single field for the template.
The following objects and field types are currently supported in standard eSignature functionality:
Objects:
|
Field Types:
|
|
|
- Currency
- Date
- Number
- Paragraph
- Boolean (Y/N)
- Single select fields
|
For the product to detect which fields require merging in the template, the template must indicate the data points that represent merge fields. NOTE: Templates may support a variable number of signatories, from 1 up to a maximum of 12. Each signer field must be indicated separately in the template.
Provider:
|
Standard Fields:
|
| DocuSign: |
Merge fields should be indicated by wrapping the appropriate text in curly brackets when using a .docx template: {}
Below is the required format for DocuSign templates:
- /Signer1Signature/
- /Signer1DateSigned/
- /Signer2Signature/
- /Signer2DateSigned/, etc.
It is highly recommended to adjust the font color of the DocuSign merge fields to match the background color. This ensures the merge fields are not visible beneath the signature and date fields, which aligns with DocuSign's recommended best practices.
|
| AdobeSign: |
Merge fields can be indicated by the following actions:
- Utilizing form fields via a PDF editor such as AdobeSign’s advanced functionality.
- Adding double curly brackets {{}} to indicate Signer fields.
Below is the required format for AdobeSign templates:
- {{Sig_es_:signer1:signature}}
- {{Dte_es_:signer1:date}}
- {{Sig_es_:signer2:signature}}
- {{Dte_es_:signer2:date}}, etc.
|
Users can view the settings for their uploaded templates by selecting either the template name or the pencil icon next to the template. For a template to be complete and ready for use, it must have:
- At least one mapped proposal type.
- All merge fields that have been detected within the template are mapped to a field from the selected proposal type(s).
When a template file is selected, the product will perform a virus scan. If malicious or suspicious code is detected, the upload will fail, producing an error message. To address this, please review the content of the document template and verify the formatting for mapping to existing fields within the proposal type(s).
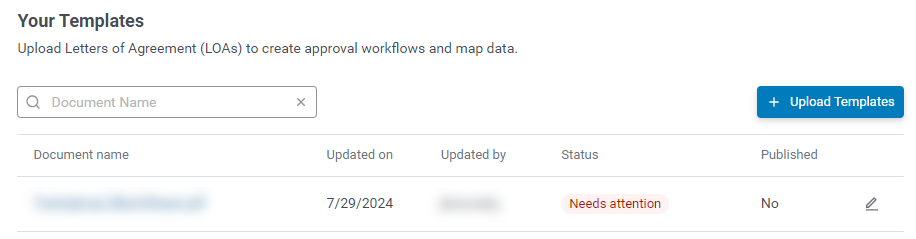
eSignature templates can be in 1 of 2 statuses after upload:

- Needs Attention → The template is missing at least one mapping element. Templates in this status cannot be published to Production.
- Unpublished Changes → The template has all expected mapping, but either has not yet been published, or there are changes to the mapped proposal type merge fields in Sandbox that are not present on production.
Step 4: Preview a Template
Preview from the Template Set-up page
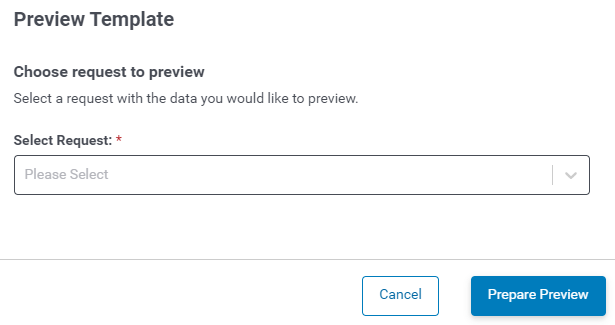
Users can preview the uploaded template from the 'Set Up Template' page using an active request in the system, and if no changes are required, users can publish the template to acquire eSignatures for grant application processing. To proceed, from the 'Set Up Template' page, scroll down and click "Preview."

Be sure to select the correct Proposal Type to ensure the appropriate e-Signature template is loaded. Once a template has at least one proposal type selected and all configured merge fields have been mapped, users can preview the template using a specific request as an example or input their own preview data.
Preview from a Request Record
When viewing a request record associated with a proposal type that includes one or more e-Signature templates, users can select a desired template from the "E-Signature template to send" field. To preview the document, click the "Preview" button located beneath the "Ready to send for E-Signature" field.
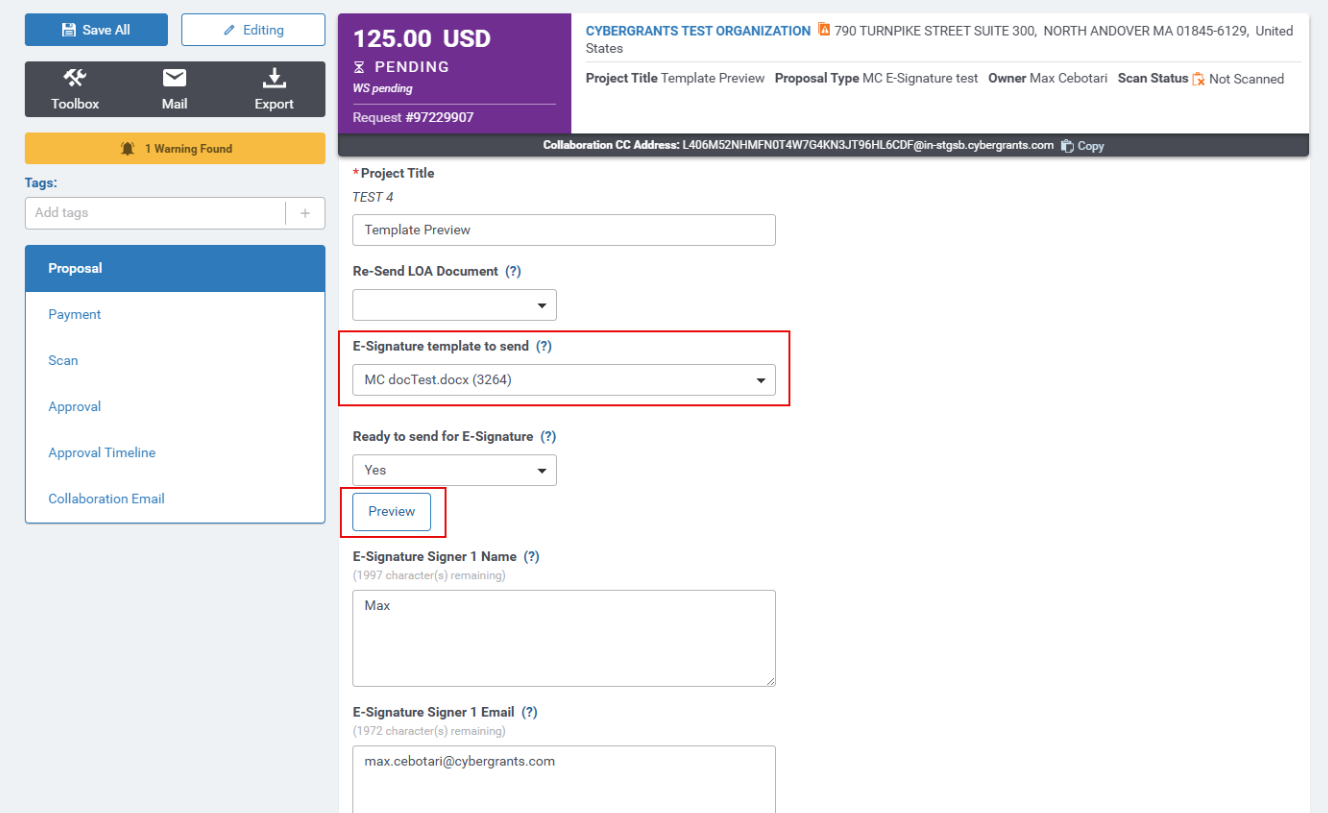
Upon clicking the Preview button, a new browser window or tab will open, initiating the download of the selected document template. This template will be automatically populated with relevant data from the request. To use this feature successfully, your browser must be configured to allow pop-up windows.
Step 5: Publish a Template
After previewing the configured template using an active, approved grant request, a link will populate allowing the user to ‘Publish’ the template.

If successful, the status will change to ‘Published’, verifying that all template settings are current and in production. Once the merge field data is complete and the document is published, CyberGrants will generate a preview link that users can select to view their populated template. Depending on the user’s browser, the preview may download automatically or open in a new window.
The published document will connect to the provider and automatically assign to all incoming approved grants. An automated hourly back-end script will transmit the document to the required signatories, and once signed, the fully executed document will upload to the grant request.
- If a template is archived, revised after the document has been transmitted to the provider and sent for eSignatures, or if follow-up is required to acquire signatures for an unsigned document, admin users must manually resend the document. The document is sent only once through the script.
What else do you need help with?
Not what you're looking for? Navigate to Understanding eSignature for Grant Programs
Looking for training?
Explore this feature at your own pace - access training video content or watch a recorded webinar by clicking the link below.


