This feature allows admin users to effectively navigate and utilize the Volunteer Events tab to track and manage volunteer opportunities within the system. Admin users can set preferences by customizing the columns and filters to view and manage their program's volunteer events.
The following steps will guide you through the Volunteer Events tab setup and review process.
Step 1: Access the Volunteer Events Tab
Enter CyberGrants and navigate to the Volunteer Events tab.
This opens your event management workspace, where all submitted events are displayed based on your filters and column preferences.

Step 2: Set up your default filters
Set up your default filters
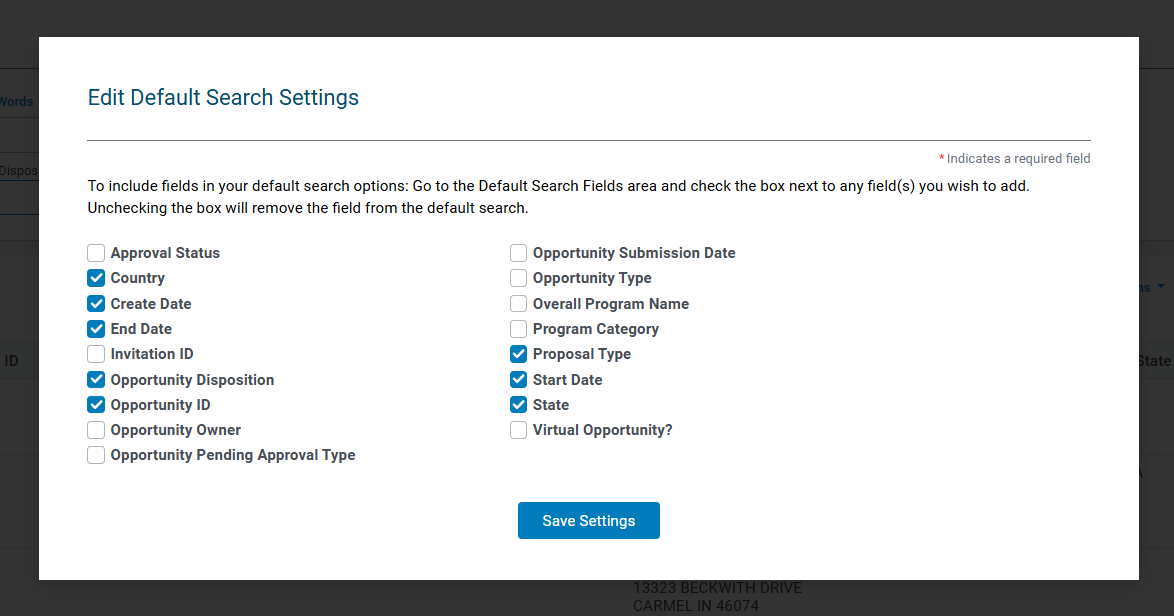
Click the Settings link in the top right corner to set your preferences for the columns and filters you want to see.
- Click Edit/Add Search Filters.
- Choose the filters you want to apply by default. Common options include:
- Proposal Type (such as Event Creation)
- Opportunity Disposition (event status like Pending or External)
- Create Date
- Start Date and End Date
- Opportunity ID
- State
- Country
- Click Save Settings to apply your changes.
Step 3: Choose which columns to display
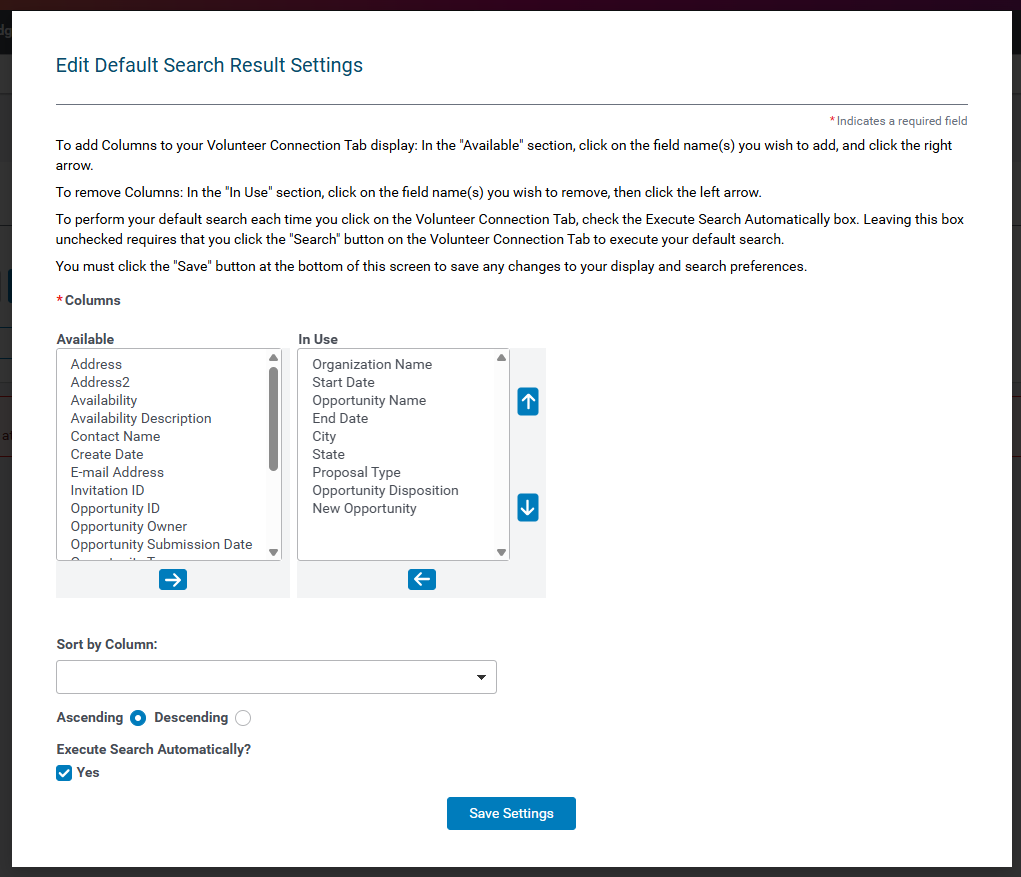
- From the Settings menu, click Edit Result Columns.
- Select column names and use the navigation arrows to move columns between the "Available" and "In Use" boxes. You can also realign your selected columns by using the Up and Down arrows.
- You can choose from the following commonly used columns:
- Opportunity ID
- Create Date
- Proposal Type
- Opportunity Disposition (status of the event)
- External – Submitted by Organization
- Internal - Event Submitted by Donor/Employee al user, or approval step is set to auto-pending.
- Closed – Event has passed the End Date and is Closed.
- Open – Event was reviewed and has reached final approval by internal user, or approval is set to auto-open events
- Active – Event is full without waitlisting or is past the signup period; not shown in search or recommendations
- Full - Event is full with waitlisting; new sign-ups join the waitlist
- Rejected – Event was reviewed and has reached final rejection by the internal user
- Organization Information
- Opportunity Name
- Start and End Date
- Address / City / State / Zip
- Contact Name
- Email Address
- New Opportunity
-
Sort your search results by a selected column in ascending or descending order.
- When done, click "Execute Search Automatically?" if you want your default search to execute each time you click on the Volunteer Events Tab. Leaving this box unchecked requires you to click the "Search" button to execute your default search
- Click Save Settings.
Step 4: Explore the filters and run a search to review submissions
Once your preferences are set, start exploring the different filters to see what results you receive.
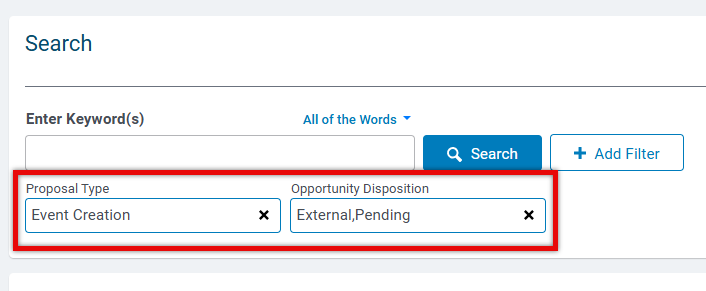
An example search could be:
- Proposal Type (the programs in your account) + Opportunity Disposition (status of the event/project).
- Choose the Event Creation proposal (there may be only one listed) and try filtering for External and Pending status to see what is awaiting your review. If you auto-approve your events, you can review the Approved status.
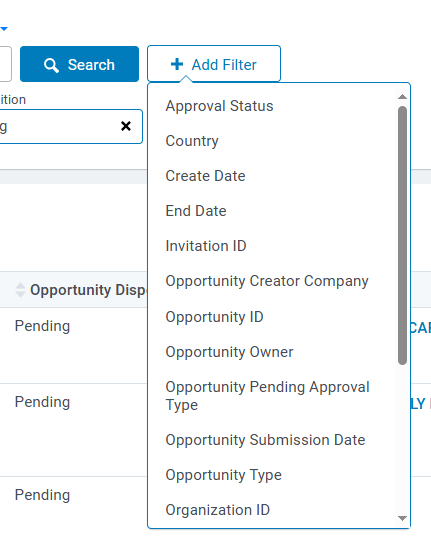
To refine your results further, click + Add Filter and select additional criteria such as:
- Create Date
- Opportunity ID
- Organization Name
- State or Country
Step 5: Save a search for future use
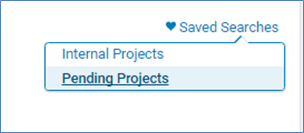
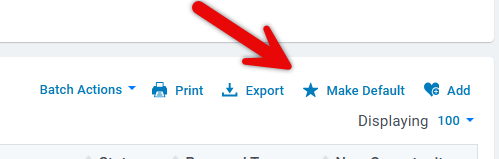
If you regularly run the same search, click the 'Add' link to create it as a favorite search.
Step 6: Understand volunteer event statuses
Each event has a status listed in the Opportunity Disposition column. The table below explains what each status means.
|
Status:
|
Description:
|
|
|
Submitted by an external nonprofit through the NPO portal.
|
|
|
Submitted by an employee through the donor-facing site.
|
|
|
|
|
|
Approved (manually or automatically); visible for employee sign-ups.
|
|
|
Declined by an admin; no longer visible to employees.
|
|
|
The event has ended or passed the signup deadline.
|
|
|
Sign-up limit reached and no waitlist is available.
|
|
|
Sign-up limit reached, but waitlist is enabled.
|
Step 7: Open and review an event
- In your search results, locate the event you’d like to review.
- Click the Opportunity Name to open the event detail page.
- Review all submitted information, including:
- Location
- Start and end dates
- Contact name and email
- Organization details
- If you make changes, click Save to update the record.
Step 8: Approve or reject an event
- On the event detail page, scroll to the bottom or click Event Approval Information in the left menu.
- If required, click Submit for Approval to start the approval workflow.
- When the approval options appear:
- (Optional) Add internal comments (these are not shared with the submitter).
- Click Open to approve the event.
- Click Reject to decline the event.
To change your decision, click Submit for Approval again to reset the status to Pending.
What else do you need help with?
Not what you're looking for? Navigate to Understanding CyberGrants System Tabs and Navigation
Looking for training?
Explore this feature at your own pace - access training video content or watch a recorded webinar by clicking the link below.


