The Main Tab in Bonterra's CyberGrants is your central workspace for managing requests and organization records. From this screen, you can search for records, view details, take action on requests, and customize your workflow with saved searches and filters. The following steps will guide you through using the Main Tab—from setting your preferences to managing records efficiently.
Step 1: Understand the layout of the Main tab
When you log in, CyberGrants opens directly to the Main Tab. This screen includes:
If you have appropriate access, you can create or edit organization, request, and GrantSeeker records directly from this tab.
Step 2: Apply filters and customize columns
Apply filters
Through the Settings gear icon in the top right corner of the screen, apply filters in the Search section to narrow your results. Common filters include:
- Organization ID
- Request disposition
- Proposal type
FrontDoor Organization Filter
- Organizations with a verified FrontDoor profile
- Organizations that are actively engaged in the Nonprofit Hub
Use this filter to prioritize or review organizations that have completed Bonterra’s centralized onboarding process.
Customize Results
Also, through the Settings gear icon, you can customize which columns are visible in the Results section.
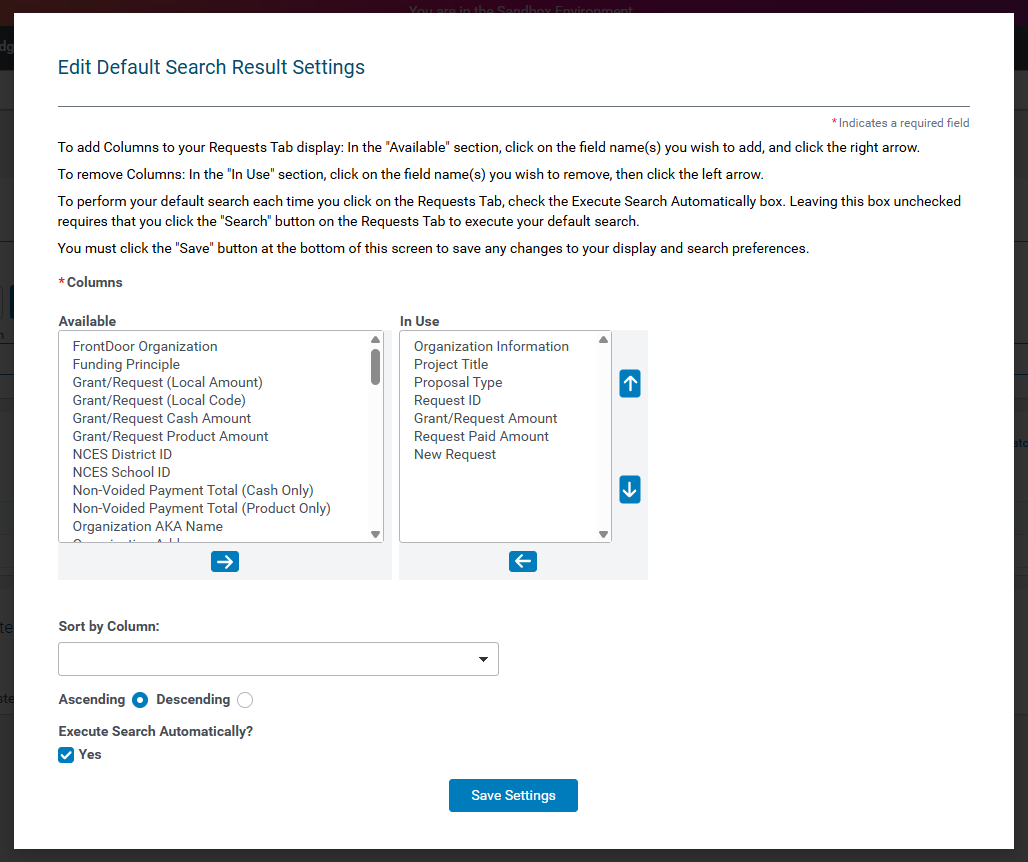
Step 3: Save time with Favorite Searches
Once you’ve selected your filters and columns, save your configuration as a Favorite Search. This allows you to:
- Reuse the same search criteria quickly
- Set a default search that loads automatically each time you access the Main Tab
Step 4: Use batch actions for efficient request management
To take action on multiple records at once:
- Select the checkboxes next to the relevant records in the Results section.
- Open the batch action menu and choose an action such as:
- Approve
- Delete
- Create/edit
Batch actions are ideal for managing large volumes of requests efficiently.
Step 5: Preview records with Quick View
Click the magnifying glass icon next to any record to open a preview panel.
This Quick View feature lets you:
- See key request or organization details
- Verify information without leaving the Main Tab
Step 6: Interpret request statuses and icons
Each request record displays a Disposition, such as:
- External – submitted by grantseeker and record not yet saved/reviewed
- Pending – record has not yet been fully evaluated
- Returned to Applicant - The request has been returned to the grantseeker
- Canceled - Indicates the request has been canceled by a reviewer
- Approved - Gifts that have been approved for payment
- Rejected - Gifts that have been rejected; sometimes marked rejected because the donor requested cancellation because of user error upon entry
You’ll also notice icons next to records that provide visual cues. Hover over an icon to view its meaning and get immediate context about the request’s status.
Step 7: Add a new organization
To create a new organization:
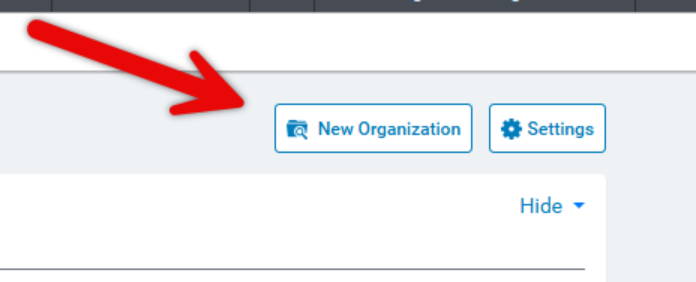
- Click the New Organization button in the Search section.
- Search for an existing record using:
- City
- Zip code
- Tax ID
- NCES School ID
-
If no match is found, proceed to create a new record using the available fields.
What else do you need help with?
Not what you're looking for? Navigate to Understanding CyberGrants System Tabs and Navigation
Looking for training?
Explore this feature at your own pace - access training video content or watch a recorded webinar by clicking the link below.


