Mailing lists are a convenient way to manage and send correspondence to a large group of contacts. These lists allow users to select all or a subset of contacts to include in various forms of communication, such as letters or emails. The "Mailing List" feature enables users to create and maintain these contact groups, providing a streamlined approach to managing large audiences. Users can save mailing lists and reuse them for different types of correspondence, ensuring efficient and effective communication with their desired contacts.
Creating a mailing list is a straightforward process that allows users to customize the list by adding or removing contacts as needed. This feature provides a centralized and organized way to manage contact information, making it easier to reach out to specific groups or the entire audience with targeted messages. Please see below for instructions on how to create a mailing list.
Step 1: Enter the Mail tab
Navigate to the Mail tab in CyberGrants.
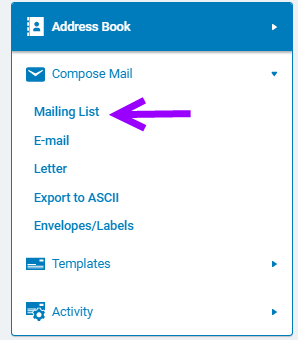
Step 2: Click Mailing List
Click "Mailing List" under "Compose Mail."
Step 3: Click on "New"
Click the “New” button to create a new mailing list.

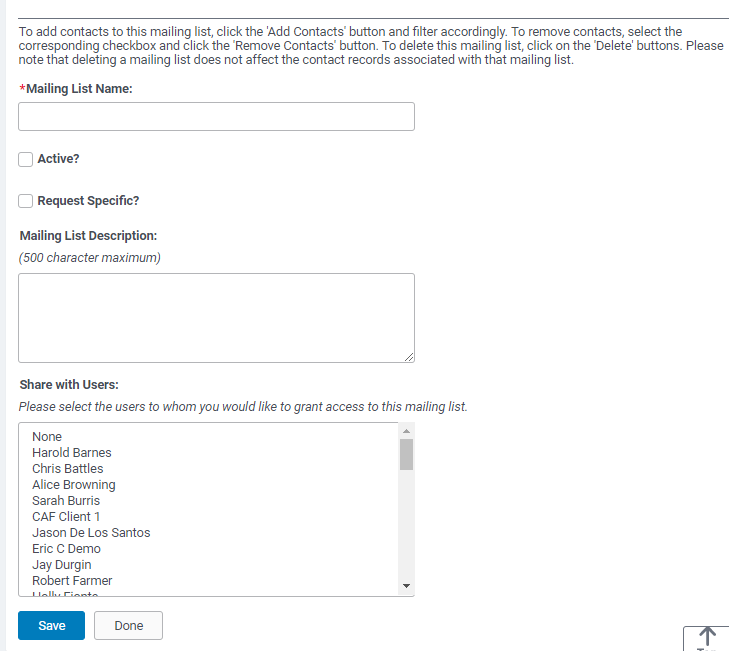
Step 4: Enter Name and Description
Enter a name and description for the mailing list.
- Indicate whether the list is active.
- Check the “Request Specific” checkbox to search for contacts based on request information.
- Select users with whom you are to share the mailing list.
- Click the “Save” button.
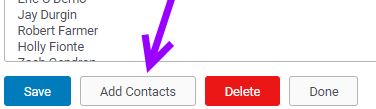
Step 5: Click "Add Contacts"
Click the “Add Contacts” button to filter the list of contacts with standard contact, organization fields (e.g., contact type, contact state, organization legal name, or organization state). If a user checks the Request Specific checkbox they can also filter the list of contacts with request fields (e.g., request date, request disposition, or payment status).
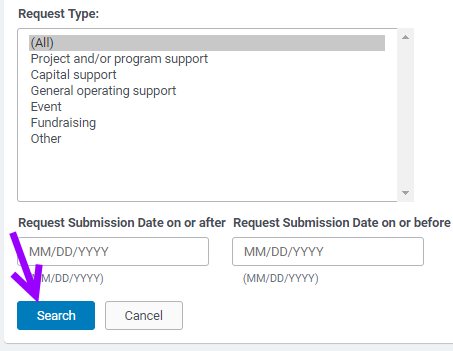
Step 6: Select Filters and Values
Select the filters and values to limit which contact records appear in the Address Book when adding contacts to the mailing list.
The following filters are available:
Contact Name:
Contact Type:
Contact Country:
Organization Legal Name:
Organization IDs:
Organization State:
Organization Country:
Organization Type:
Request IDs:
Request Disposition:
Proposal Type:
Invitation ID:
Request Date on or after
Request Date on or before
Project Start Date on or after
Project Start Date on or before
Project End Date on or after
Project End Date on or before
Final Disposition Date on or after
Final Disposition Date on or before
Request Owner:
Payment Status:
Payment Type:
Scheduled/Actual Payment Date on or after
Scheduled/Actual Payment Date on or before
Payment Batch Number:
Request Type:
Request Submission Date on or after
Request Submission Date on or before
Step 7: Click Search
Click the “Search” button.
Step 8: Add Selected Contacts
To add a contact to the mailing list, check the checkbox next to the contact name and click the “Add Selected Contacts” button. To add all the returned contacts to the mailing list, click the “Add All Contacts” button.
Step 9: Click Done
Click the “Done” button once all of the contacts are added.
What else do you need help with?
Not what you're looking for? Navigate to Understanding Mail Activity


