Looking to create custom measures from dimensions in an Insights Explore? Watch the video below to learn how by using a dimension's ellipses menu.
Insights Analysts can leverage the field dimension's ellipses menu within an Insights Explore to efficiently access and apply various analytical functions to their data. This intuitive feature streamlines the process of selecting and incorporating desired metrics into the query, saving time and enhancing the overall analytical workflow.
Proceed as follows to utilize this functionality effectively.
Step 1: Access Insights and Choose an Explore
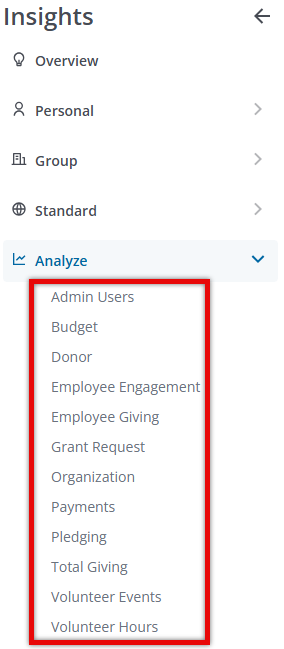
Log into CyberGrants and navigate to the Insights platform.

Then, select the desired Explore to begin your analysis.
Step 2: Expand the Folder and Locate the Dimension
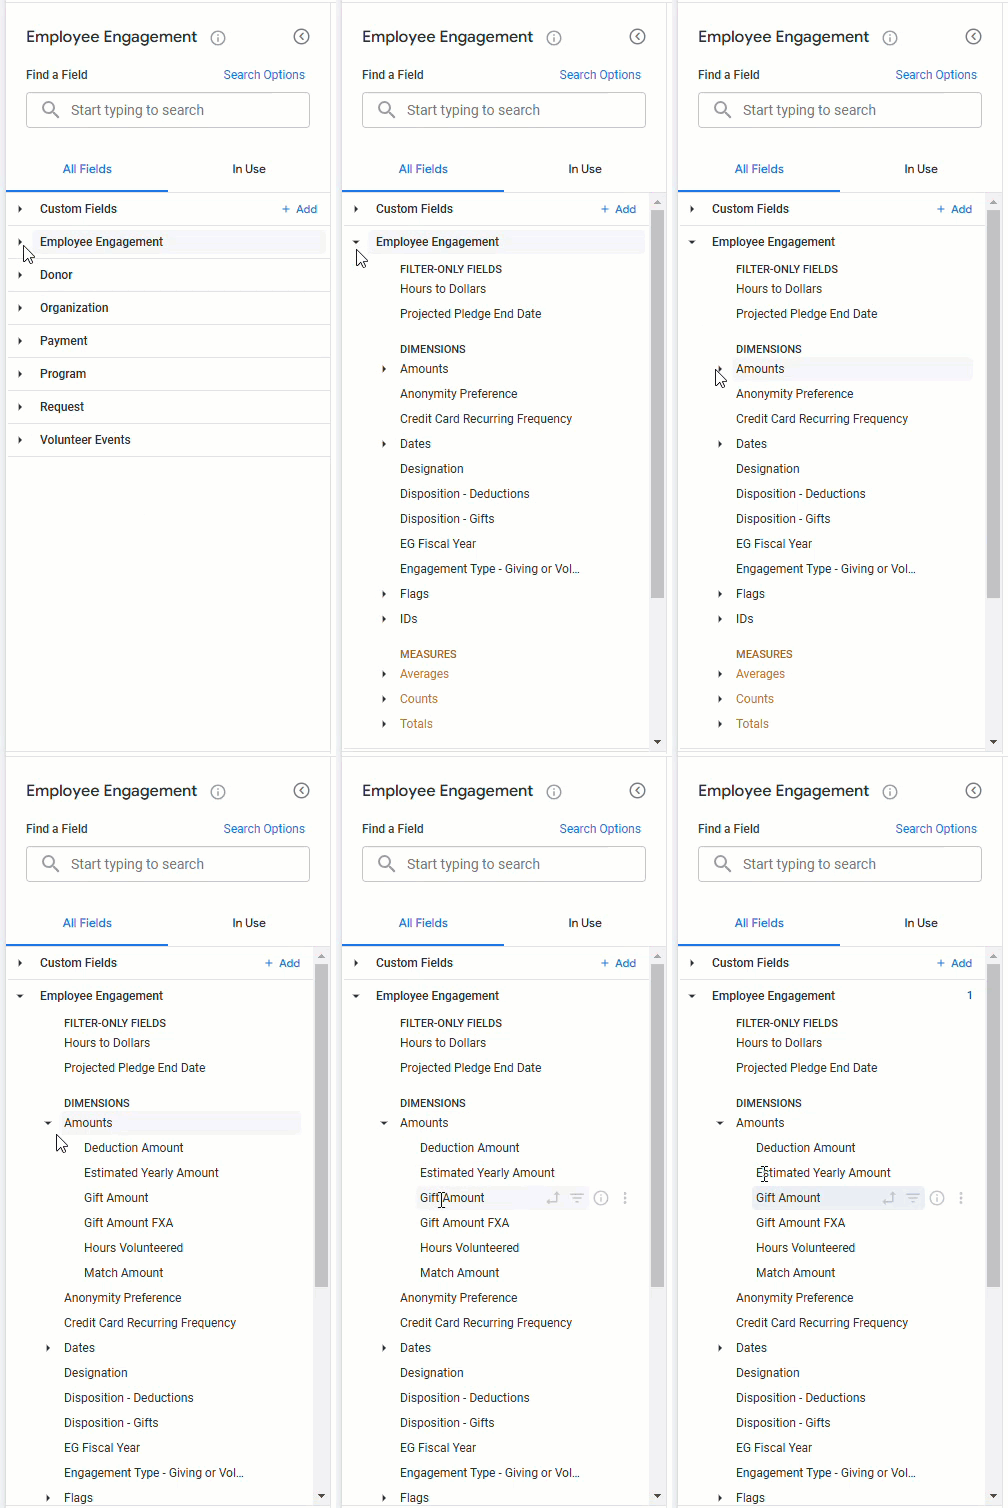
Identify the dimension for which you want to perform analysis. Expand the folder containing the relevant dimension by clicking on the expansion icon and locate the desired dimension within the expanded folder.
Step 3: Access the Ellipses Menu
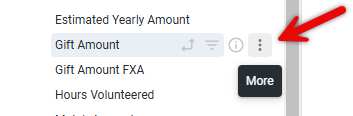
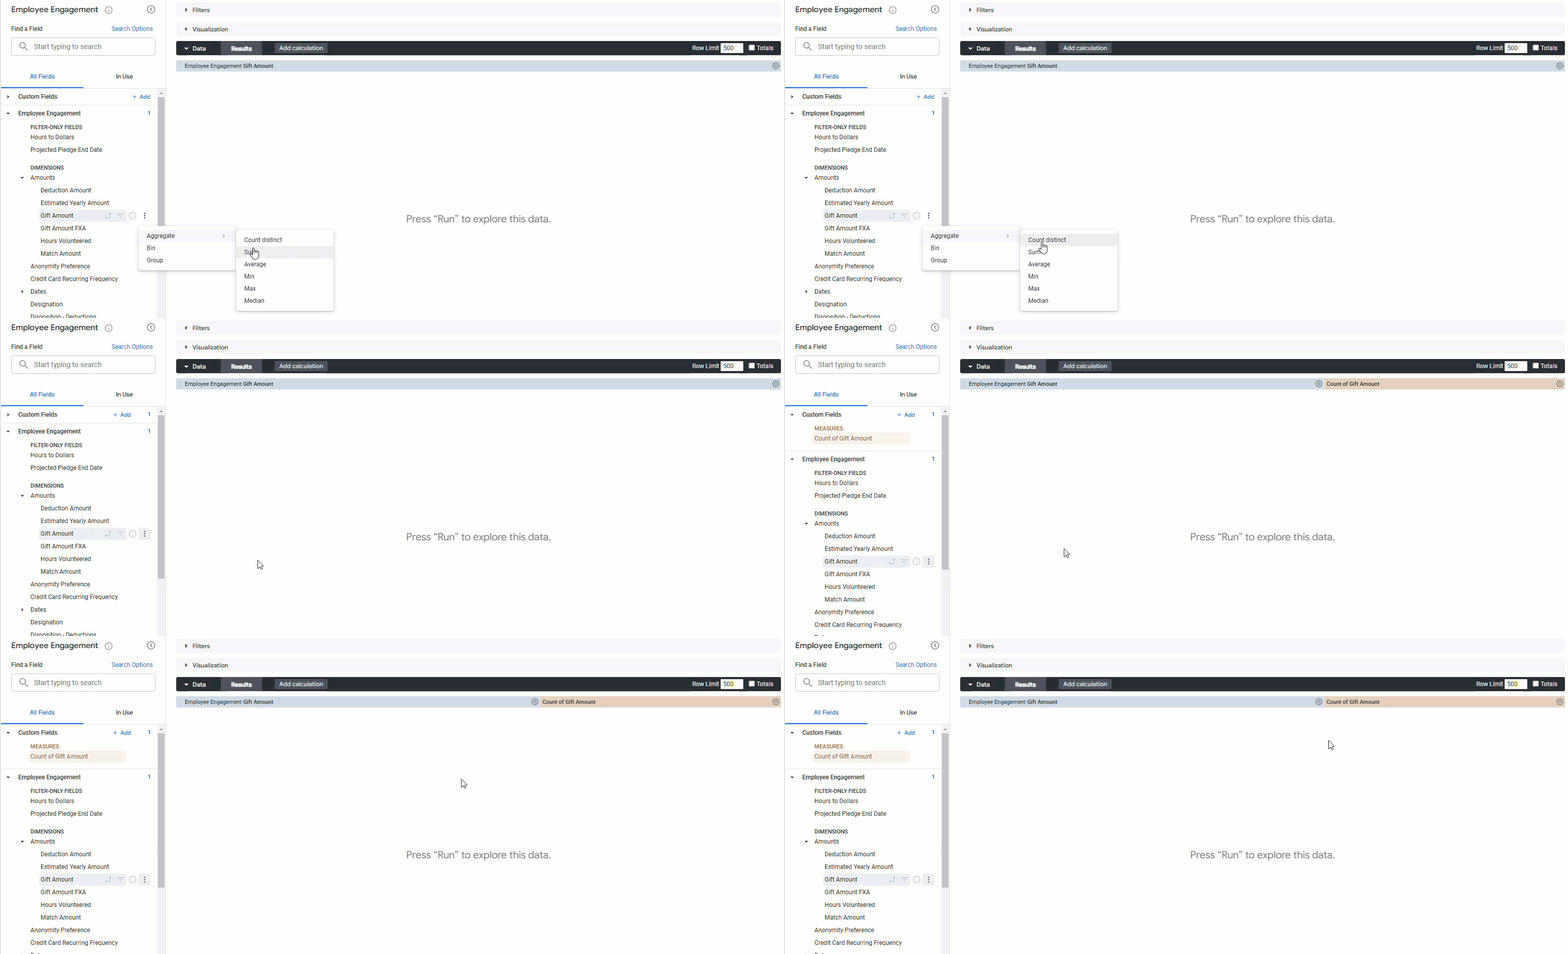
Hover over the vertical ellipses (three-dot menu) next to the selected dimension and click on the ellipses to reveal the available analytical functions.
Step 4: Select a Function
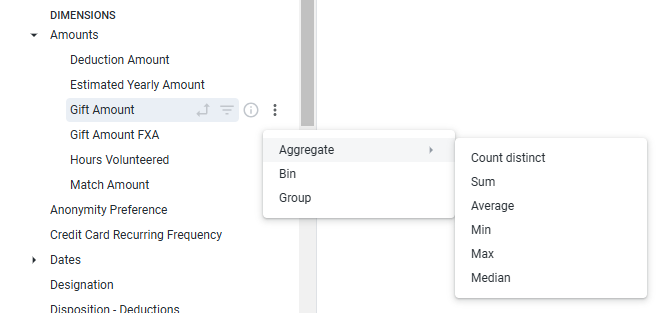
The suggested functions displayed will vary based on the data type of the chosen dimension (e.g., number, text, date). Review the available options and select the appropriate function to apply to the dimension.
Step 5: View the Automatic Addition to the Querry
Upon selecting the desired function, the new field will be automatically added to the query, streamlining the analytical process.
Step 6: Note Specific Considerations
If you select the "count" function, a "count distinct" operation will be executed in the generated SQL.
What else do you need help with?
Not what you're looking for? Navigate to Understanding how to create Custom Measures from Dimensions in Insights


