The Insights Explore's Bin custom field type empowers Analysts to create ad hoc custom bins, or tiers, for numeric type dimensions (standard and custom) without the need for complex logical functions in expressions. Custom Bin fields are created using a "classic" tier notation style, which can be interpreted as follows:
- T01 [0.0,500.0) represents the range including 0, up to but not including 0, and up to but not including 500
- T05 [10000.0,inf) denotes the range including $10,000 and up to infinity.
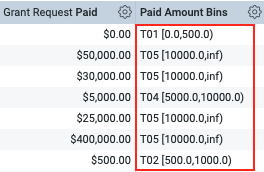
This functionality can be invaluable when seeking to quickly group values into specific integer ranges, thereby adjusting the granularity of the data to suit analytical requirements. Proceed as follows to learn about creating custom bins in an Insights Explore.
Step 1: Access Insights and Choose an Explore
Log into CyberGrants and navigate to the Insights platform.

Then, select the desired Explore to begin your analysis.
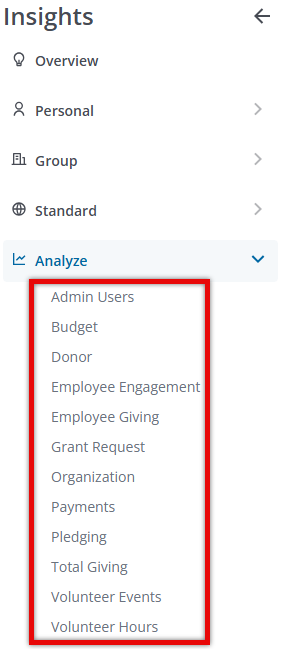
Step 2: Access the Bin Creation Modal
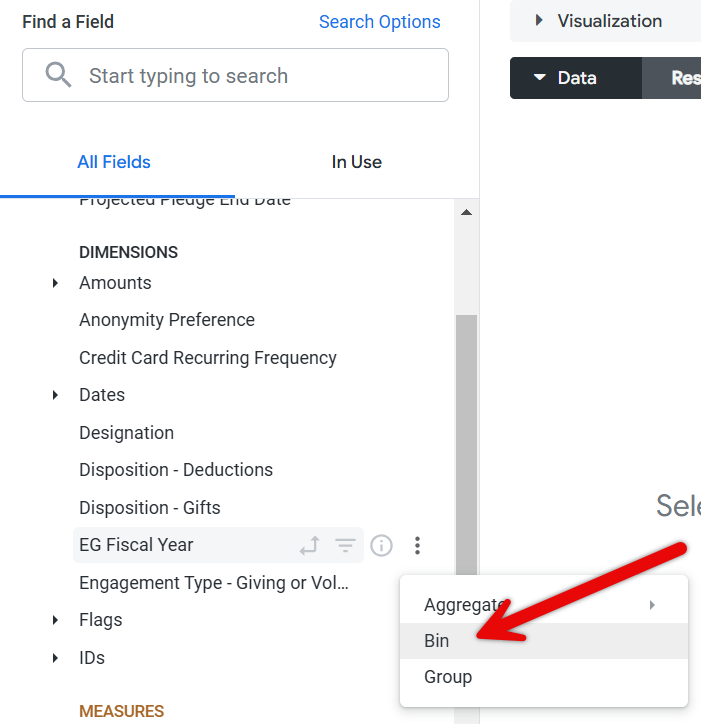
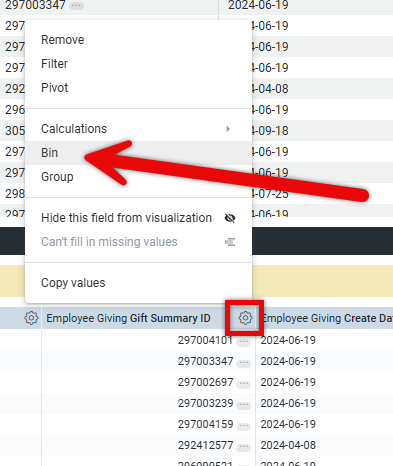
Analysts can access the Bin creation modal through one of two methods:
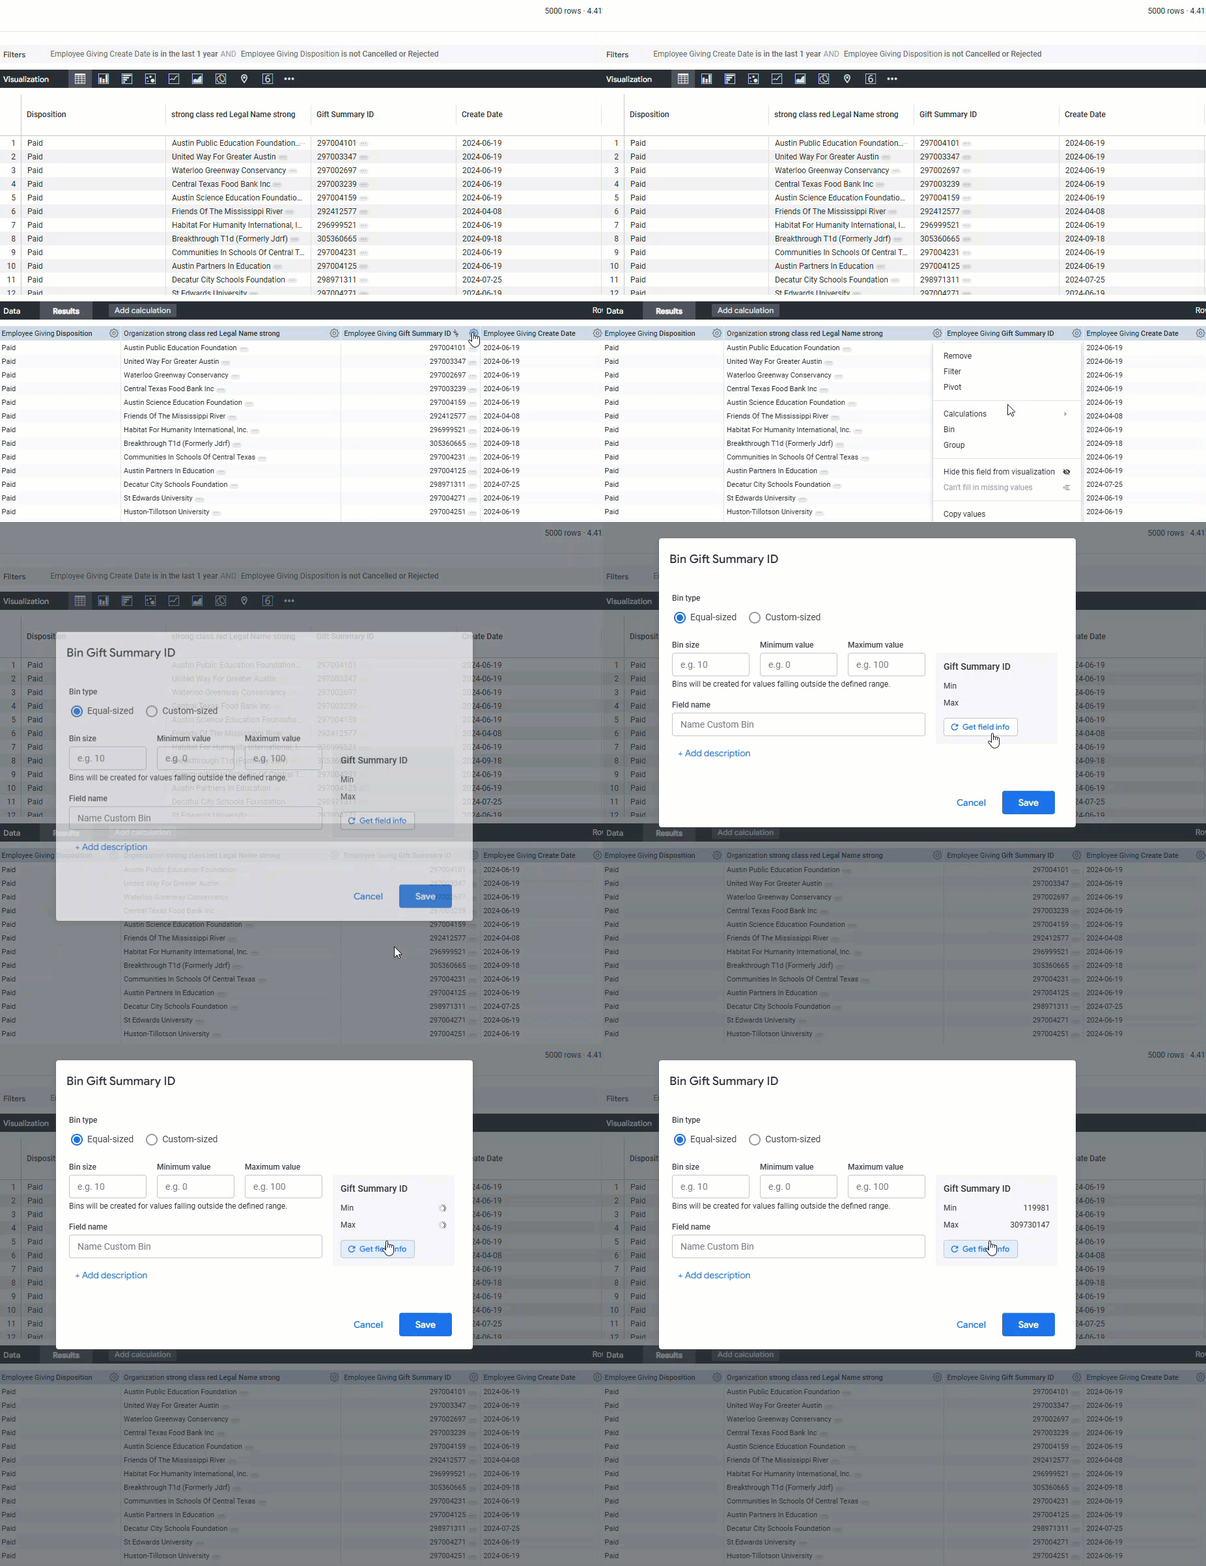
- From the field picker, expand the relevant folder to locate the dimension for which you wish to create a custom bin, click the dimension's vertical ellipsis menu, and select "Bin."
- Alternatively, if the dimension is already present in the Explore data table, access the "Bin" option directly from the dimension's gear menu.
Step 3: Select a Bin Type and Configure Field Settings
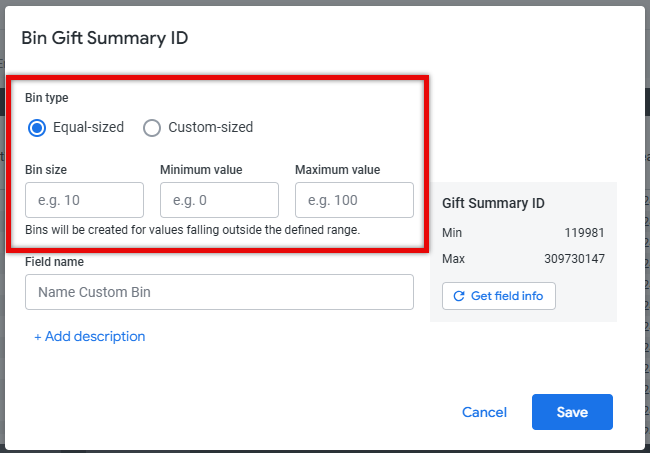
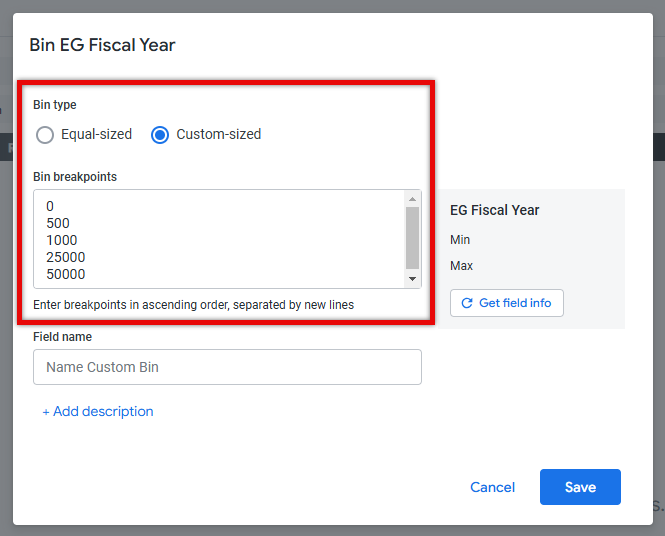
The Bin modal offers two distinct bin-type options:
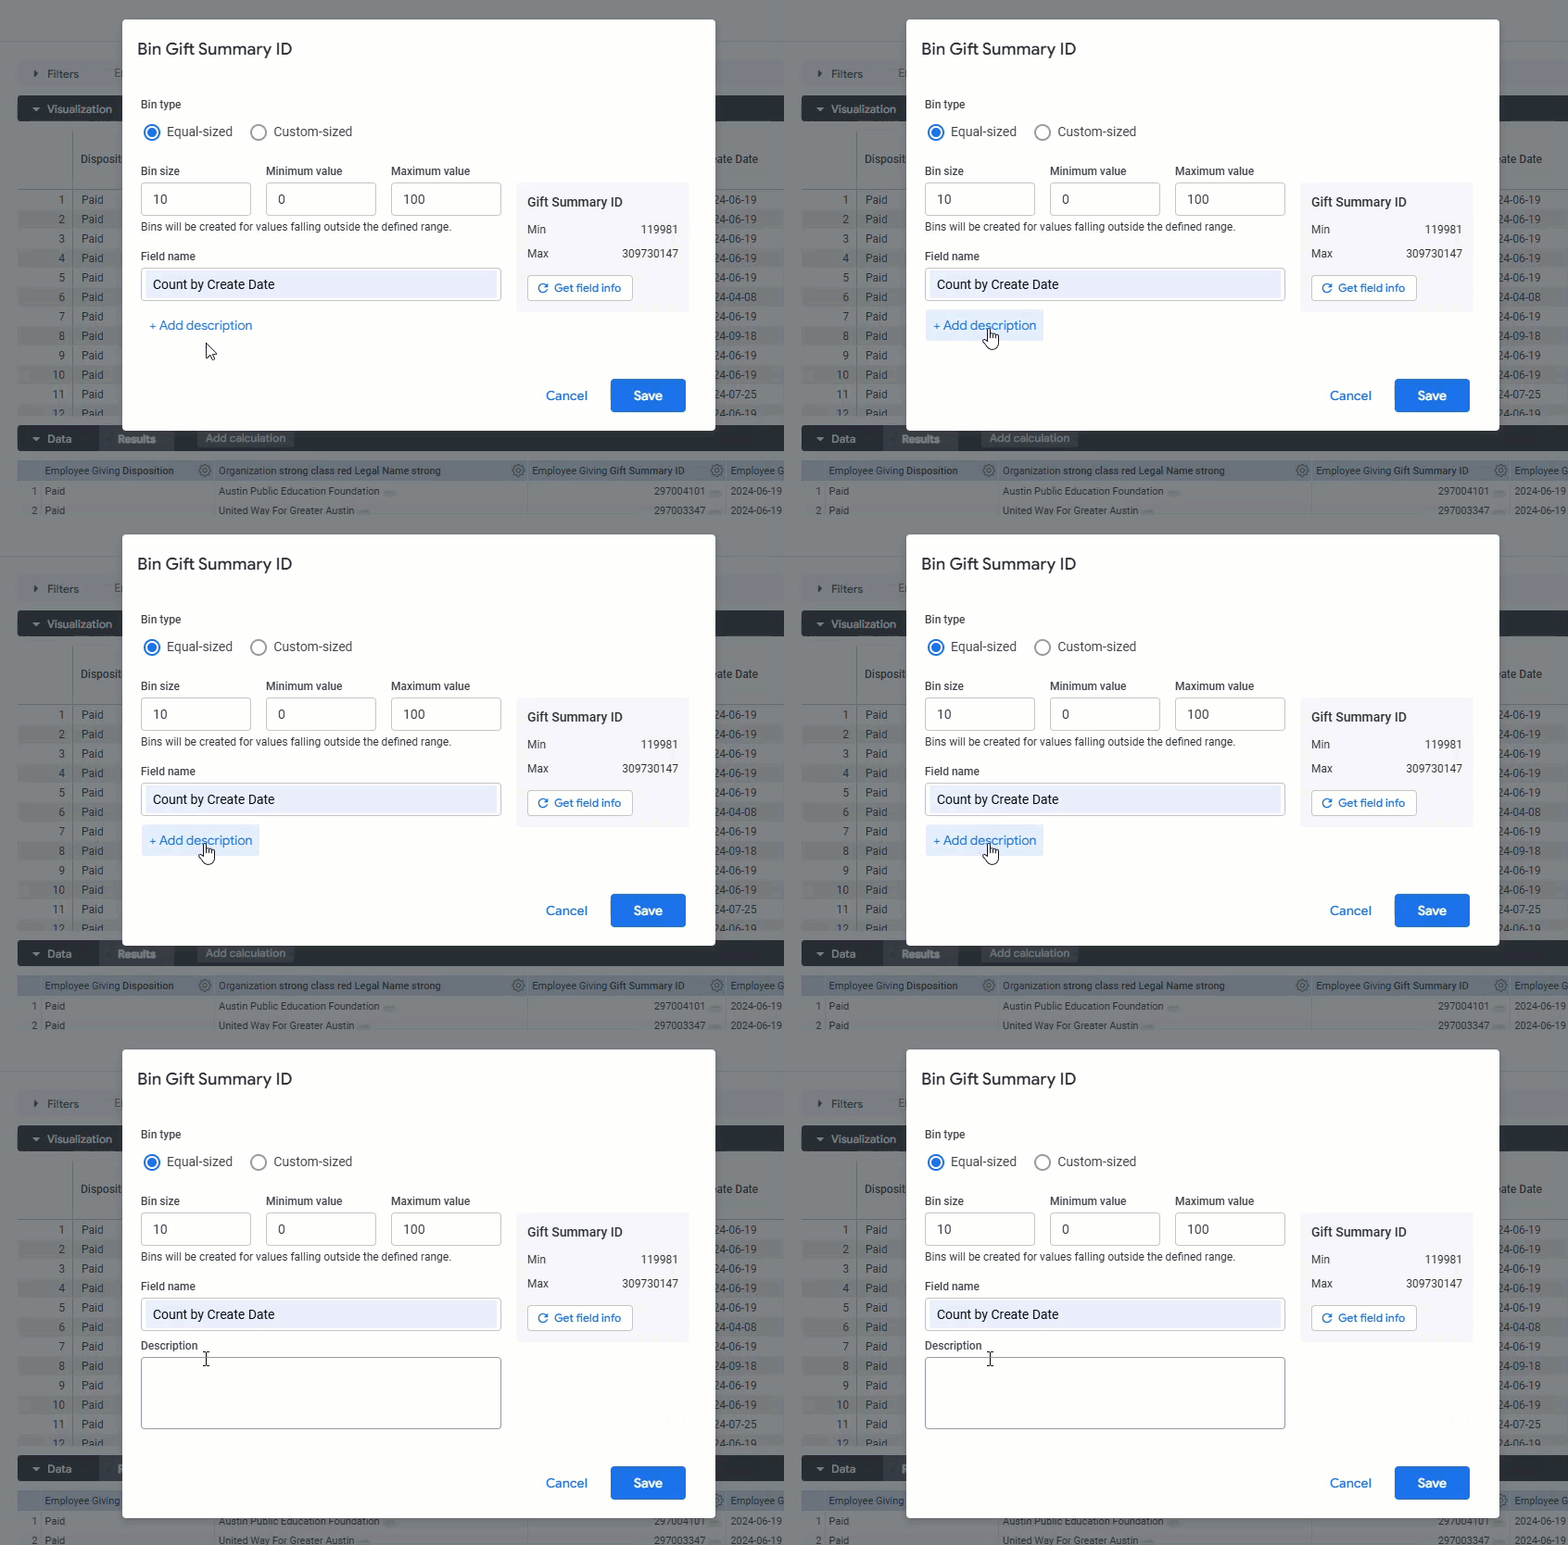
- Equal-sized - This approach allows you to bin numeric values into equal integer ranges, such as 0-10, 10-20, and 20-30. Then, enter the desired Bin size, Minimum value, and Maximum value.
- Custom-sized - Conversely, this option empowers the analyst to create custom bin sizes of varying integer ranges. To specify the tier breakpoints, enter them in ascending order in the Bin breakpoints field, separating each value with either commas or new lines.
Step 4: Review Dimension Details
As an optional preparatory step, analysts can elect to click the "Get field info" button. This will provide valuable insights into the dimension, including the minimum and maximum values, as well as the overall value range.
- This contextual information allows analysts to make more informed decisions when specifying the custom bin parameters.
Step 5: Specify a Field Name and Description
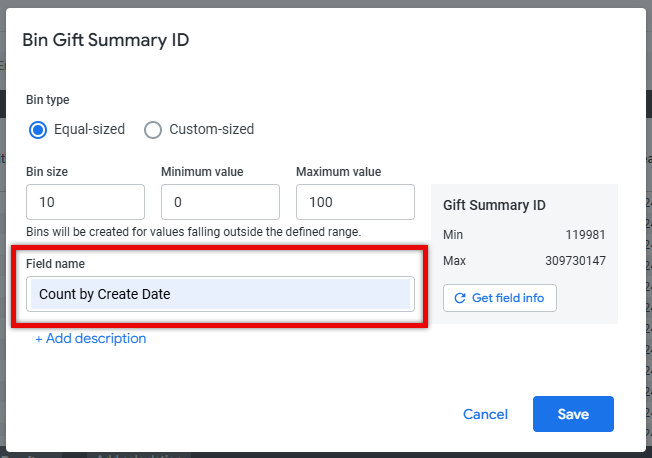
Provide a field name that will appear in both the field picker and the data table. While the default naming convention is "Dimension_Name Bins," you can customize this as needed.
Additionally, you can click the "+Add Description" link to include an optional description of up to 255 characters, which can provide valuable context for other users interacting with the custom field.
Step 6: Save and View the Custom Bin
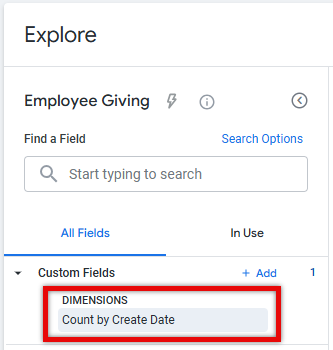
Once the custom bin parameters have been defined, click "Save." The new field will now appear in the "Custom Fields" section of the left field picker, where it can be added or removed from the data table as needed.
- The custom field can also be utilized as a filter or included in visualizations, although it is important to note that custom fields cannot be used to create dashboard filters.
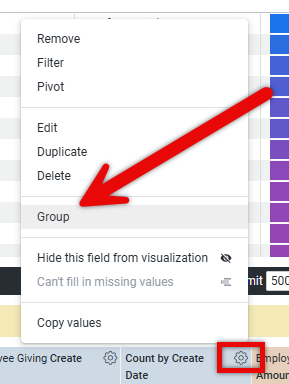
From this point, you can further refine your custom bins by creating custom groups to rename the defaulted bin names.
What else do you need help with?
Not what you're looking for? Navigate to Understanding Insights Custom Fields


