Ready to customize your view? The video below walks you through adding and configuring Insights dashboard filters so you can focus on the most relevant information.
Insights Analysts can tailor the displayed information within a dashboard to meet their specific analytical needs using filters. Dashboard filters allow you to narrow down the data shown, enabling you to focus on the most relevant information.
- When viewing a dashboard, a user can temporarily update dashboard filter values without affecting other users. Their filter values will always revert to the configured default value each time they revisit the dashboard.
The following instructions will guide you through the process of adding and configuring filters to your dashboards.
Step 1: Edit Dashboard
Access your dashboard and click the vertical ellipses menu in the top right corner to select "Edit dashboard."
- This will put you in "Editing" mode, indicated by a blue banner along the top of the dashboard.
Step 2: Click "Add Filter"
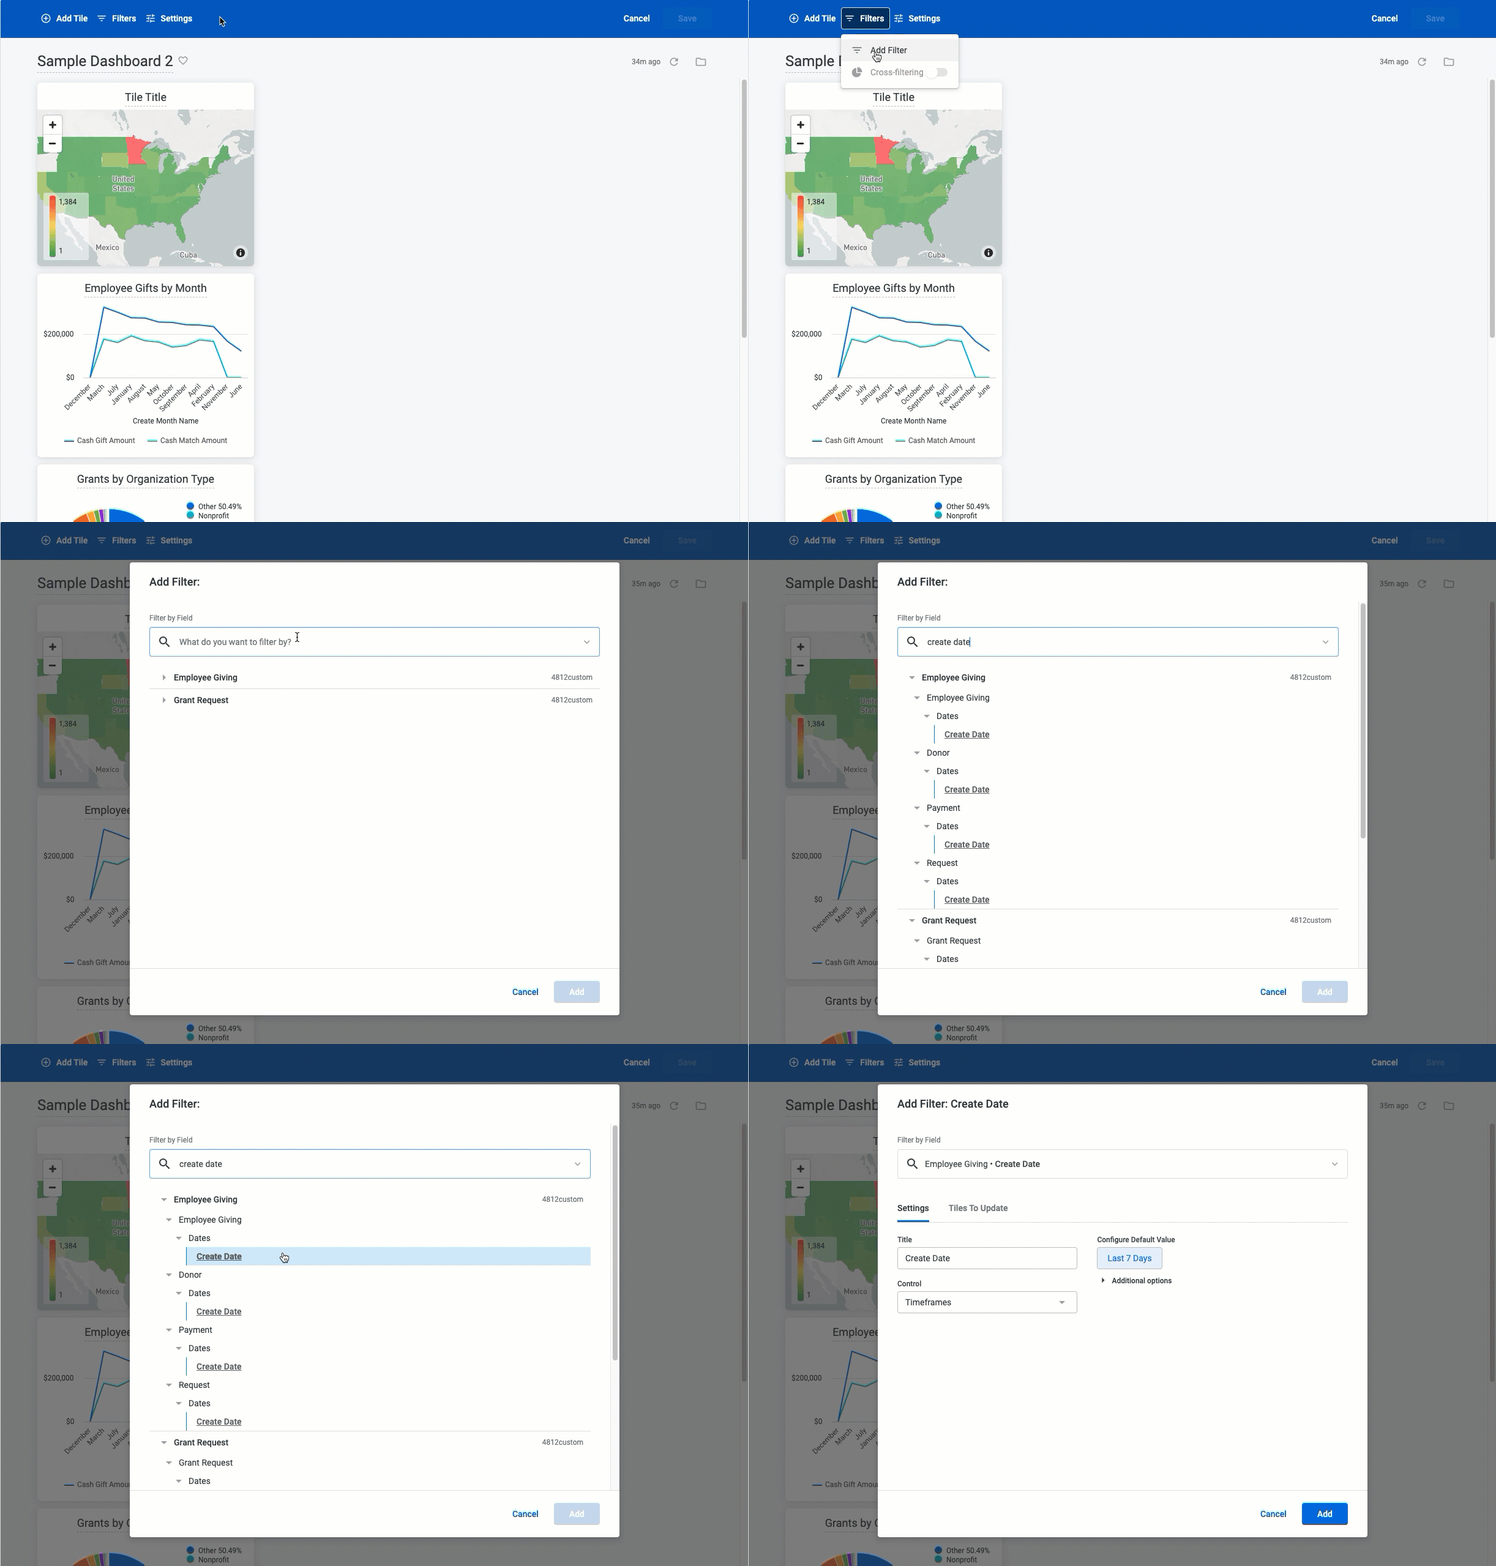
Begin adding filters that can be used to limit the data represented across all dashboard tiles by clicking the "Add Filter" button on your dashboard.
- This will open a modal window where you can select the field you want to use as the filter.
Step 3: Locate a Filter
You can either expand to browse the available folders and find the appropriate filter option or use the search text box to quickly locate the field you need across all available folders. Once you've identified the appropriate filter, click on the filter name to select it and add it to your dashboard.
- NOTE: When adding a filter, you will only be able to select from fields that exist within the Explore(s) being used for the dashboard.
Step 4: Configure the Filter Settings
After selecting the filter field, a configuration window will appear, allowing you to customize the filter's behavior:
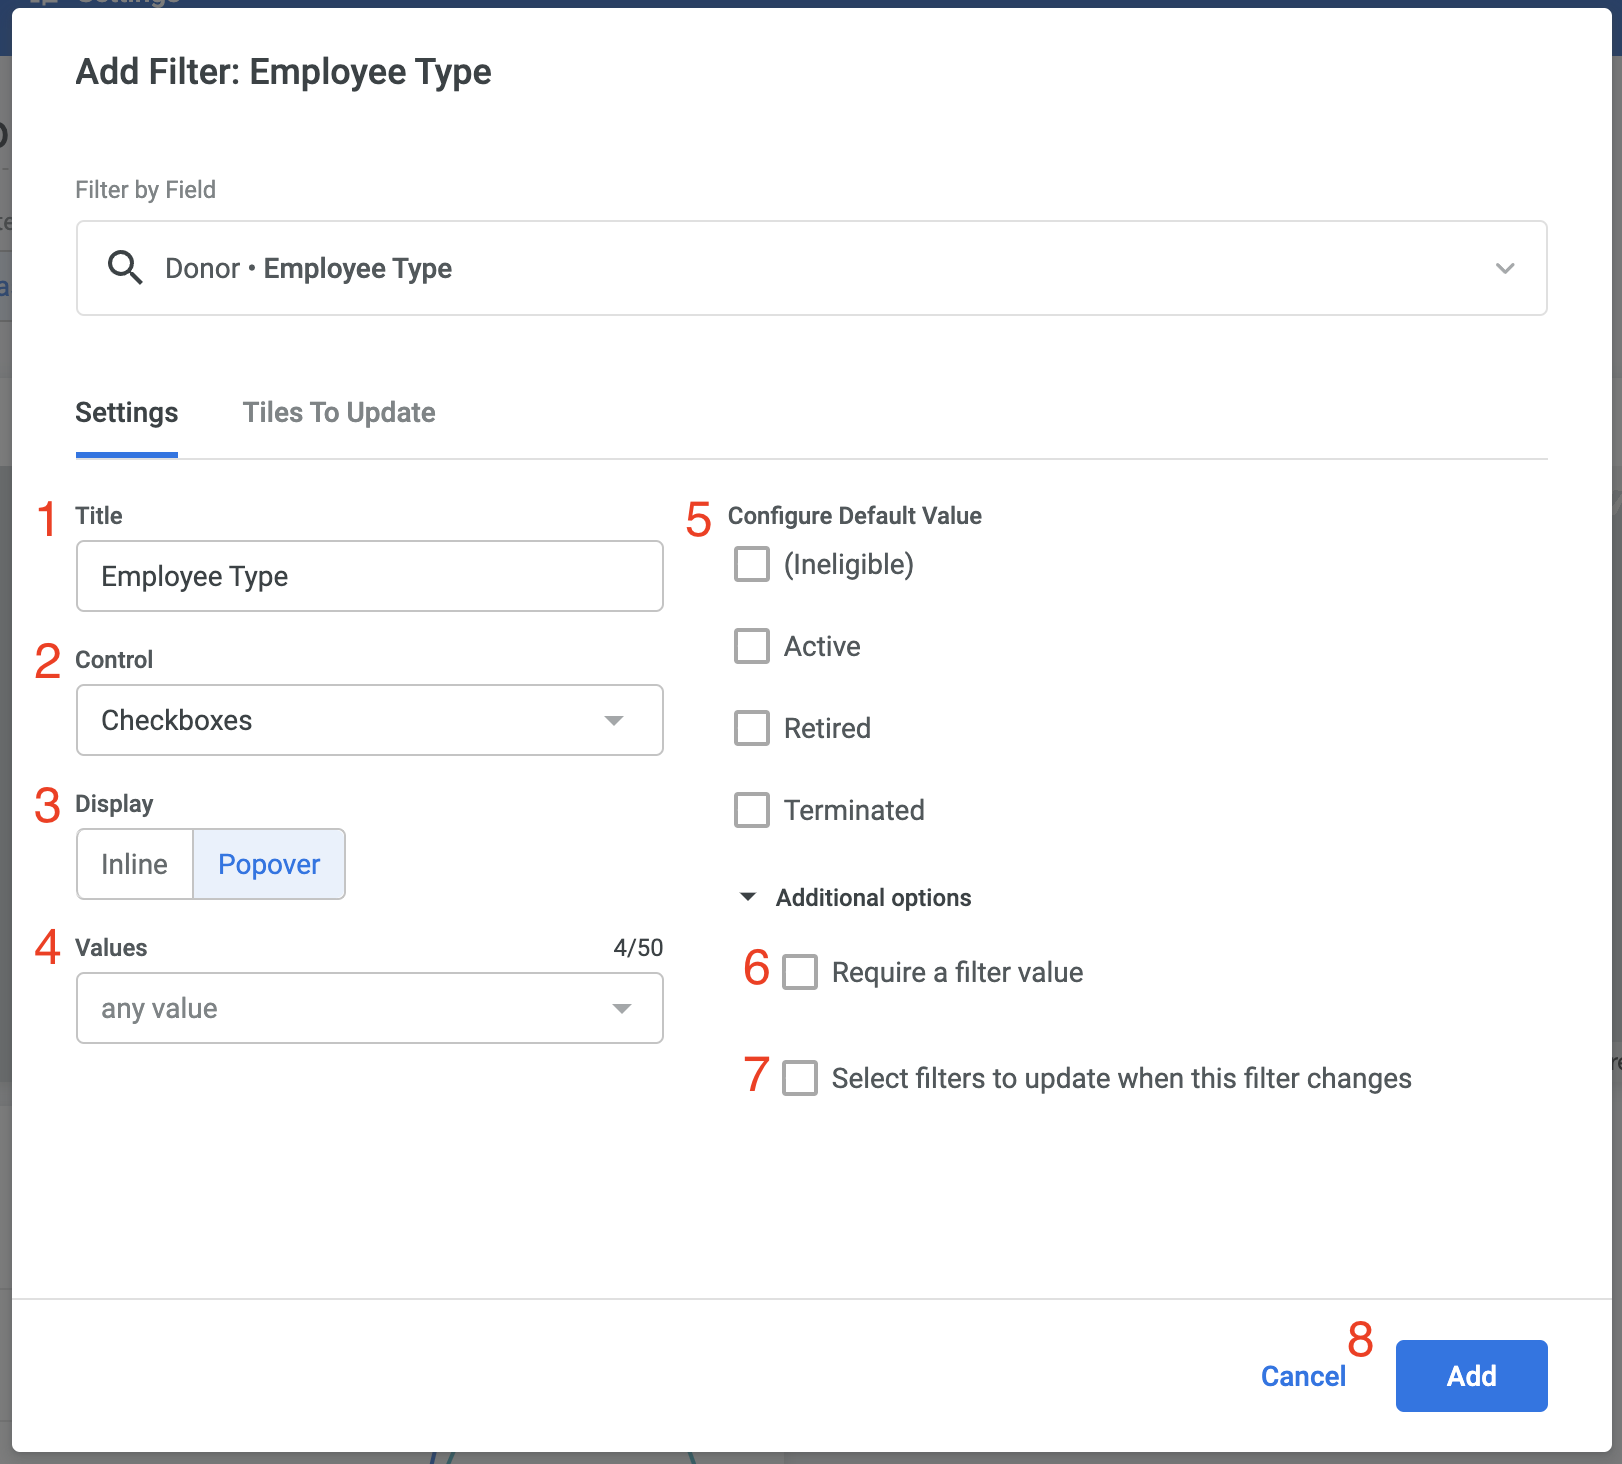
- Title - Provide a descriptive title for the filter as it will appear on the dashboard. The title option pre-populates with the name of the field.
- Control - Select from a list of control types, which will vary depending on the type of data you are filtering.
- Display - For controls that can be displayed as either inline or popover, select how the filter will be displayed. If a control can be displayed in only one way, this option will not appear.
- Values - To set specific value options for the filter, choose from the drop-down or enter the value options in this field. Leave blank to allow value options from the database to be surfaced, up to the maximum number of values available for that control. For numeric data, this field is replaced by Min and Max fields.
- Configure Default Value - Optionally, set the default value for the filter.
- Require a filter value - Select this option to ensure that a value is always provided for the filter.
- Select filters to update when this filter changes - Link other filters to this filter to create dynamic updates across your dashboard. If there are no other filters on the dashboard, this option will be disabled.
- Add and Cancel - Click one of these buttons to save or cancel the new filter.
Step 5: Apply Filters to Relevant Tiles
In the Tiles To Update tab, you can select which tiles should be affected by the new filter. Insights automatically applies the filter to any tiles created from the same Explore as was the filter, and sets the value of the Field to Filter to the same field as the field chosen for the filter.
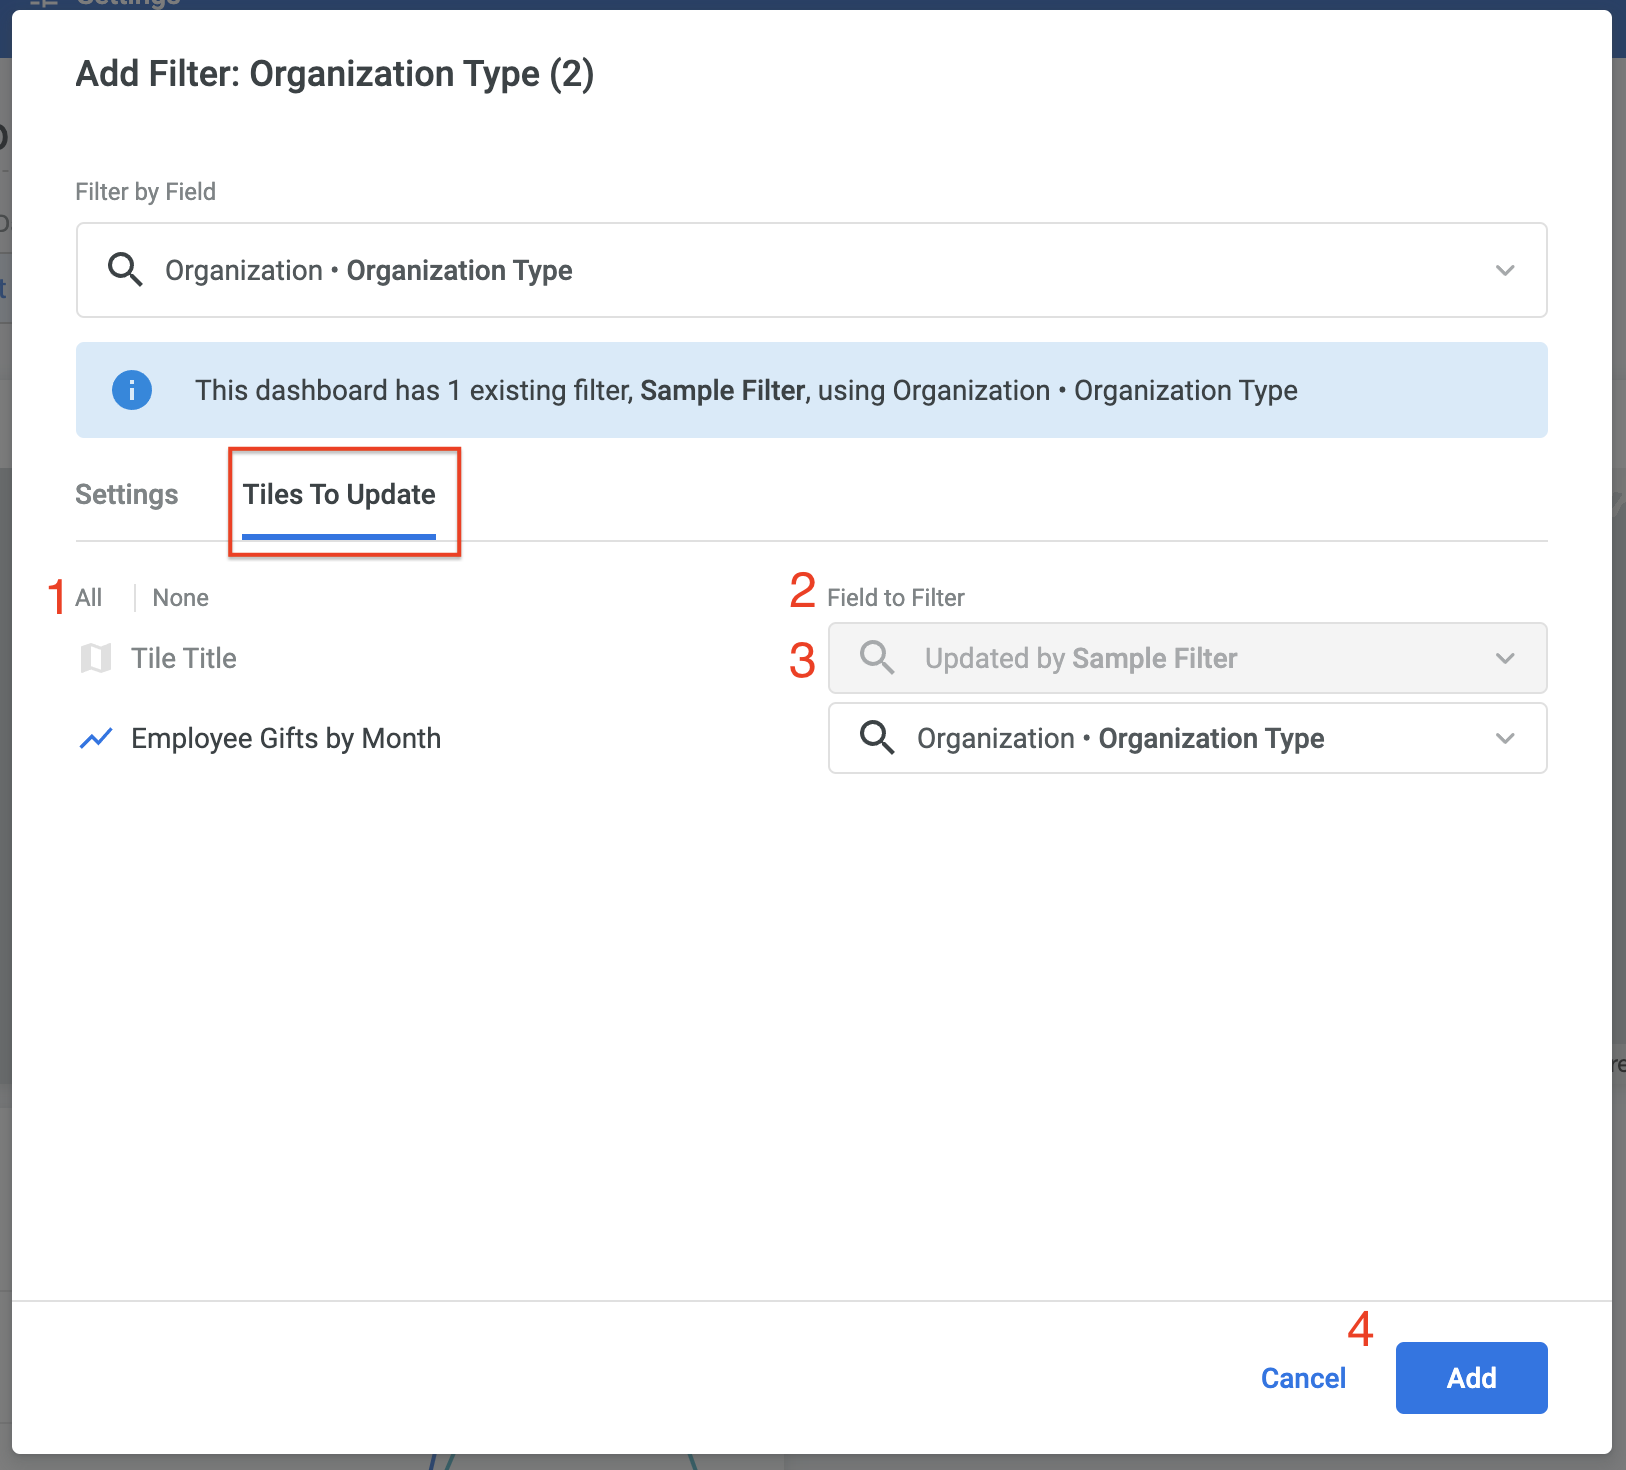
- Choose Tiles - Select All or None to turn the filter on or off for all tiles.
- Field to Filter - In the Field to Filter section, for each tile, choose which field will be affected by the filter, or choose not to apply the filter to an individual tile.
- Select Filter - If you select a field that is already used in an existing filter, any tiles filtered by the existing filter are unavailable to the new filter.
- Add and Cancel - Select Add or Cancel to save or cancel the new filter.
Step 6: Add Additional Filters
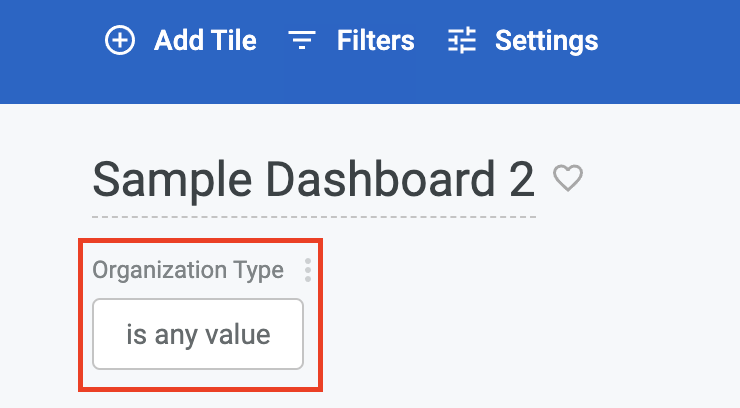
You will now see your added filter displayed at the top of your dashboard. Repeat the steps above for as many filters as you would like to have for your dashboard.
Step 7: Rearrange Filter Order
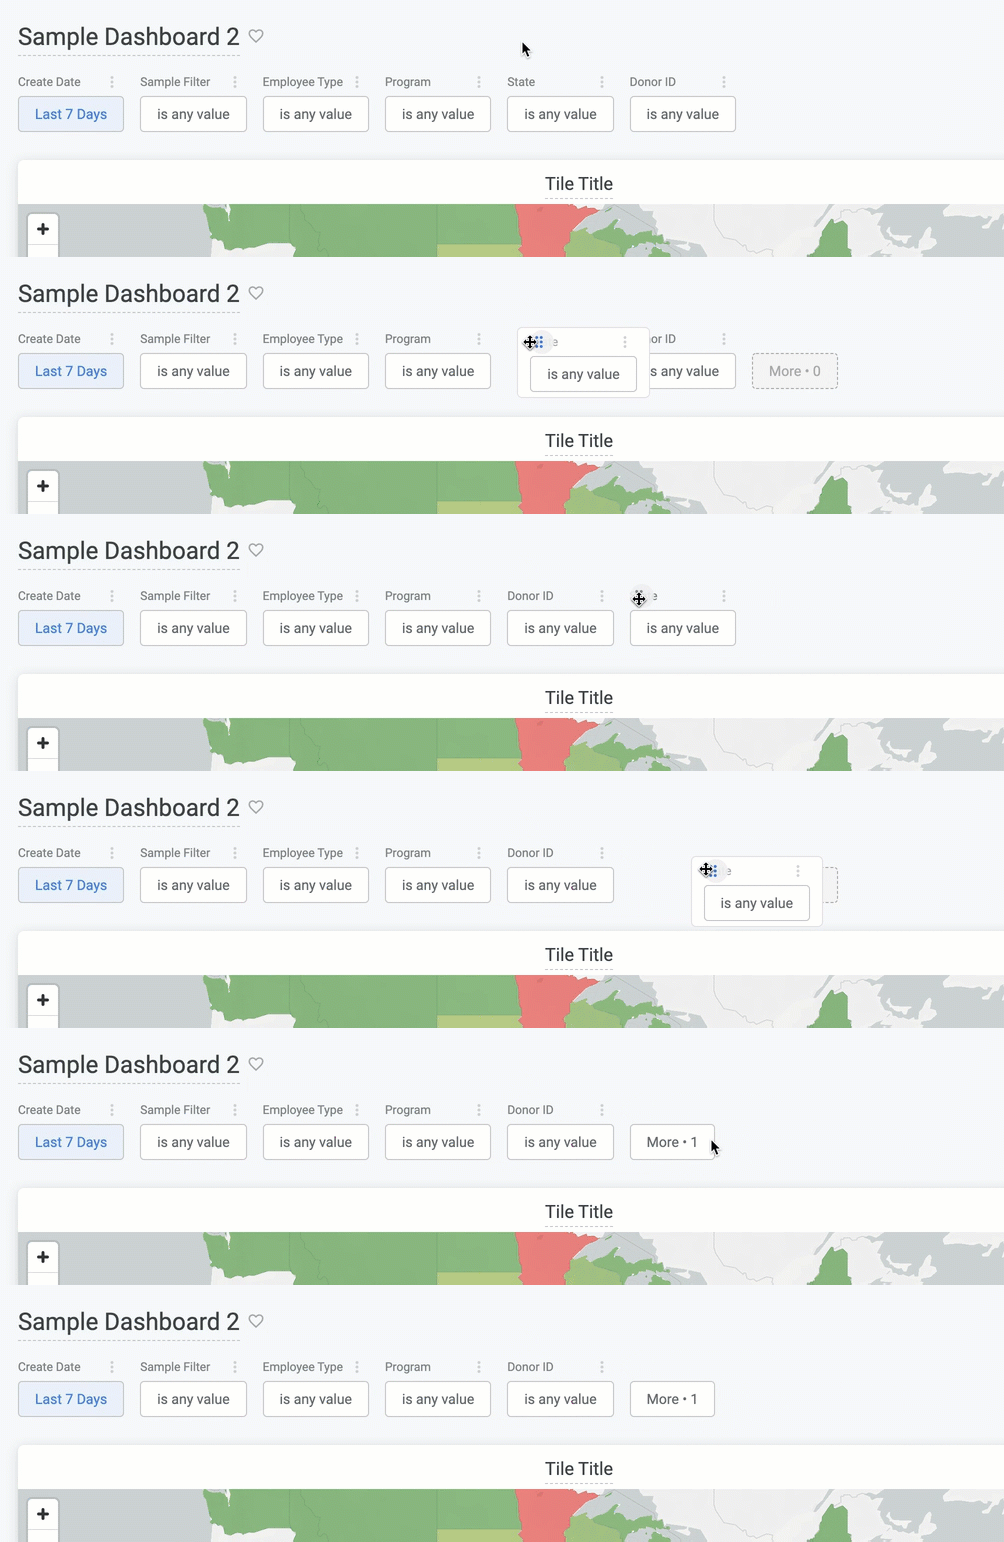
To change the order of your filters, click the 6-dot menu in the top left of each filter and drag it to your preferred position.
Step 8: Create a "More" Folder
To declutter your dashboard's filter view, you can place certain filters in a "More" folder. Simply click on a filter and drag it to the right of all the other filters, and the "More" folder will appear.
What else do you need help with?
Not what you're looking for? Navigate to Create an Insights Dashboard Overview


