Understanding the process of creating a new Insights dashboard enables Analysts to build meaningful data explorations and thoughtfully arrange the tiles on a dashboard to ensure a clean, intuitive layout.
- With a custom dashboard, users can leverage their data to analyze their program's strategic initiatives in a format that best meets their reporting needs.
The following instructions will guide you through the process of building a new dashboard within the Insights platform.
Step 1: Build Data Explorations
To begin the dashboard creation process, you must first build one or more data explorations within the Analyze section of Insights. Carefully construct your analysis, selecting the appropriate visualization to represent the data.
Step 2: Save the New Dashboard
Once you are satisfied with your exploration, click the gear icon in the upper right corner and choose "Save to Dashboard" to proceed. You will be prompted with a modal, where you can give your report a title, choose a folder, and save it to an existing dashboard or create a new one.
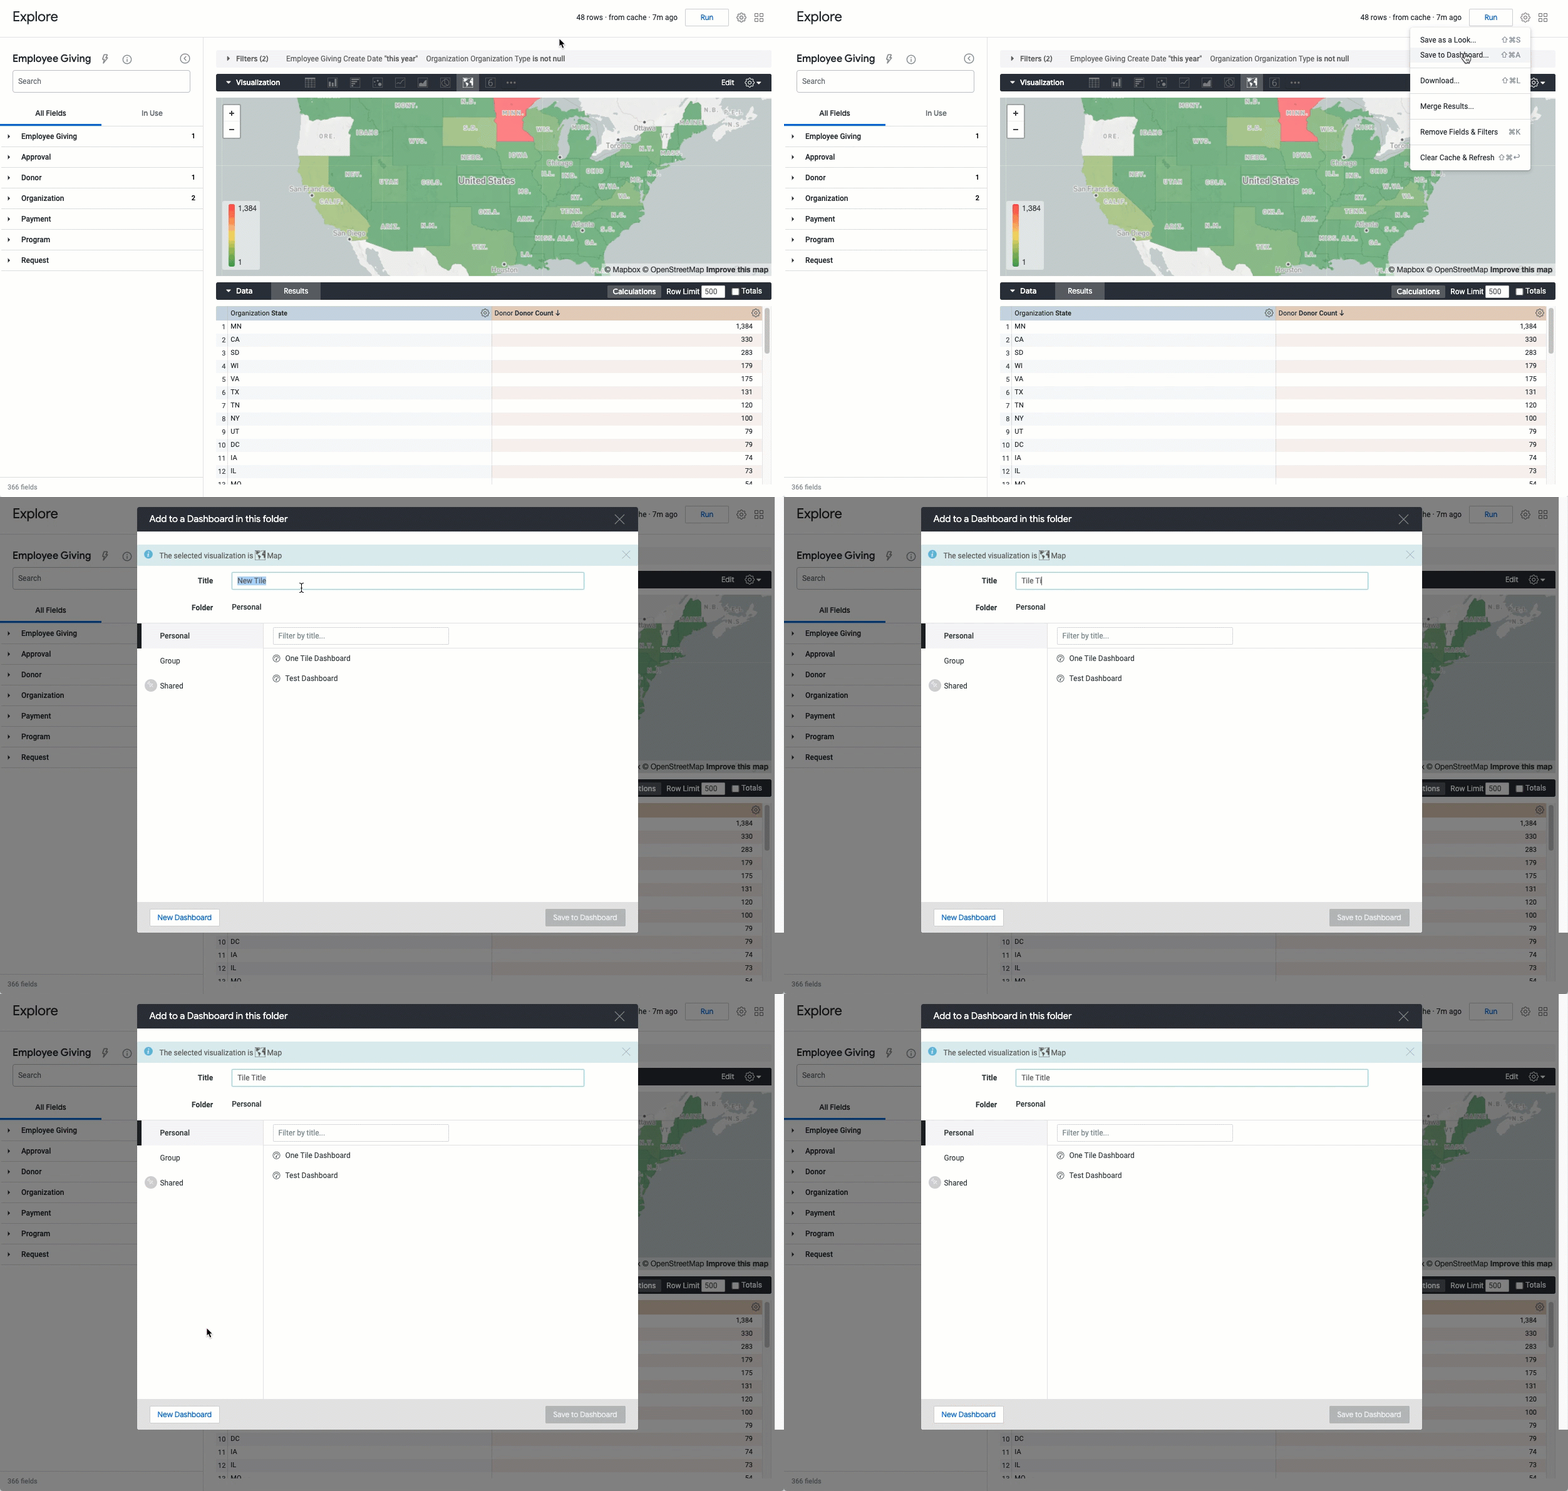
- Title - Give your report a title. This title will appear above the tile visualization on the dashboard.
- Folder - Choose which folder you would like to save your report to:
- Personal - Content only you can access.
- Group - Content that all licensed Insights users within your company can access.
- “Shared” is for standard system content. NOTE: Only specific system Admins will have access to save content to this folder.
- Dashboard - Choose either an existing dashboard to save your new exploration or proceed with creating a dashboard by selecting “New Dashboard” in the bottom left of the modal.
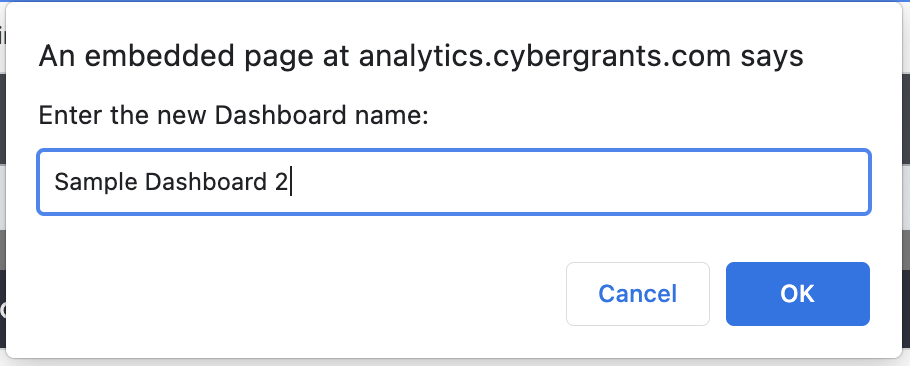
- Dashboard Name - When creating a new dashboard, you are prompted to give your dashboard a name.
Step 3: Click "Save to Dashboard"
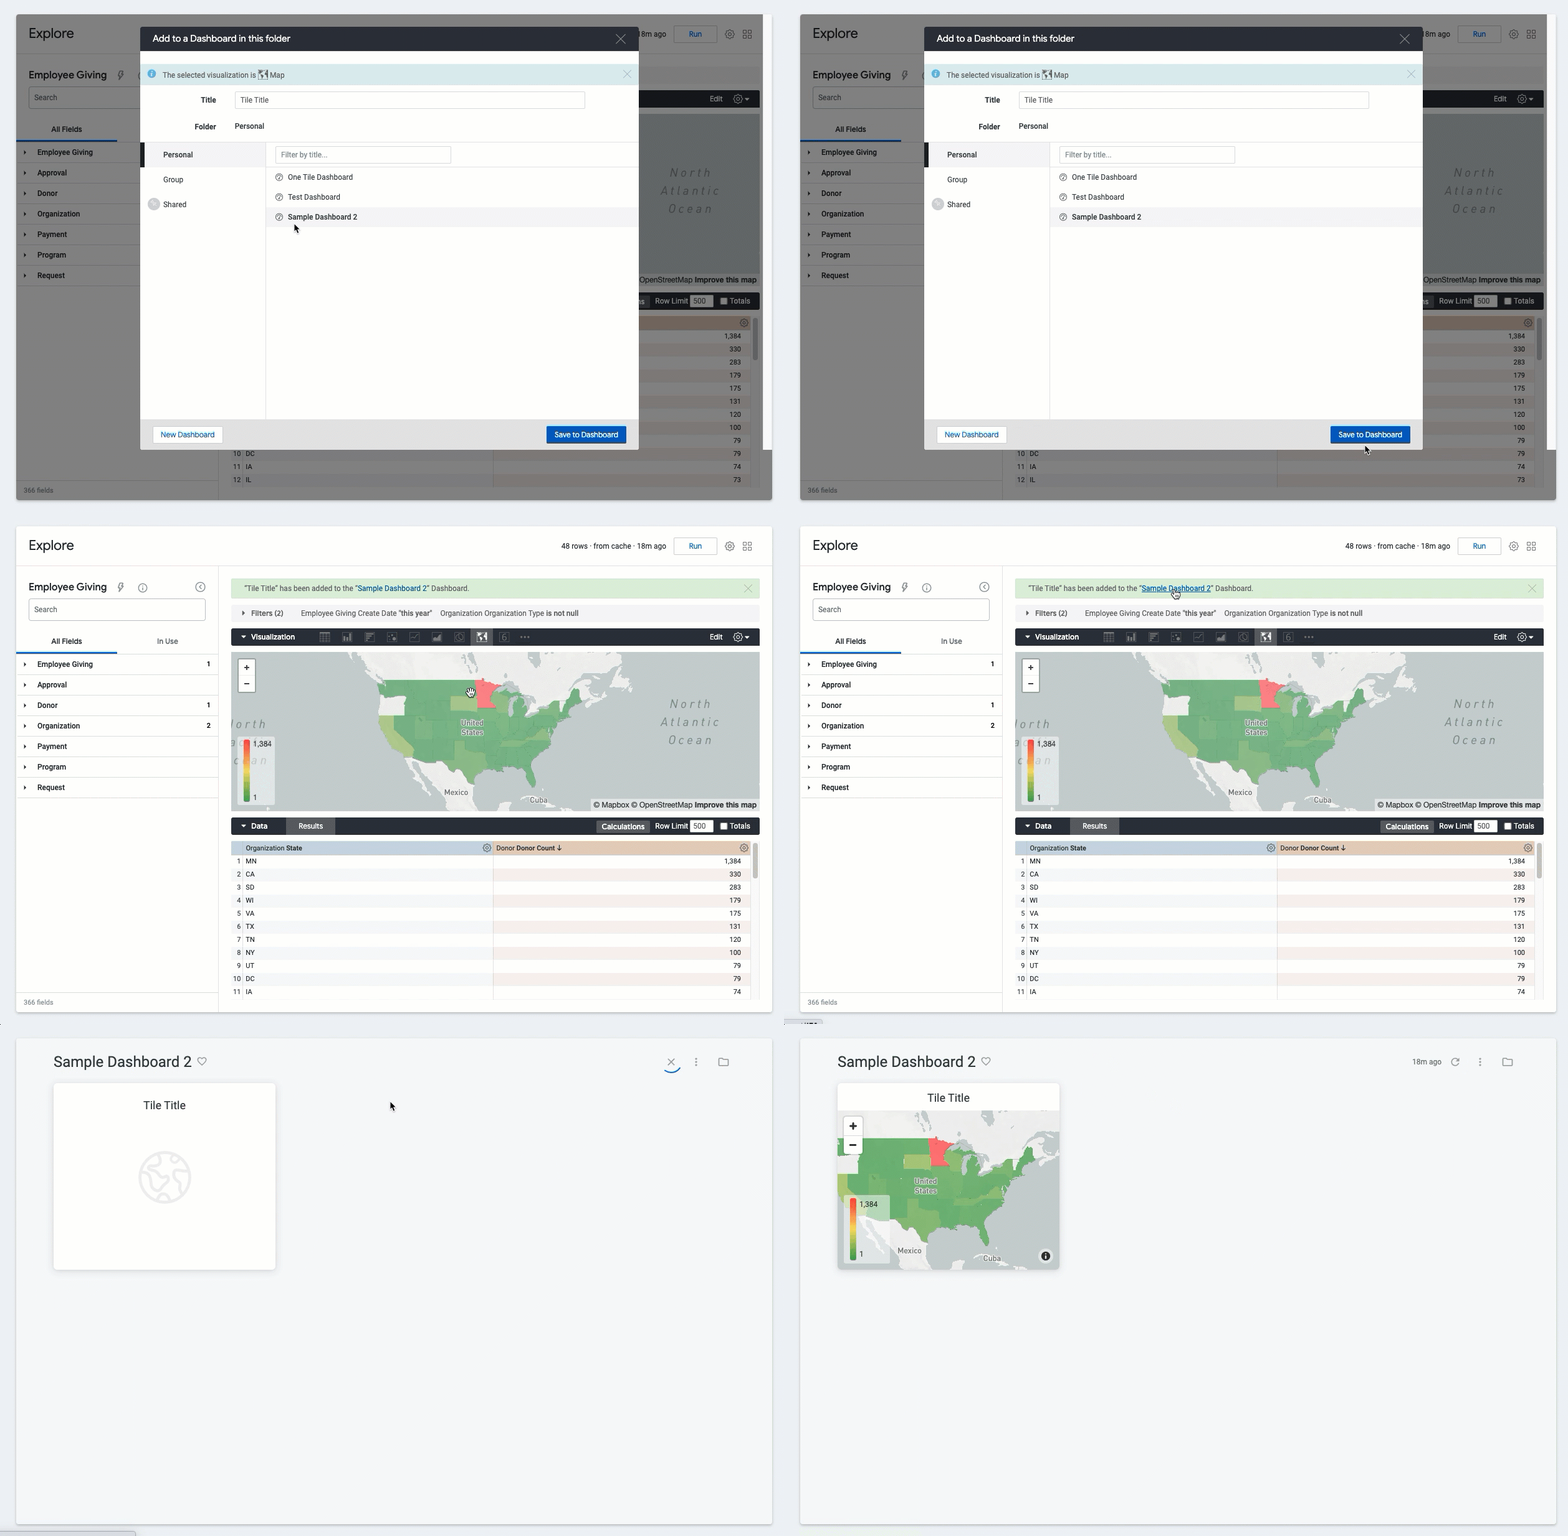
Once you have entered the name of your new dashboard, click OK. You will, then, see your new dashboard name in the list of dashboards to choose from.
- Select and click “Save to Dashboard.” A green banner message will display at the top of the Explore that confirms where this report has been saved.
Step 4: Access the New Dashboard
You can quickly access your new dashboard by clicking the linked dashboard name from the banner. Your new dashboard will, also, appear within the "Dashboards" folder in the location you selected to save it (Personal or Group).
Step 5: Add More Reports to the Dashboard
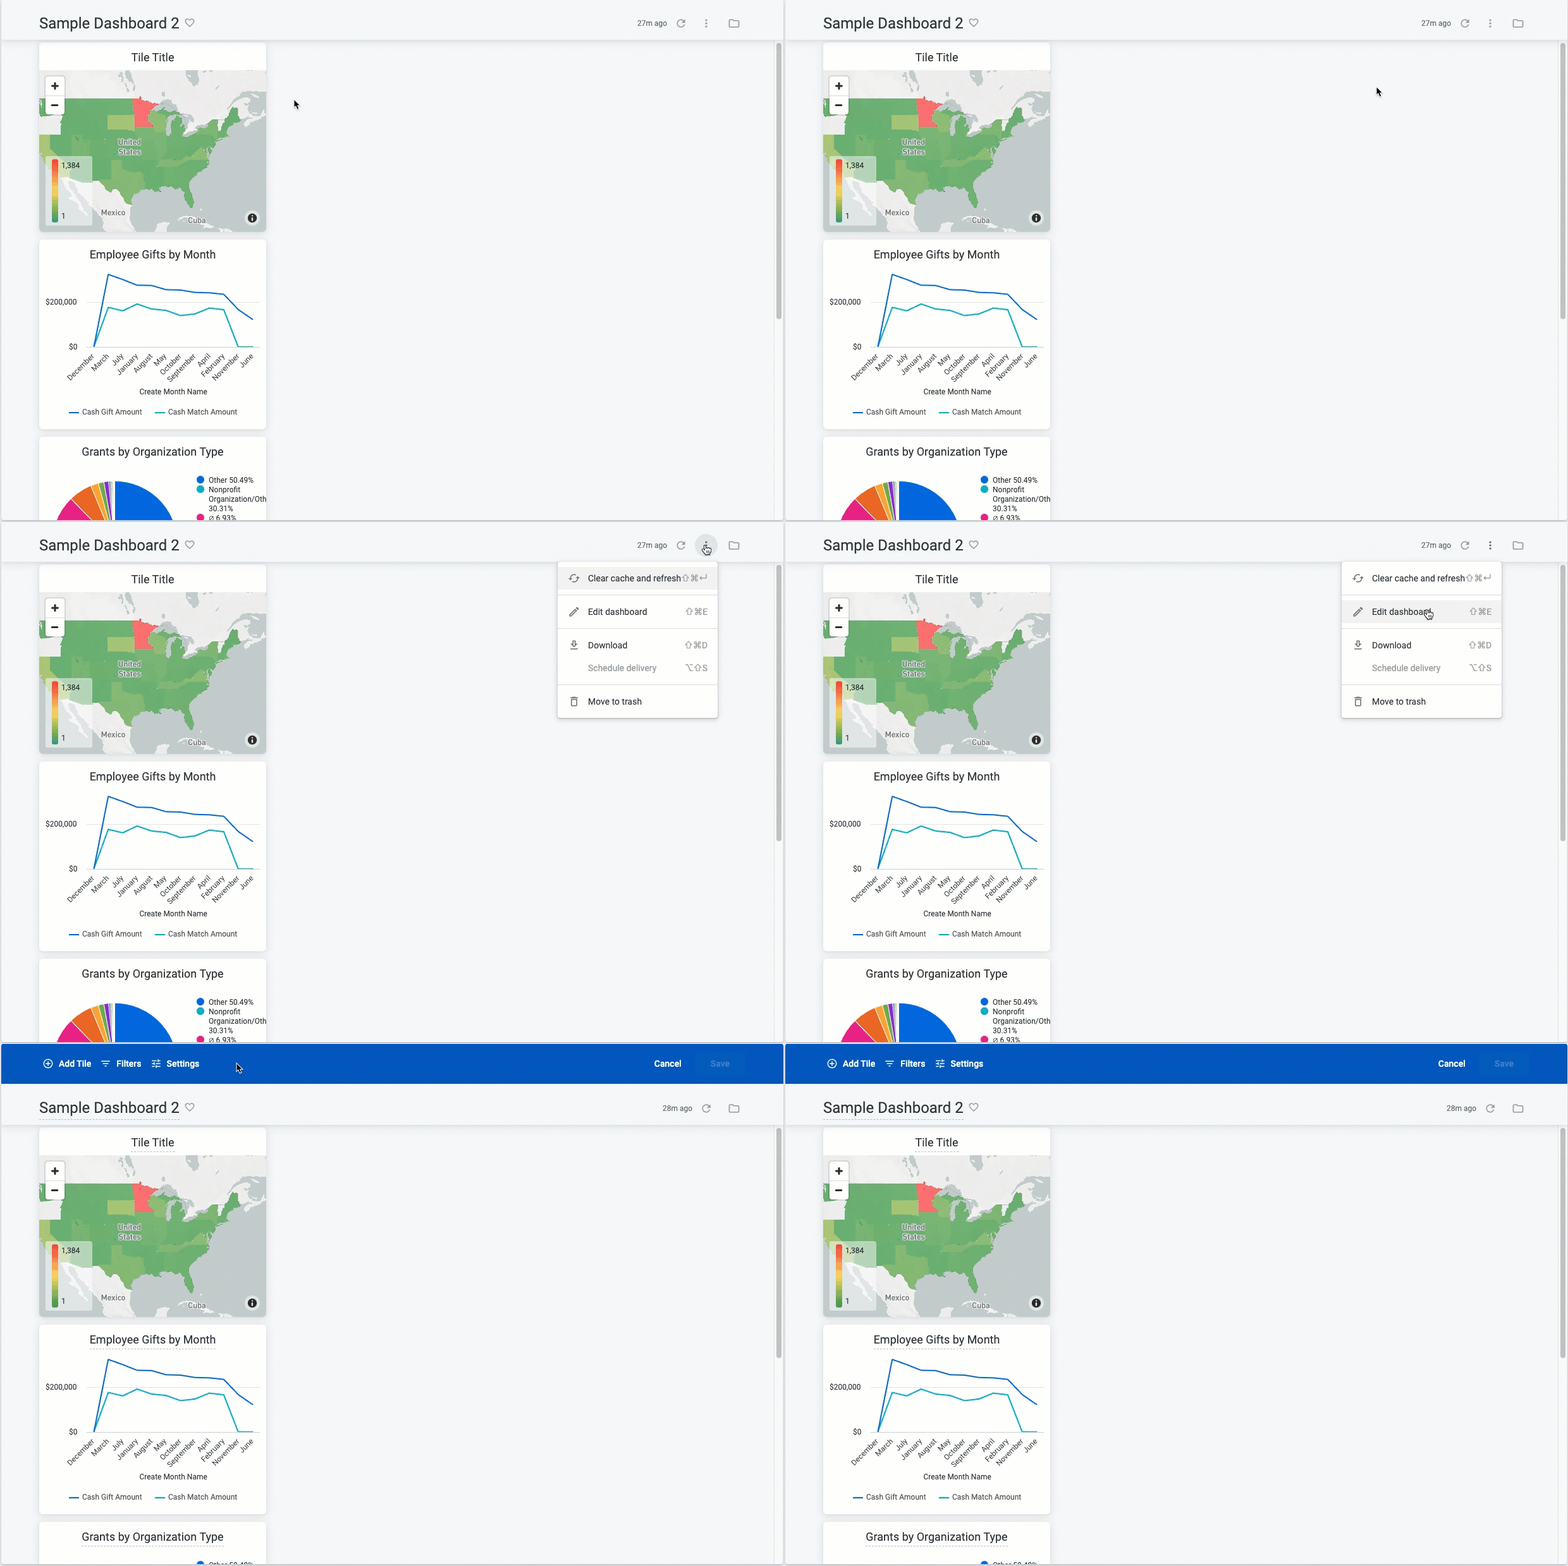
You will now see your new dashboard, containing the report that was just saved to it. We recommend repeating the process of building a handful of reports via Analyze Explores and saving them to your new dashboard before you begin to edit the dashboard itself.
- This will create a collection of report tiles that you can later edit and customize.
Step 6: Edit the New Dashboard
Once you have added a collection of report tiles to your dashboard, you can, then, edit it as needed. To edit your dashboard, click the vertical ellipses menu in the top right and select "Edit dashboard."
- This will put you in "Editing" mode, indicated by a blue banner along the top of the dashboard.
What else do you need help with?
Not what you're looking for? Navigate to Create an Insights Dashboard Overview


