Budget lines in Bonterra CyberGrants represent the specific allocations of funds within a budget year. Customers can create new budget lines, edit existing ones, link them to organizations, and view a complete log of activity for each line. These actions help ensure accurate fund tracking and control over how payments are scheduled and managed.
The following steps will guide you through creating, linking, and managing budget lines.
Step 1: Access the production environment
Budgets and budget lines are created through the Budget tab in the production environment. From the sandbox environment, select Access Production or log directly into your production site.
Step 2: Create a new budget line
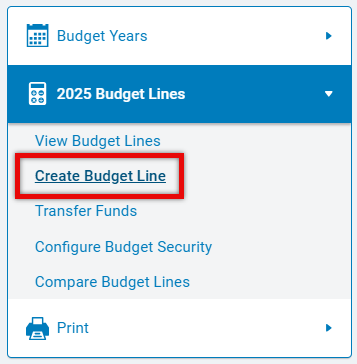
- From the Navigation Panel, select Create Budget Line.
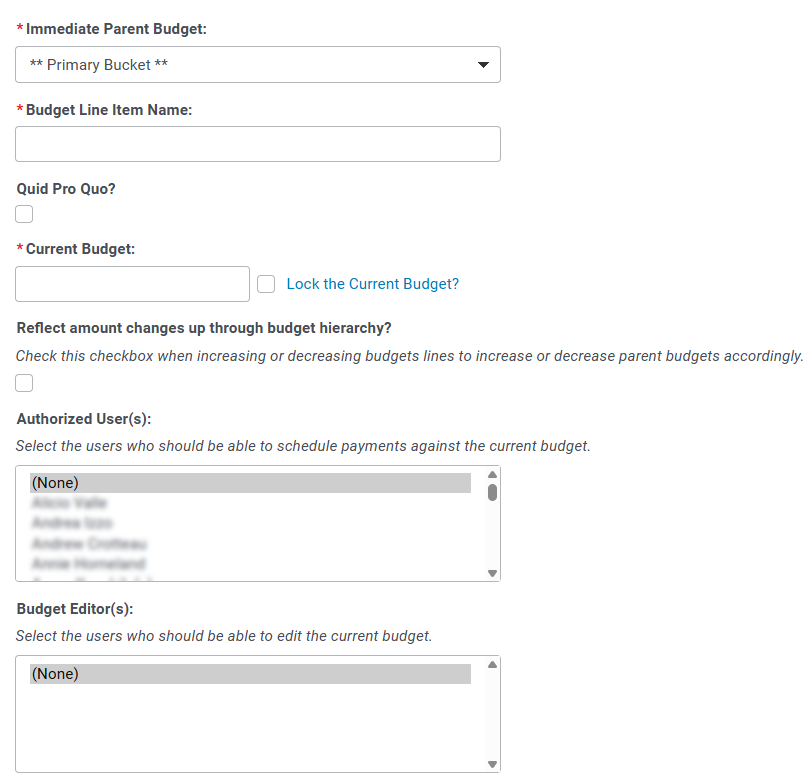
- Enter all required information in the Edit Budget Line Item form. Note: Only full license users can schedule payments and access budgets. Fields in the form include:
- Immediate Parent Budget - Defines whether the budget line is a child of another line or a parent. To make the line a parent budget, select Primary Bucket. If no parent is chosen, the new line becomes a Primary Bucket.
- Budget Line Item Name - Allows you to change or define the budget line’s name.
- Quid Pro Quo? - Indicates whether the line deducts all complete payments or only tax-deductible payments. Tax-deductible refers to payments eligible for IRS deduction (e.g., excluding dinners, tickets, or advertising).
- Original Budget – If applicable, displays the amount originally allocated when the budget line was created (read-only).
- Current Budget - Displays and allows edits to the current amount allocated.
- Reflect amount changes up through budget hierarchy - Determines whether budget changes apply upward through parent budgets. If unchecked, parent budgets remain unchanged.
- Authorized User(s) - select who can schedule payments against the budget line. Inactive users previously assigned remain visible but cannot be re-assigned.
- Budget Editor(s) - select who can edit the current budget line.
- Click Save, then Done to finalize.
Step 3: Link a budget line to an organization
- Select Link to Organization. A new browser window opens.

- Enter keywords or an organization ID, choose a search method, and click Search.
- Matching organizations appear in the results list.
- Select one or more organizations to associate with the budget line.
- (Optional) Use the Change Budget Name to Match Organization Name field to update the budget line’s name to match the organization.
- Choose whether to apply changes to other budget years.
- Click Save, then Done to return to the budget screen.
When linked, only the specified budgets (and those with no organization linkage, such as Contingency or Discretionary Funds) are available when scheduling payments for that organization.
Step 4: View the budget log
- In the Edit Budget Line Item header, click the File icon in the top right-hand corner.

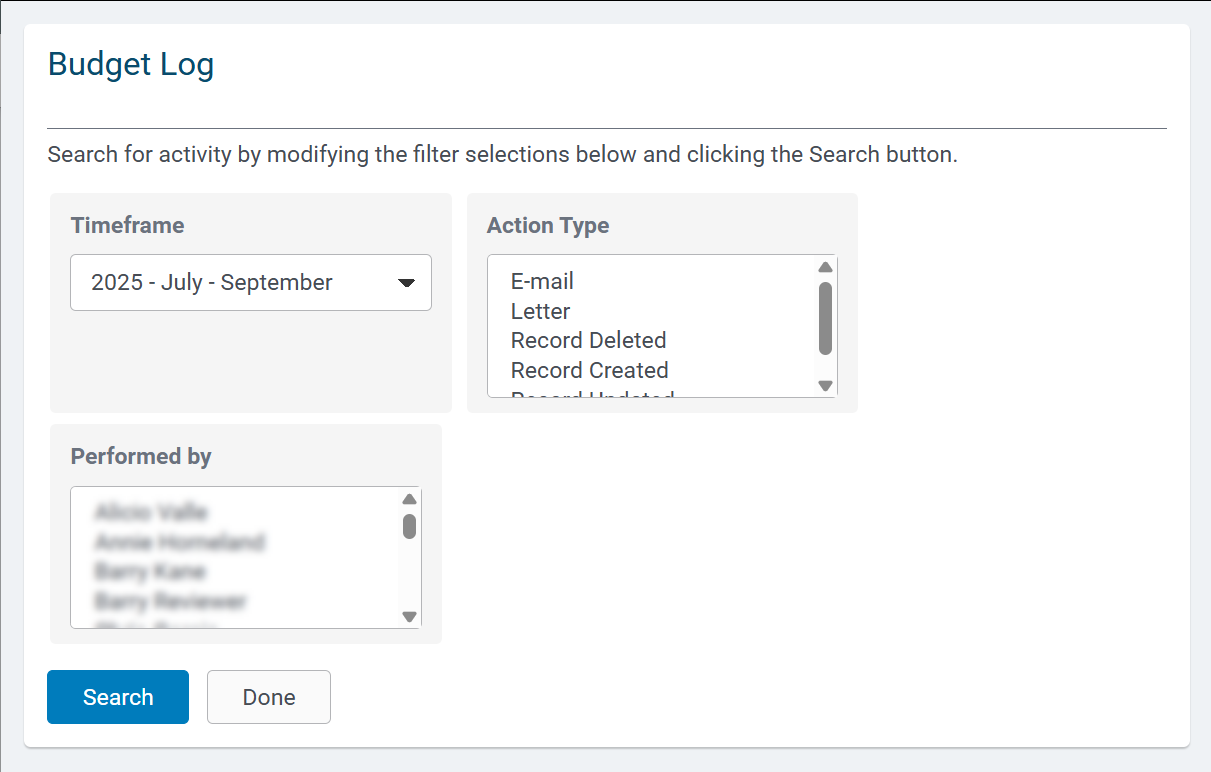
- Review the audit trail of all system activity related to the budget line.
- Actions can be filtered by action date, type, user, or a combination.
What else do you need help with?
Not what you're looking for? Navigate to Budget Overview
Looking for training?
Explore this feature at your own pace - access training video content or watch a recorded webinar by clicking the link below.


