The Insights platform provides users with a few different options to save data from their Explore analyses. Insights Analysts can save their work as a new dashboard, to an existing dashboard, or as a Look/report.
Proceed as follows to learn how to save an Explore's data effectively.
Step 1: Access the Insights tab
Log in to the CyberGrants platform and navigate to the Insights tab.
Step 2: Choose an Explore
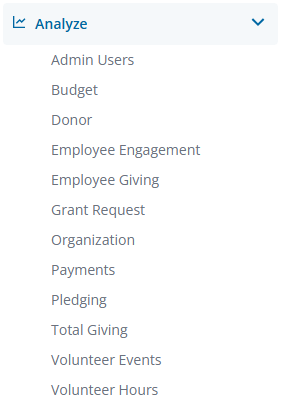
From the left-hand menu, Insights Analysts can click on Analyze to view the available Explores. Select the Explore that best aligns with your data analysis objectives.
Step 3: Create a Data Table
Customize your data set by adding field dimensions or measures as needed, then click "Run" to populate the values in the data table.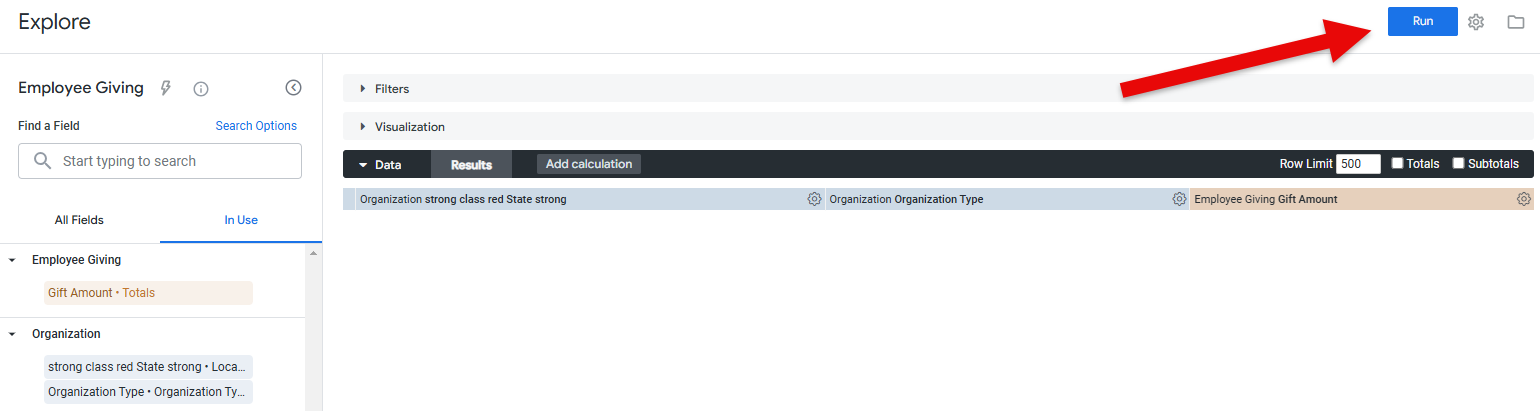
Step 4: Initiate Saving Process
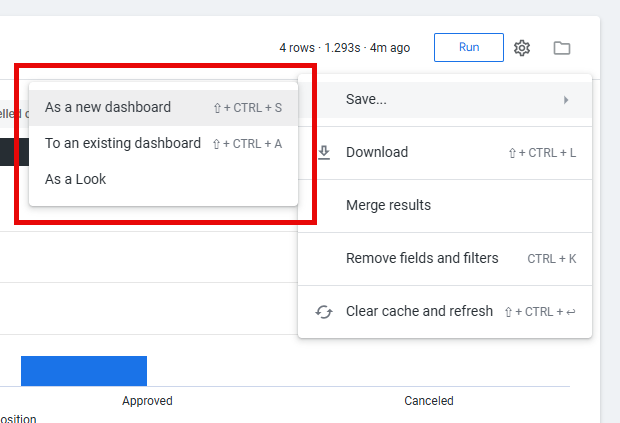
Click the gear icon in the top right corner of the Explore to view the three available save options.
- Save as a new dashboard
- Save to an existing dashboard
- Save as a Look
A "Dashboard" is a collection of Reports/Looks. Analysts can choose to save their work to a new or existing Dashboard. Click here to learn more about creating and editing dashboards.
A "Look" is an alternative term for a Report.
Step 5: Save as a New Dashboard
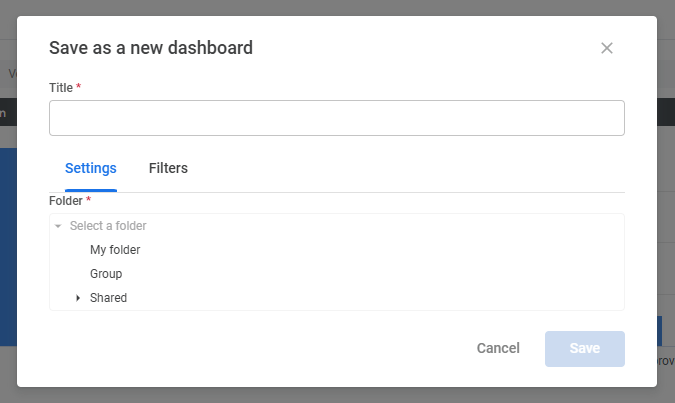
The following options are available when saving to a new Dashboard.
- Enter Dashboard Title - Create a unique title for your new Dashboard.
- Select a Folder Location - Select the folder where you would like to save your dashboard. Analysts can save the dashboard to a Personal or Group folder, with Shared being reserved for Administrators.
- My folder (Personal) - Content only you can access.
- Group - Content that all licensed Insights users within your company can access.
- Shared - NOTE: “Shared” is for standard system content. Only specific admins will have access to save content in this folder.
- Choose Filters - Include interactive filter controls that can be adjusted on the dashboard.
Step 6: Save to an Existing Dashboard
The following options are available when saving to an existing Dashboard.
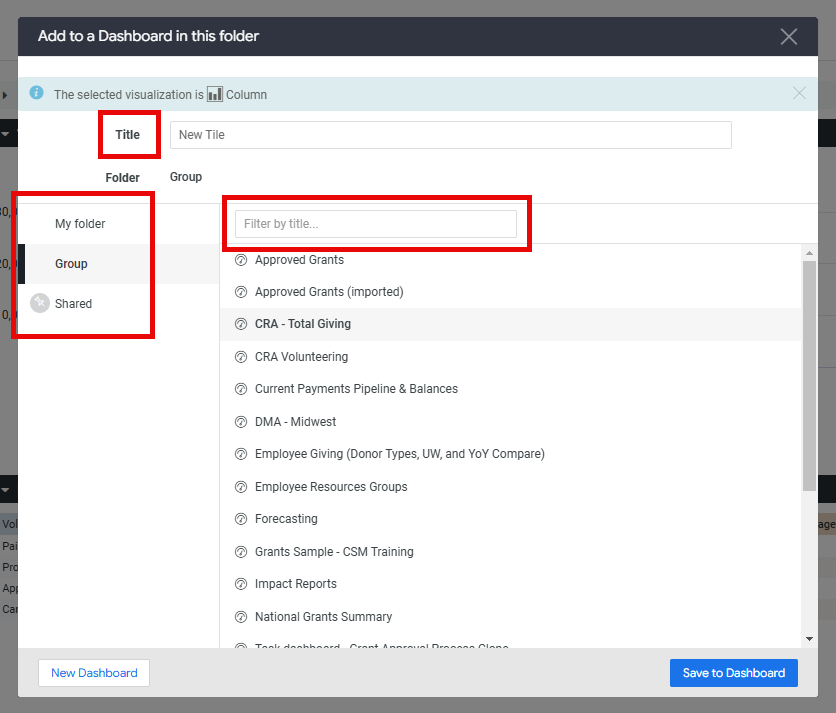
- Enter Report Title - Create a title for your report. The title entered here will appear in the tile visualization when the report is added to the Dashboard.
- Select a Folder Location - Select the dashboard folder where you would like to save your report. Analysts can save the report to a Personal or Group folder, with Shared being reserved for Administrators.
- My folder (Personal) - Content only you can access.
- Group - Content that all licensed Insights users within your company can access.
- Shared - NOTE: “Shared” is for standard system content. Only specific admins will have access to save content in this folder.
- Select a Dashboard - Choose an existing dashboard or select “New Dashboard” in the bottom left of the modal to create a new dashboard if one does not exist that aligns with your data analysis.
Step 7: Save as a Look
The following options are available when saving a data visualization as a "Look".
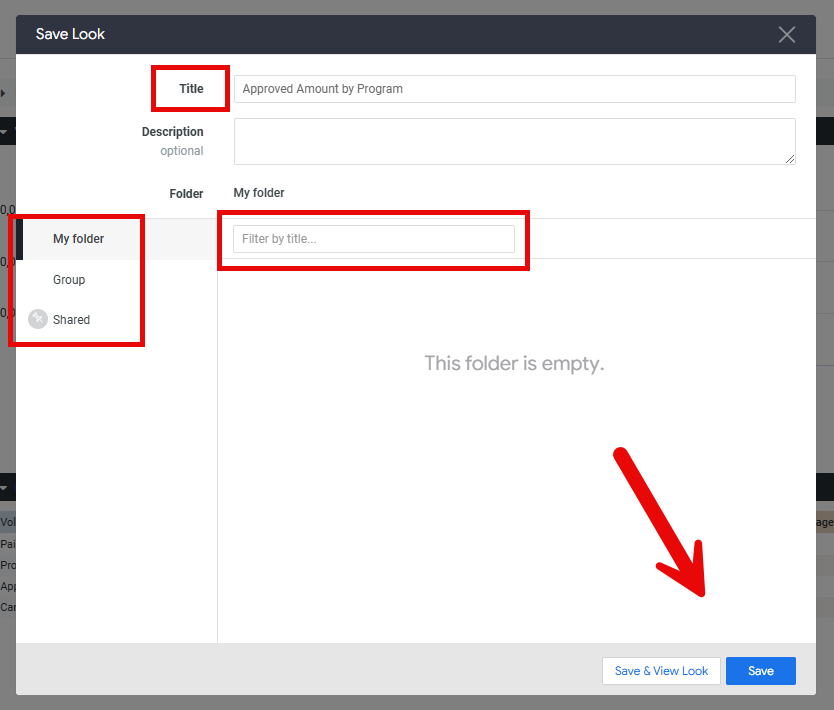
- Enter Title and Description - Provide a descriptive title and, if desired, an optional description for the report.
- Select a Folder Location - Select the folder where you would like to save your Look. Analysts can save the Look to a Personal or Group folder, with Shared being reserved for Administrators.
- My folder (Personal) - Content only you can access.
- Group - Content that all licensed Insights users within your company can access.
- Shared - NOTE: “Shared” is for standard system content. Only specific admins will have access to save content in this folder.
- Complete Saving Process - Analysts can either choose to "Save & View Look" to be taken directly to the saved Report, or simply "Save" and continue to their next analysis.
What else do you need help with?
Not what you're looking for? Return to Navigating Insights Explores Basics or access the Insights Analyze Basics Overview


