Analysts can leverage Insights to uncover valuable program data by selecting the appropriate data fields within an Explore allowing them to tailor the analysis to their specific program objectives, ensuring the data they examine is both relevant and meaningful.
Proceed through the following steps to select data fields in an Insights Explore.
Step 1: Access the Insights tab
Log in to the CyberGrants platform and navigate to the Insights tab.

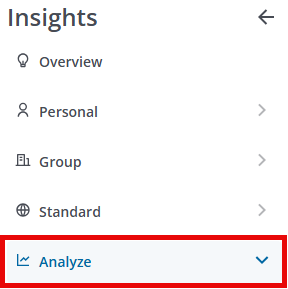
Step 2: Click on Analyze
From the left-hand menu, Insights Analysts can click on Analyze to view the available Explores.
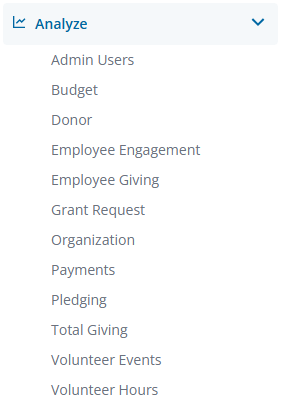
Step 3: Choose an Explore
Review the available Explores and select the one that best aligns with your data analysis objectives.
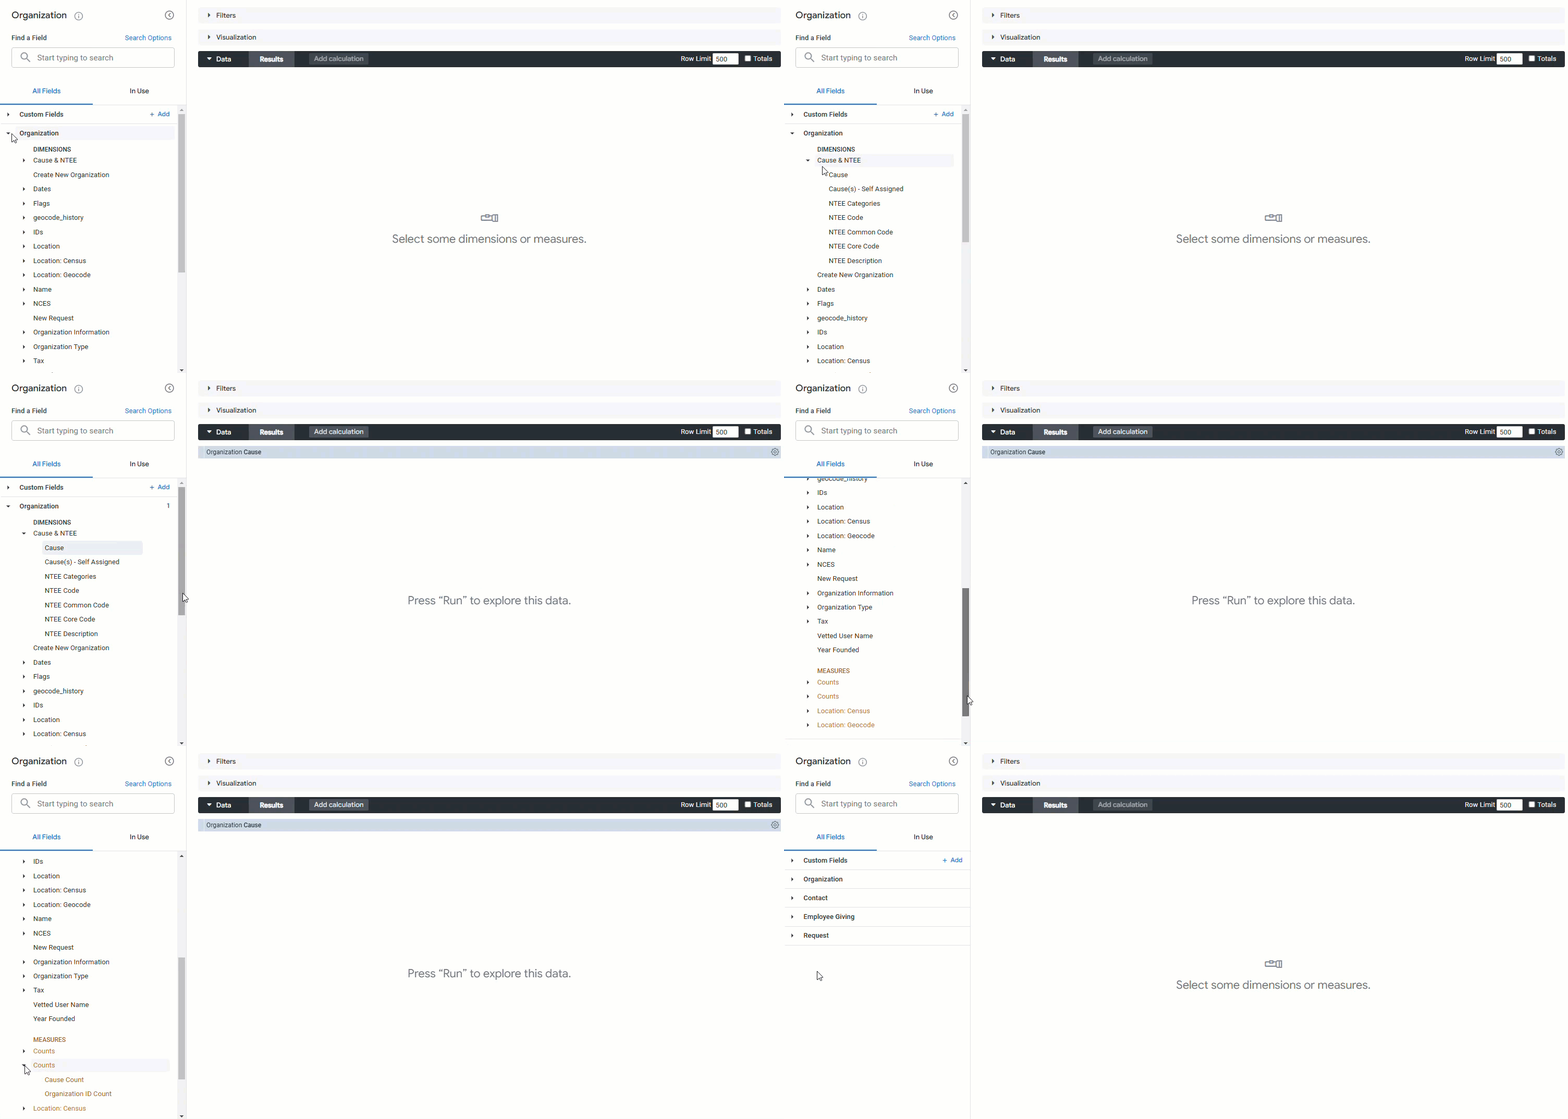
Step 4: Select Data Fields
To add a dimension or measure to begin an analysis, simply click on the desired field name from the field list. This action will immediately incorporate the selected field into the data table.
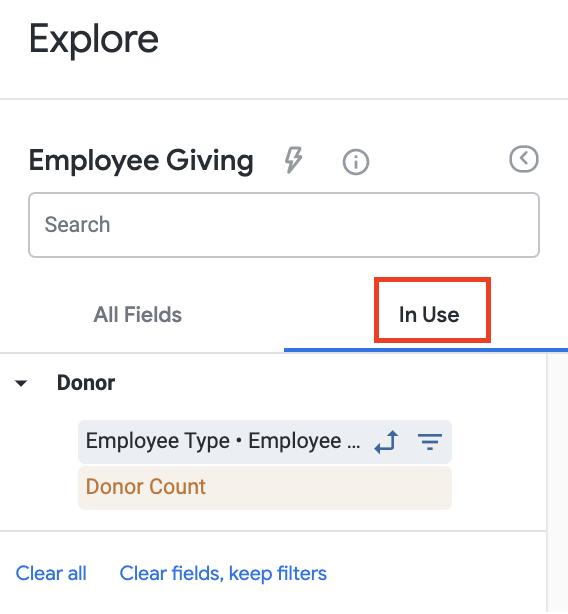
Step 5: Manage Selected Fields
Once one or more fields have been added to the data table, click on the "In Use" tab from the left field picker menu. This tab will display all the fields currently being utilized in the analysis, enabling you to remove or clear any unnecessary fields as needed.
Step 6: Run the Analysis
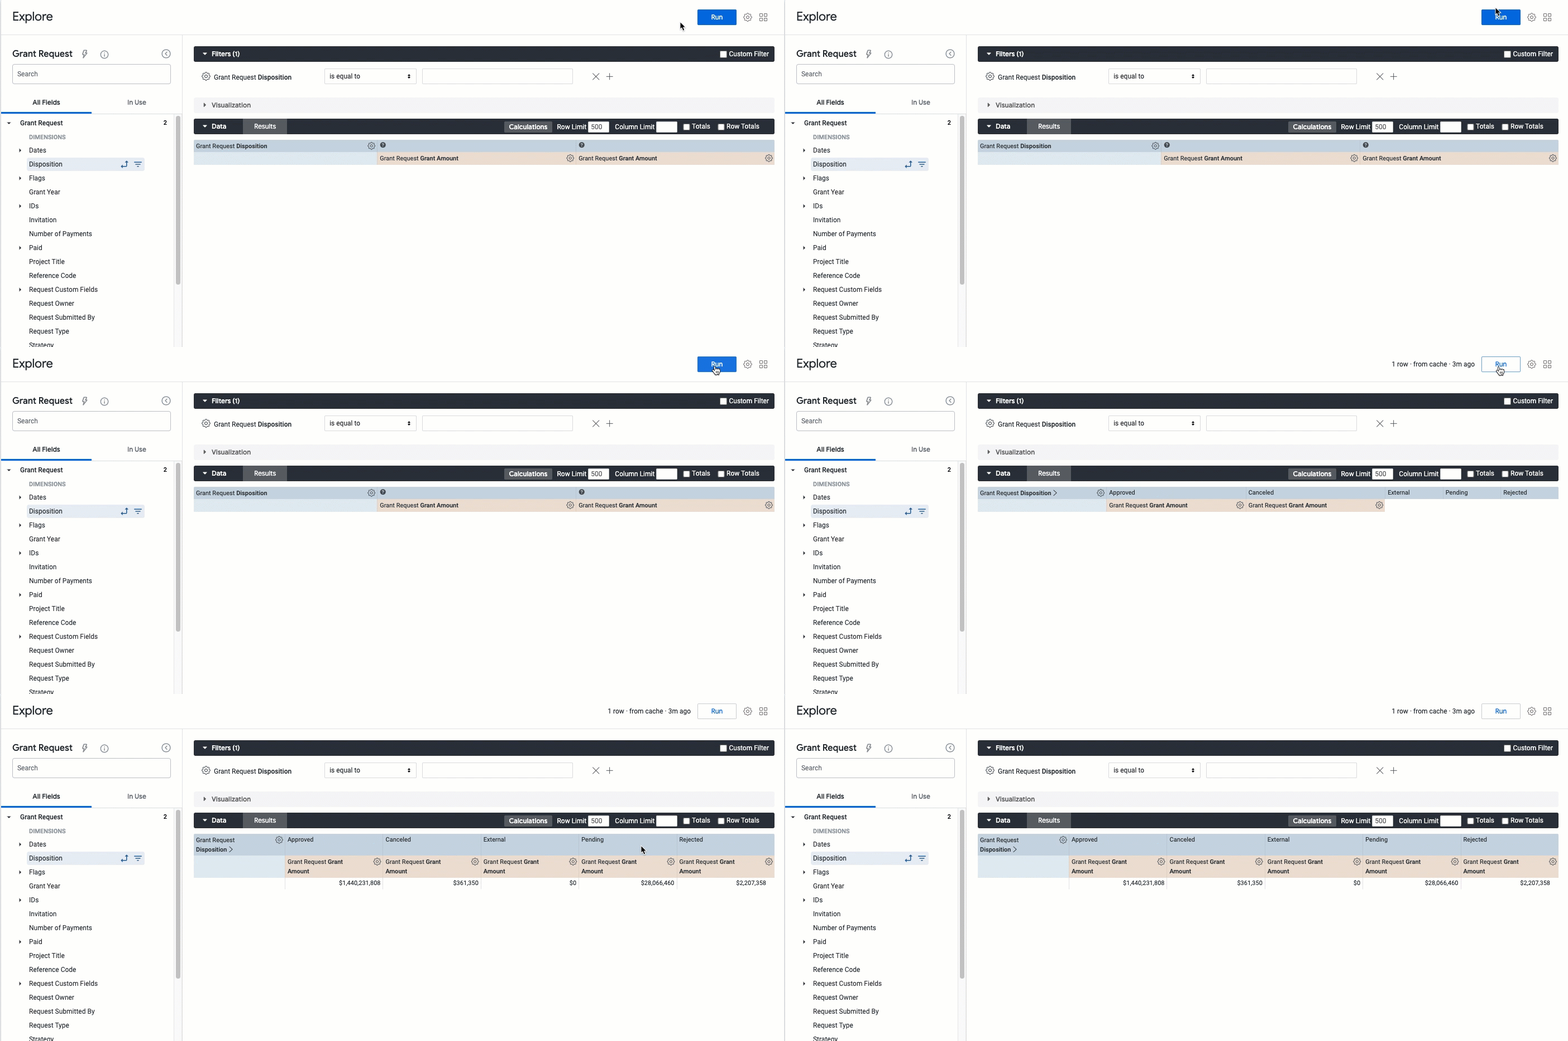
After adding or modifying the fields you want to analyze in the data table, click the "Run" button located in the top right corner. This action will populate the data table with the selected fields, allowing the user to proceed with their data analysis. The same is true if you have added new fields since you last hit “Run” for your analysis.
What else do you need help with?
Not what you're looking for? Return to Navigating Insights Explores Basics or access the Insights Analyze Basics Overview


