Data fields are the building blocks for your program's proposal types, quizzes, surveys, and impact reports. Review the following to learn more.
Step 1: Explore the Data Fields
Navigate to the Admin tab to access fields that are available within the Data Field areas listed.
Available Data Field Areas:
Application Configuration:
|
- Contact
- Organization
- Organization Approval
- Request
- Impact Report
- Spend Detail
- Product
- Payment Phase
- Payee
- Payment
- Approval
- Budget
- Survey
|
Employee Application Configuration:
|
- Employee Profile
- Friends and Family
- Employee Group/Team
- Employee Giving
- Employee Giving Detail
- Event/Opportunity
- Employee Event Search
- Payroll
- Payroll Distribution
- Nomination
- Nomination Approval
|
There are 6 data field areas that are exclusively for internal (Grantmaker) users and are not visible to external Grantseeker or employee users. These include:
- Payment
- Approval
- Budget
- Organization Approval
- Nomination Approval
- Payroll Distribution
Step 2: Change Default Order
Within each Data Field section, the default order of fields can be changed. To begin, navigate to the Admin tab in Sandbox and then, select the appropriate Data Field type under either Application Configuration or Employee Application Configuration.
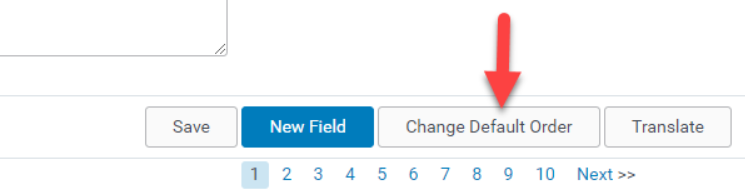
- Scroll down to the bottom of the list of Fields and select "Change Default Order" link.
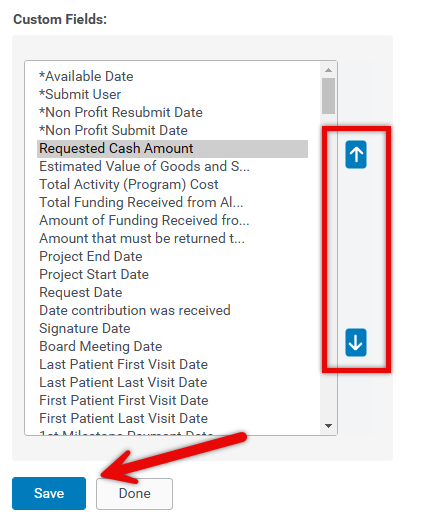
- Click on one or more fields listed in the box that appears.
- Use the navigation buttons by selecting the up arrow button on the right to move the field(s) up and the down arrow button on the right to move the field(s) down.
- When prepared, click save and then, publish.
What else do you need help with?
Not what you're looking for? Navigate to Understanding Field Configuration.


